
How to Show a Custom Thank-You Message After a WordPress Form (With the Visitor’s Answers)
- Category
- Tutorial
- Published
- Updated
- Reading time
- 9 min
- Tags
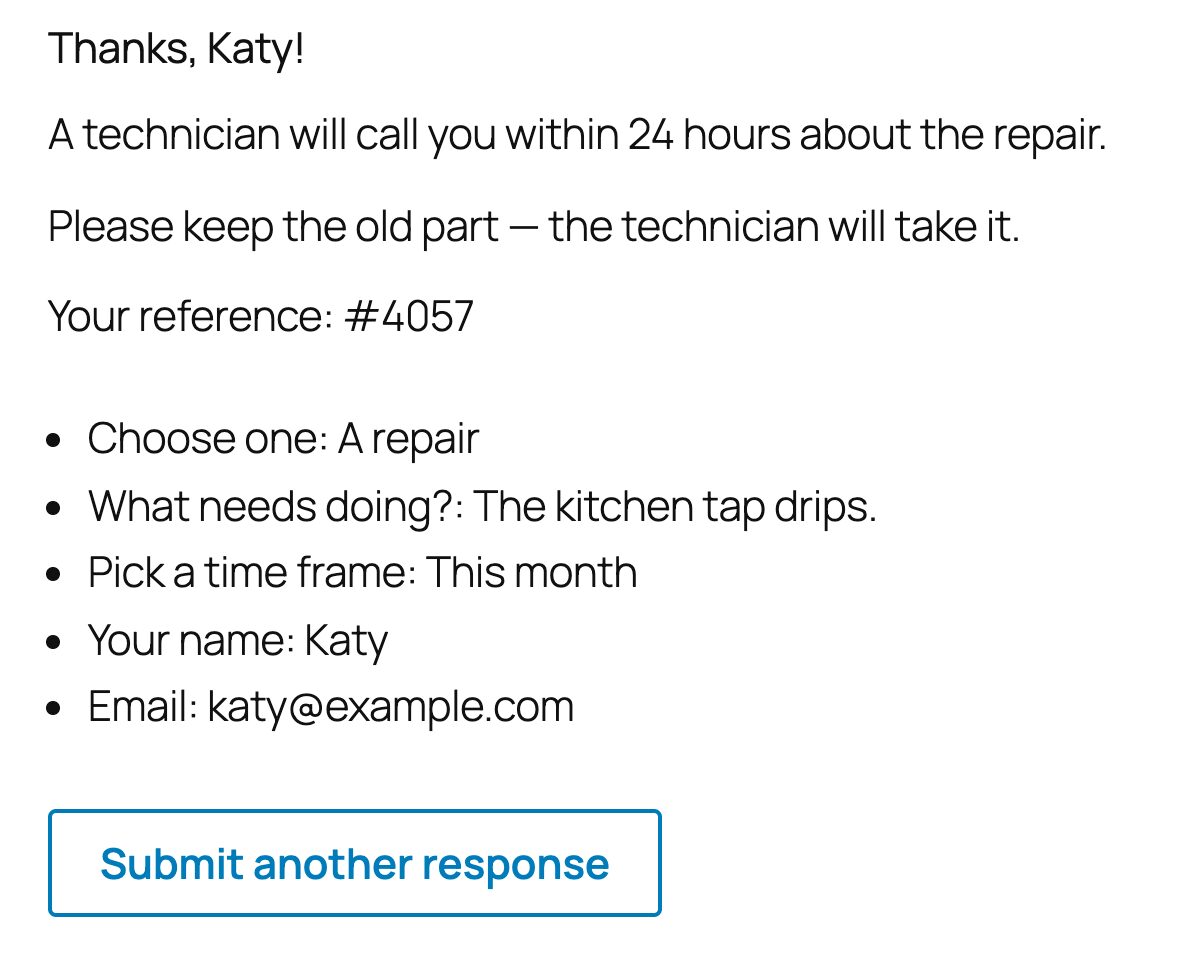
To show a custom thank-you message after a WordPress form, add a Confirmation block to the form in CraftForms and write the message with ordinary blocks. After a successful submit it replaces the form on the same page. It can greet the visitor by name, show a reference number and a summary of their answers, change its wording depending on what they picked, and offer a Submit another response button. It’s in the free version.
This guide builds the thank-you for a home repair company’s request form, then answers the question every site owner hits sooner or later: when is a message enough, and when do you still want a separate thank-you page?
TL;DR
- Add the Confirmation block inside the form. It’s shown in place of the form after a successful submit.
- Write it with headings, paragraphs, images, buttons and columns. Type
{{to insert an answer, for example{{field.full_name}}. {{submission.id}}gives a reference number; the All Form Data block lists every answer as a table, list or paragraphs.{{field.full_name|there}}falls back to “there” when the name is empty.{{#if service == 'repair'}}…{{else}}…{{/if}}shows a sentence only for some answers. A whole block can get a Show if condition too.- A Redirect URL still wins when the form has one. Use a thank-you page when you need a separate URL, for example for ad conversions.
Thank-you message or thank-you page?
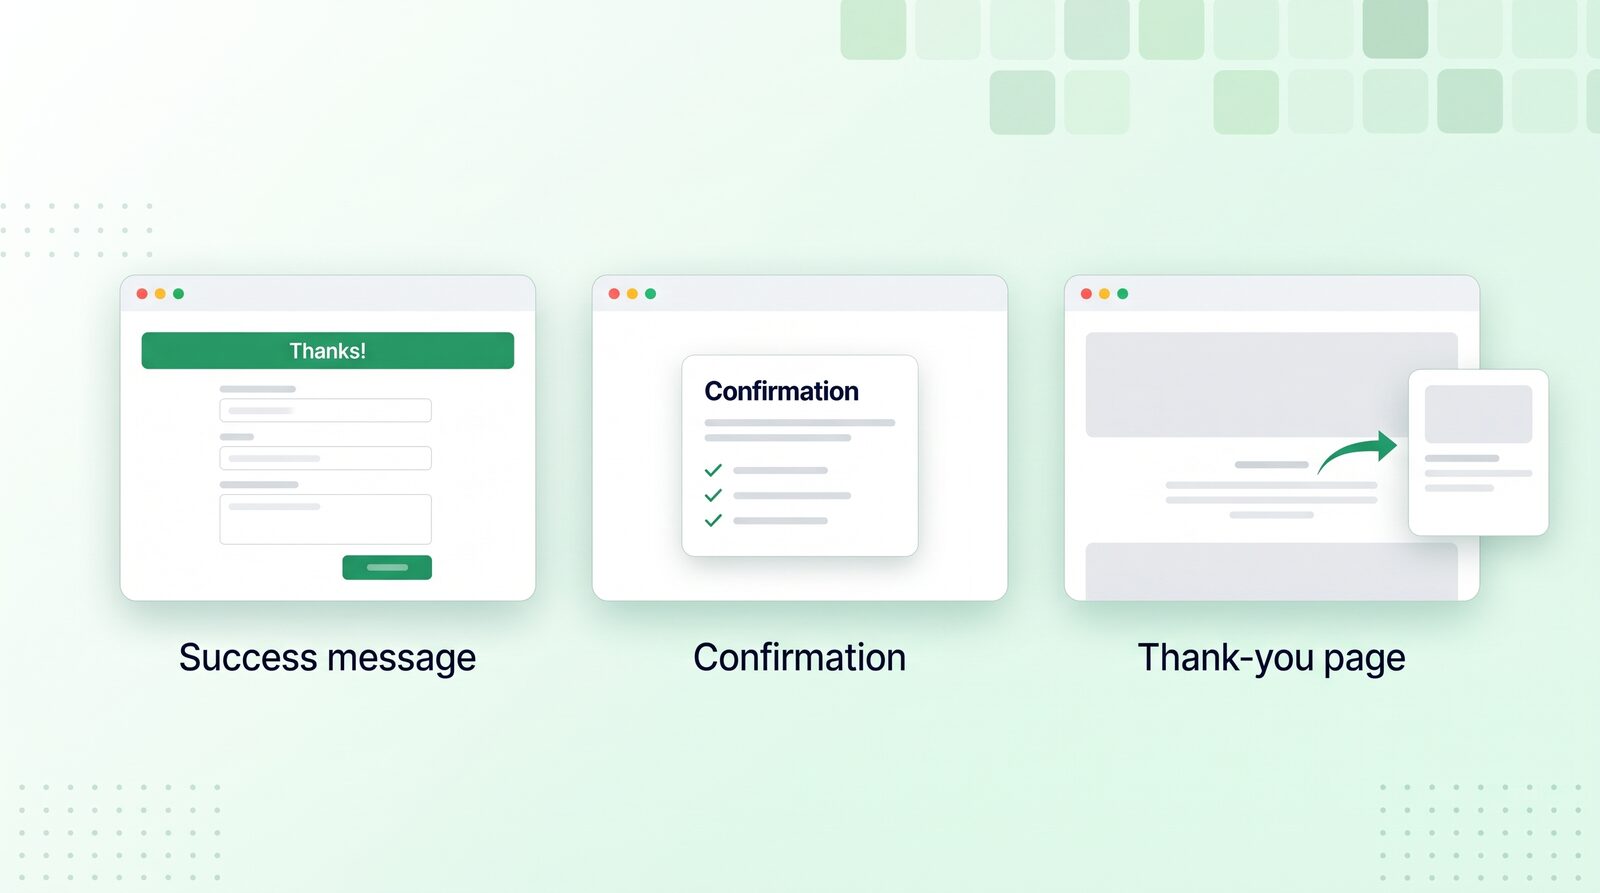
There are three things a form can do after a submit. Pick by what the visitor needs next.
| After submit | Best for | Weak at |
|---|---|---|
| Short success message (a line above the form) | Newsletter sign-ups, quick contact forms | Saying anything specific; the form stays on screen and invites a second submit |
| Confirmation in place of the form | Quote requests, bookings, applications, orders: anything where the visitor wants to know what happens next | Ad platforms that only count a thank-you URL |
| Redirect to a thank-you page | Conversion tracking by URL, a long next-steps page, upsells | Personal details: you pass them in the URL or lose them |
The Confirmation sits in the middle. It says as much as a thank-you page, it stays on the page the visitor was already looking at, and it knows their answers without anything in the URL.
What you need
- CraftForms, free: the Confirmation block, answer tags, fallbacks, conditional text and Show if, and the All Form Data block.
- A Save Submission submit action if you want a reference number.
- CraftForms PRO only for
{{order.number}}and{{order.total}}, which exist when the form creates an order (catalog items and online payments).
How to add a custom thank-you message to a WordPress form
The example form asks four things: Choose one (A repair, A new installation, Just a question), What needs doing?, Pick a time frame and the visitor’s name and email.
- Go to CraftForms → Forms and open the form.
- Click the block inserter (+), search for confirmation and add the Confirmation block after the last field. A form can have one.
- It starts with a “Thank you!” heading and a paragraph. Change them to your own words.
- Add whatever else belongs there: a paragraph about next steps, an image, a button to your price list. All Form Data and QR Code / Barcode work in it too. Fields don’t: the form is gone by then.
- Save the form.
In the editor the block has a blue tab, Confirmation · Shown in place of the form after it’s sent. Fold it with the arrow on the tab while you work on the fields.
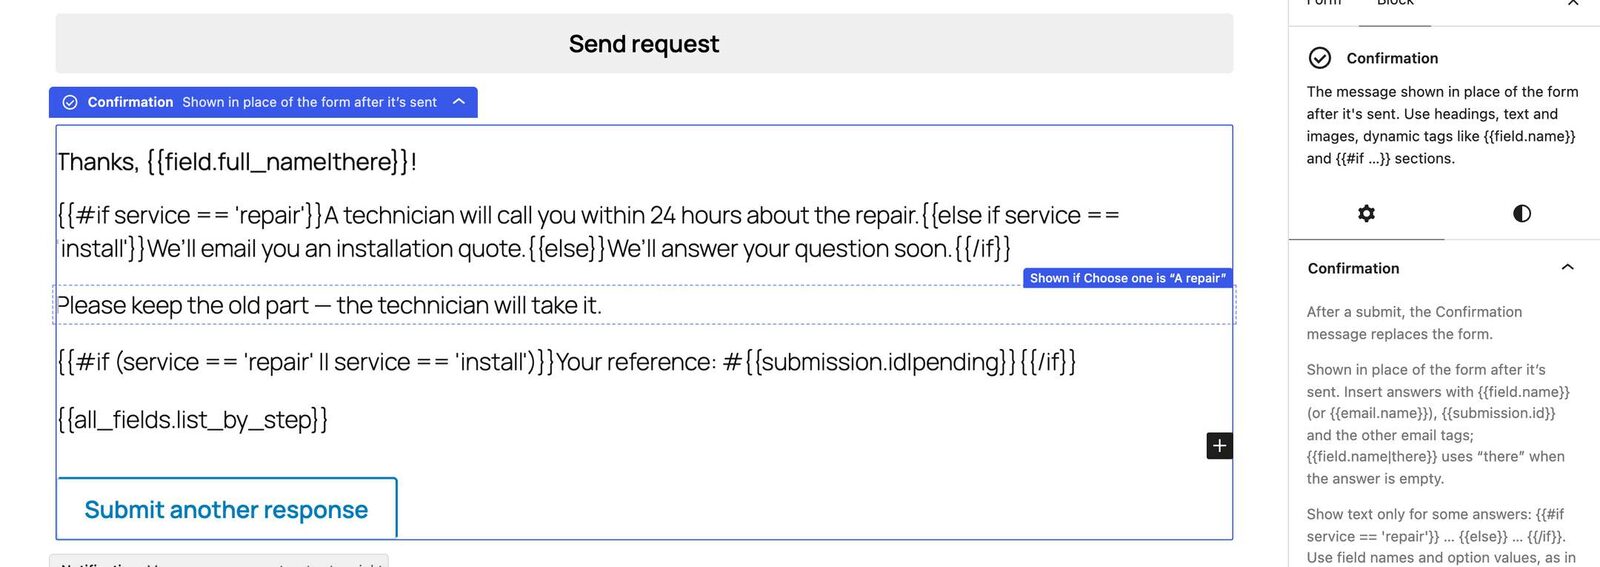
Select the block for its settings. The top line tells you what happens after a submit on this form (“After a submit, the Confirmation message replaces the form”). ”Submit another response” button is on by default and brings the form back empty, at its first step. Button text changes its wording. Colours, margin and padding are in the usual Styles and Advanced panels.
How do you show the visitor’s answers in the thank-you message?
Type {{ in a heading or paragraph and pick a tag from the list. The message is built on the server after the submit actions have run, so it knows everything an email template knows:
| Tag | Shows |
|---|---|
{{field.full_name}} | An answer, by field name. For a choice, the label: “A repair”. |
{{submission.id}} | The saved submission’s number, a ready-made reference. Needs a Save Submission action. |
{{all_fields.list}} | Every answer the visitor filled in. Also .table and .paragraphs. |
{{order.number}}, {{order.total}} | The order the form created (PRO). |
{{site.name}}, {{date.date}} | Site and date tags, as in emails. |
The easy way to the full summary is the All Form Data block: pick Display as (Table, Bulleted list, Paragraphs). Empty and hidden fields are left out, so the list only shows what the visitor actually answered. On a multi-step form, turn on Group by step and the answers sit under each step’s title.
The heading of the example reads:
Thanks, {{field.full_name|there}}!What if the visitor left the name empty?
That’s what the |there is for. A fallback after the pipe is used when the tag is empty: “Thanks, there!” instead of “Thanks, !”. It works on any tag, for example #{{submission.id|pending}}.
How do you change the message depending on the answer?
A repair, a new installation and a question need different next steps. Wrap each sentence in a condition:
{{#if service == 'repair'}}A technician will call you within 24 hours about the repair.
{{else if service == 'install'}}We'll email you an installation quote.
{{else}}We'll answer your question soon.{{/if}}
The first matching condition wins. Conditions use the field name (service) and the option value ('repair'), not the label people see, so they keep working if you reword or translate the form. Numbers work too (size > 3), and checkbox groups use includes('gift', extras).
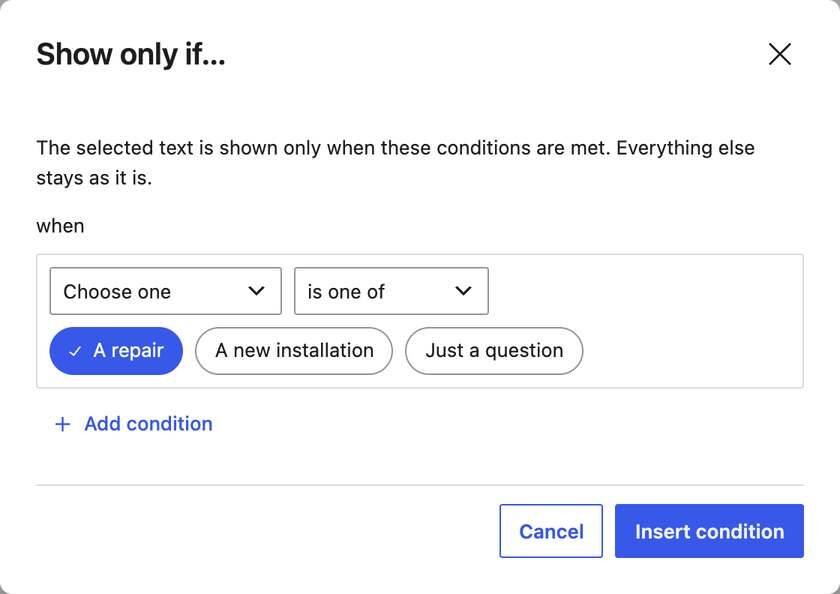
You don’t have to type it. Select the sentence, open More (⌄) in the text toolbar and choose Show if…. Pick the field, is one of and the option, then Insert condition.
Hide a whole block
For a paragraph, an image or a group of blocks, use the block’s own condition. Select it, open Show if in the sidebar and click Add condition. The example’s “Please keep the old part — the technician will take it.” only shows for repairs. In the editor the block gets a dashed outline and a badge, Shown if Choose one is “A repair”, so you can see the logic without opening anything.
A paragraph or heading left empty by a condition is removed from the Confirmation, so the message never has gaps. The reference line is wrapped in a condition as well, so someone who only asked a question doesn’t get a ticket number:
{{#if (service == 'repair' || service == 'install')}}Your reference: #{{submission.id|pending}}{{/if}}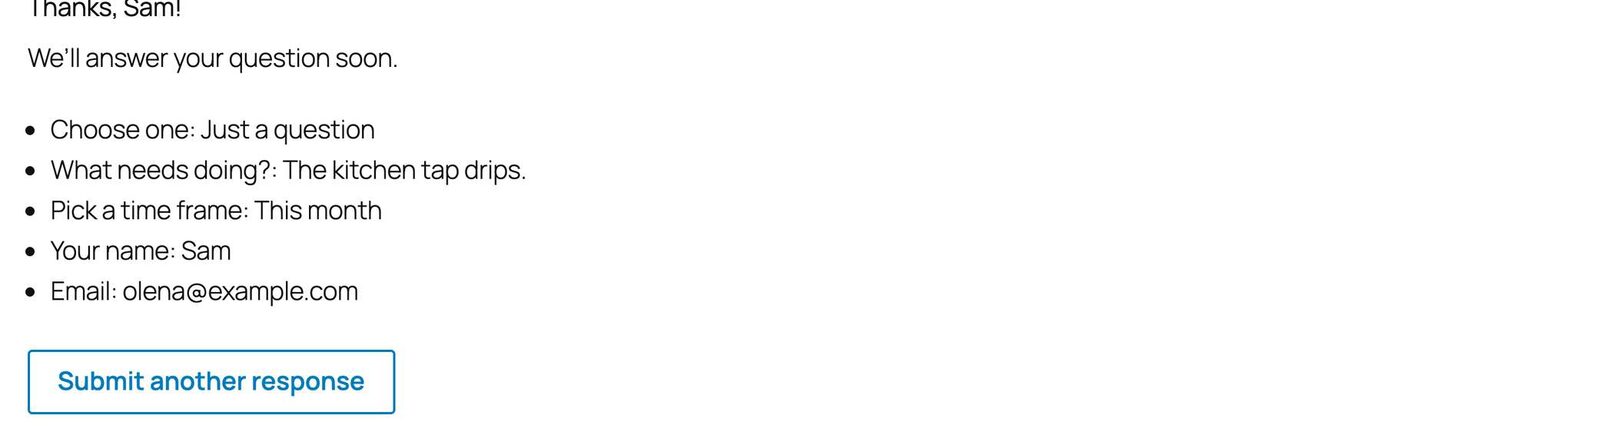
What happens after a submit?
One rule decides, and the first match wins:
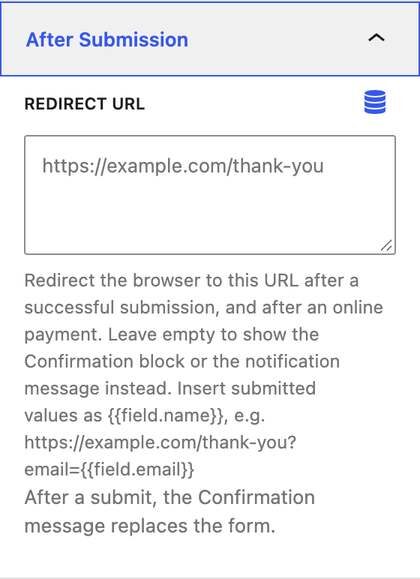
- Redirect URL. If the form has one (sidebar Form tab → After Submission → Redirect URL), the visitor goes there and the Confirmation isn’t shown.
- Confirmation. If the form has the block, it replaces the form.
- Default. Otherwise the success message shows. After an online payment, the visitor goes to the Payment success URL.
You don’t have to remember this: both the After Submission panel and the Confirmation’s sidebar say which one applies to the form you’re editing.
When the Confirmation shows, the fields, steps, progress bar and buttons are hidden and the page scrolls to the message if needed. Screen readers are moved to it, so the visitor hears the thank-you instead of silence.
After an online payment
Hosted payments follow the same rule. With a Confirmation and no Redirect URL, a buyer who pays on Stripe, PayPal, Mollie or Square comes back to the form’s page and sees the Confirmation there, order number included. If the payment isn’t confirmed yet when they arrive, a line says so: “We are confirming your payment. You will get an email when it is done.” Our Stripe payments tutorial covers the gateway side.
Can you still track conversions without a thank-you page?
Yes, if you track with GA4. CraftForms sends a craftforms_submit event on every successful submit, so the Confirmation doesn’t cost you a conversion. Mark the event as a key event and you’re done; our GA4 form tracking guide shows how, with or without Tag Manager.
Some ad platforms only count a page URL. For those, keep a Redirect URL. It can still carry answers into the page: https://example.com/thank-you?email={{field.email}}.
Tips for a thank-you message people read
- Say what happens next, and when. “A technician will call you within 24 hours” beats “We’ll be in touch”.
- Give a reference. A number the visitor can quote saves a “did you get my request?” email.
- Repeat the key answers, not all of them. For a long form, a table of twenty rows is a wall. Use the list for short forms and pick two or three tags for long ones.
- Keep the button. “Submit another response” is useful for event sign-ups and multi-person bookings. Rename it (“Book another room”) or turn it off for one-off requests.
- Send the same words by email. The Confirmation uses the same tags as an email template, so copy the text into the customer email and they have it in writing.
- Test each branch. Submit once per option to check that the right sentence shows.
FAQ
Is the Confirmation block free?
Yes. The block, answer tags, fallbacks, conditional text, Show if and All Form Data are in the free version. Only order tags need PRO.
Can I show the submitted data after a WordPress form is sent?
Yes. Add the All Form Data block, or the {{all_fields.list}} tag, to the Confirmation. Empty and hidden fields are left out.
Does the thank-you message work with multi-step and conversational forms?
Yes. It replaces the whole form, steps included, and on the step map the last step ends in Confirmation instead of Submit. It’s a good ending for a conversational form, where a one-line success message feels abrupt.
Can visitors see the message in the page source before they submit?
No. The message is built on the server after the submit, so it isn’t in the page beforehand. Submitted values are cleaned before they’re shown, the same as in emails.
Can the thank-you message be translated?
Yes. Its texts are part of the form’s translations, and it’s shown in the language the form was shown in.
Next step
Open your busiest form, add a Confirmation block, and replace “Thank you!” with one sentence that says what happens next and a {{field…}} tag with the visitor’s name. That’s two minutes of work. The full reference is in the Confirmation documentation and Conditional Text and Fallbacks. The block arrived in CraftForms 2.2.