TL;DR
- CraftForms has a visual email template builder inside the WordPress block editor — no HTML, no coding.
- Add dynamic tags like
{{email.name}},{{email.checkin_date}}, or{{email.price}}and they fill in with real submission data on send. - Connect the template to any form via the Send Email Template action.
- Add Mailtrap’s free sandbox as an SMTP server to catch test emails in a browser inbox — nothing reaches a real address while you’re still building.
- Check CraftForms → Email Logs to confirm every send: which server delivered it, whether it succeeded, and the full email body.
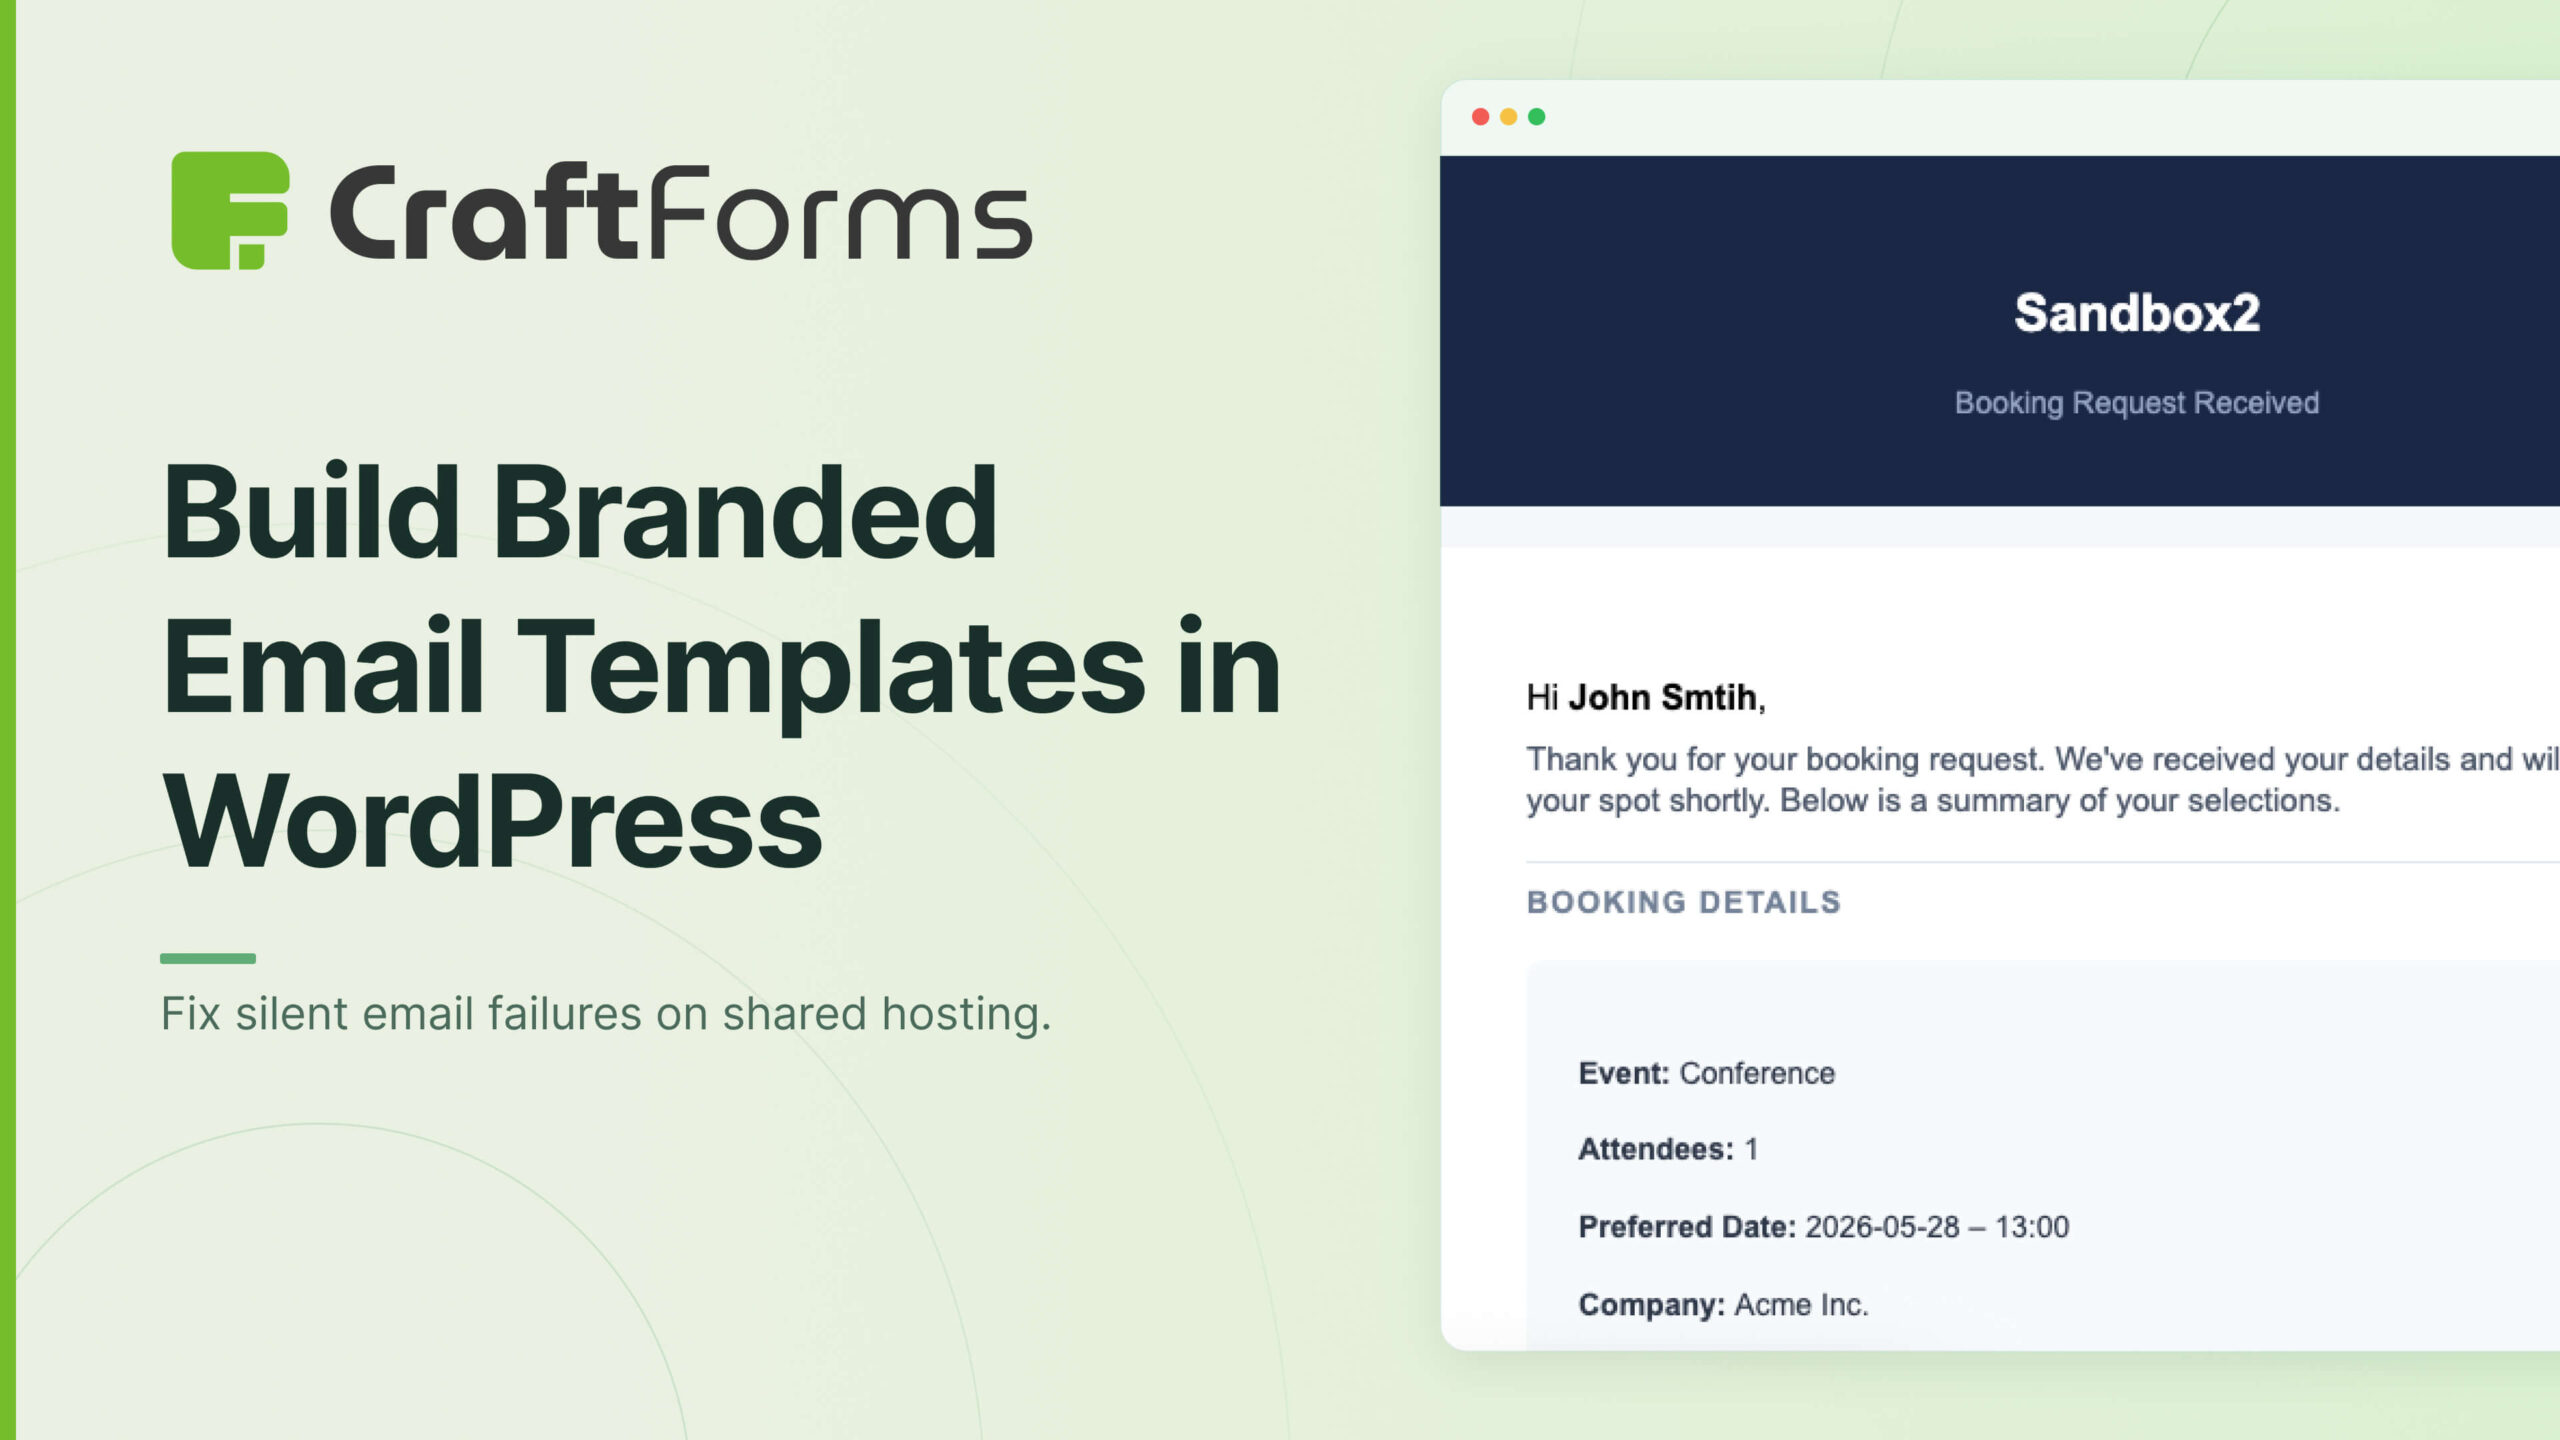
A booking confirmation lands in the guest’s inbox five seconds after they submit your form. It has your logo at the top, the check-in and check-out dates they chose, the total they’re paying, a button to add the stay to their calendar. It looks like it came from a real hospitality business — because it did.
That’s not a third-party email marketing tool. It’s CraftForms’ built-in email template builder, and it took about twenty minutes to set up.
Visual email template builder is a FREE version functionality! ❤️
Most WordPress contact form plugins send a notification that looks like this: a plain white email, monospace font, a dump of every field value, your WordPress site URL at the bottom. It gets the information across. It also tells your customer they’re dealing with a website held together with default settings.
Your confirmation email is often the first thing a customer receives from you after making a booking or placing an order. It’s the moment when the transaction becomes real for them. A branded, well-structured email builds trust, reduces the “did it actually go through?” anxiety, and sets the tone for everything that follows.
CraftForms includes a visual template builder for this — inside the WordPress block editor you already know. Here’s how to use it.
What the CraftForms email template builder actually is
The template builder isn’t a custom editor bolted onto the plugin. It’s the native WordPress block editor — the same Gutenberg interface you use to write posts and pages — applied to email.
You add blocks: headings, paragraphs, images, buttons, columns, spacers. You set colours and typography. You arrange sections visually. When you save, CraftForms automatically compiles the result into email-safe HTML: CSS is inlined so it renders correctly in Gmail, Outlook, and Apple Mail. You never touch a line of code.
The right sidebar gives you tools that are specific to email:
- Starter Templates — a library of pre-built designs to start from instead of a blank canvas
- Email Template Preview — opens a modal showing exactly how the compiled email renders
- Dynamic Data — a panel that lists all available dynamic tags for the template, including every field from any connected form
- Email Settings — set a default subject line and recipient address directly in the template
- Styles — background colour for the email body
The result is a WYSIWYG email editor with the full capability of the block editor behind it.
Step 1: Create a new email template
Go to CraftForms → Email Templates in your WordPress admin and click Add New.
The block editor opens. Before you start designing from scratch, click Starter Templates in the right sidebar. A modal shows a selection of pre-built designs — booking confirmations, order receipts, contact acknowledgements. Pick one that’s close to what you need and click Insert — it loads into the editor as fully editable blocks.

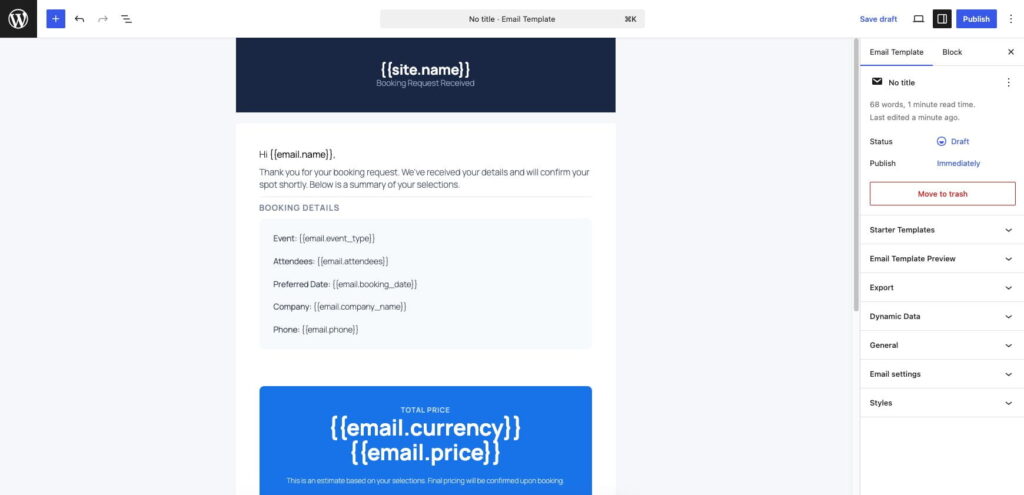
Give the template a name using the document title field at the top (e.g. “Booking Confirmation — Guest”).
Step 2: Design the template visually
Edit the template exactly as you would a WordPress page. Click any block to select it, then use the block toolbar and right sidebar to adjust it.
Useful patterns for confirmation emails:
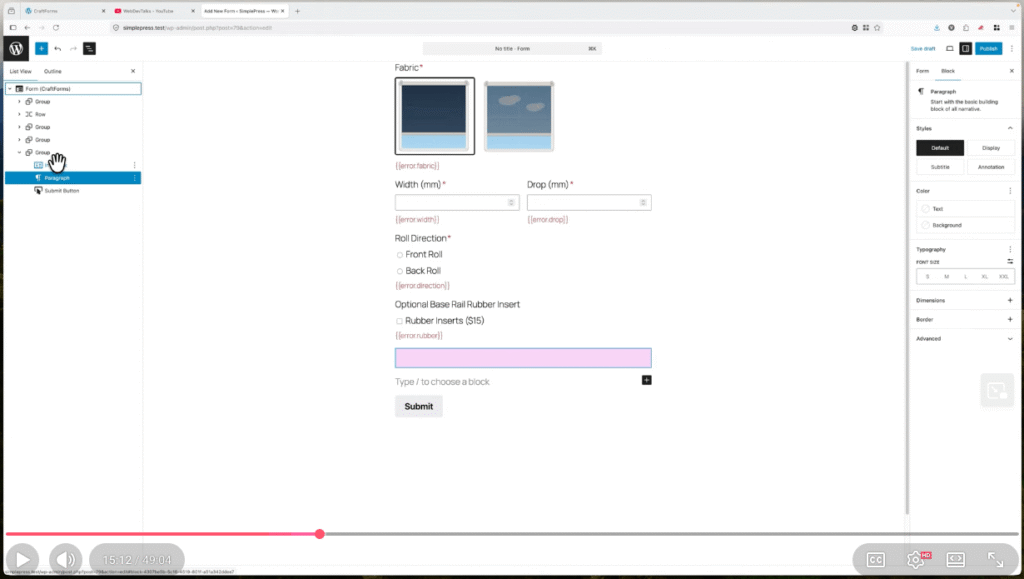
- Full-width header block with your site name or logo image and a headline like “Your booking is confirmed”
- Two-column layout for booking details — label on the left, value on the right (e.g. “Check-in” /
{{email.checkin_date}}) - A prominent button block linking to your site, your cancellation policy page, or a calendar download
- Footer section with your contact details and a note about how to get in touch
For colours, use the Styles panel in the right sidebar to set the email background. Individual blocks follow the standard block editor colour controls.
When you want to see how it all looks as a real email, click Open the preview in the “Email Template Preview” sidebar panel. A modal opens with the fully compiled, CSS-inlined HTML rendered as it will appear in an email client.
Step 3: Add dynamic tags
This is where the template goes from a generic design to a personalised confirmation. Dynamic tags are placeholders that CraftForms replaces with actual submission data when the email is sent.
Open the Dynamic Data panel in the right sidebar. It lists all the tags available for the template, organised by category.
Site tags (always available, no form required):
{{site.name}}— your WordPress site name{{site.url}}— your site URL{{site.admin_email}}— the admin email address
Form field tags (appear once you connect a form — see Step 4):
{{email.field_name}}— the value of any named field in the form- For booking date pickers:
{{email.checkin_date}},{{email.checkout_date}} - For single-date pickers:
{{email.date}},{{email.time}} - For price:
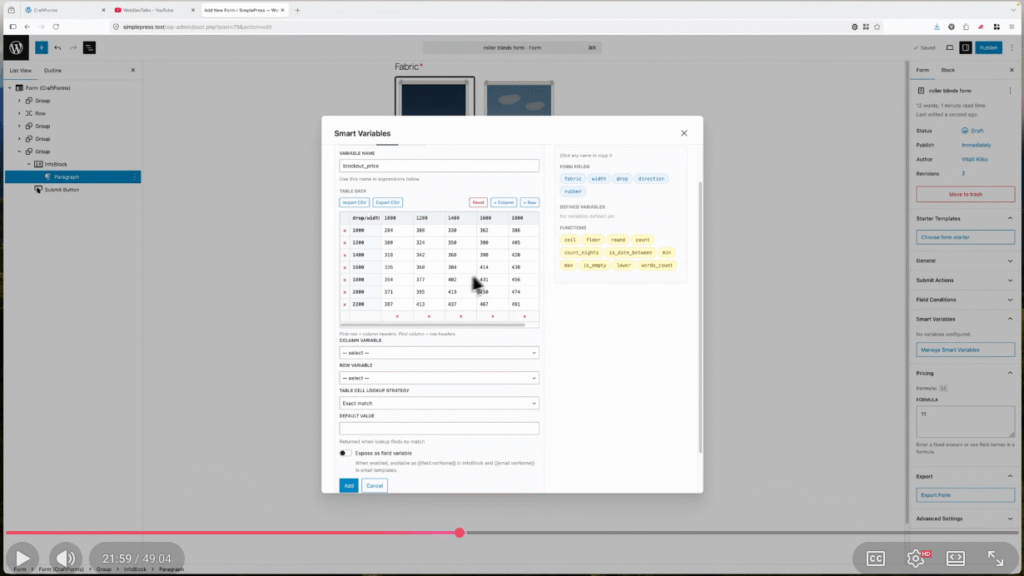
{{email.price}},{{email.currency}} - Smart Variables (calculated fields marked as exposed):
{{email.variable_name}}
Click any tag in the panel to copy it, then paste it into a text block in the editor. The tag appears as literal text while you’re editing — it’s replaced with the real value at send time.

A practical booking confirmation body might look like this:
Hi
{{email.first_name}},Your booking at
{{site.name}}is confirmed.Check-in:
{{email.checkin_date}}Check-out:{{email.checkout_date}}Total:{{email.price}}{{email.currency}}We look forward to welcoming you. If you need to make any changes, reply to this email.
The subject line and default recipient address go in the Email Settings panel. The subject supports tags too — Booking confirmed — {{email.first_name}} works as a subject line.
When you’re happy, click Save. CraftForms compiles the template to email-safe HTML in the background. It’s ready to use.
Step 4: Connect the template to a form
Open the form you want to trigger this email, or create a new one. In the form editor, go to the Actions section (the tab or panel that lists what happens after submission).
Add a Send Email Template action if one isn’t already there. Configure it:
- Email Template — select the template you just created from the dropdown
- Recipient — enter the email address to send to, or use a tag like
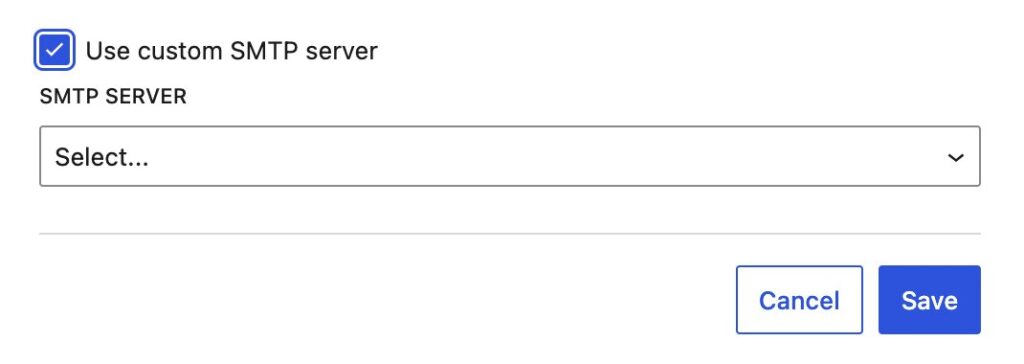
{{email.email_field}}to send to the address the user entered in the form - SMTP Server — tick Use custom SMTP server and select your SMTP server from the dropdown (we’ll add the Mailtrap sandbox server next)

Save the form.
Step 5: Test with Mailtrap’s free sandbox
Before this email reaches any real address, test it. Mailtrap is a free service that acts as a catch-all SMTP server for testing: any email your site sends to it gets intercepted and displayed in a web interface — you see the full HTML render, the raw source, the headers, and a spam score. Nothing lands in a real inbox.
Set up a Mailtrap account:
- Sign up at mailtrap.io — the free plan gives you up to five sandbox inboxes with 1,000 test emails per month, no credit card required.
- In the Mailtrap dashboard, go to Sandboxes → Add Sandbox to create a new one. Then click on that newly created inbox to access its settings.
- Under SMTP, you’ll see the credentials for this inbox.
Add Mailtrap as an SMTP server in CraftForms:
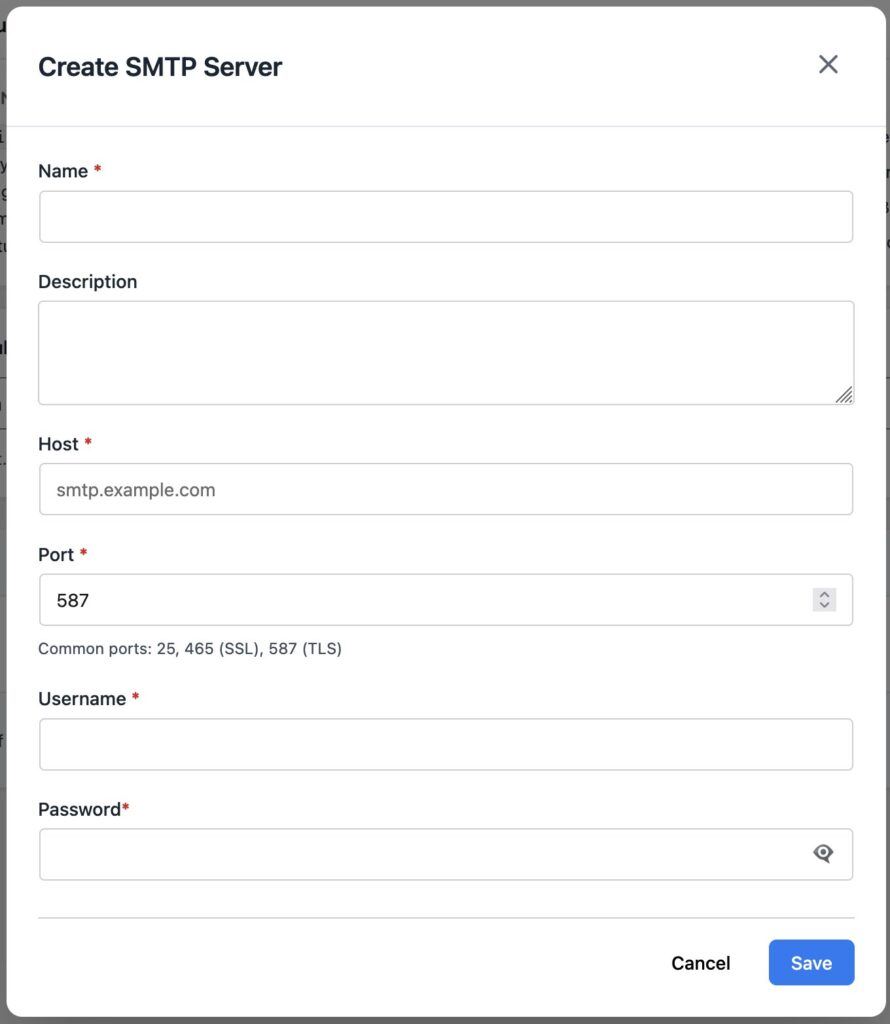
- Go to CraftForms → SMTP Servers and click Add New.
- Fill in:
- Name:
Mailtrap Sandbox(or any label you’ll recognise) - Host:
sandbox.smtp.mailtrap.io - Port:
2525 - Username: your inbox username from Mailtrap
- Password: your inbox password from Mailtrap
- Name:
- Click Save.
The server is now available to any email action in CraftForms. Go back to your form, open the Send Email Template action, and make sure Mailtrap Sandbox is selected as the SMTP server.
Run the test:
Fill in and submit the form as a real visitor would. Open Mailtrap’s dashboard and click into your inbox. Within a few seconds the test email appears. Click it to open the preview.
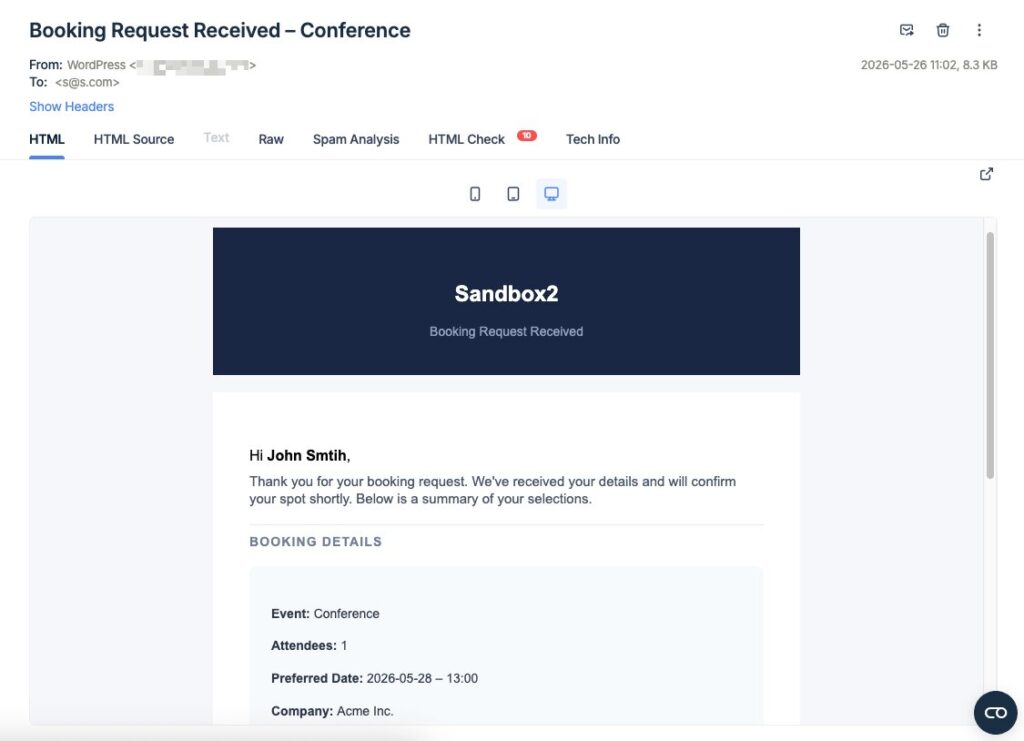
You can see exactly how the email renders, inspect every header, and check the spam analysis. If the layout needs adjusting, go back to the template, make changes, save, and submit the form again. Because Mailtrap catches every send, you can iterate freely without any risk.
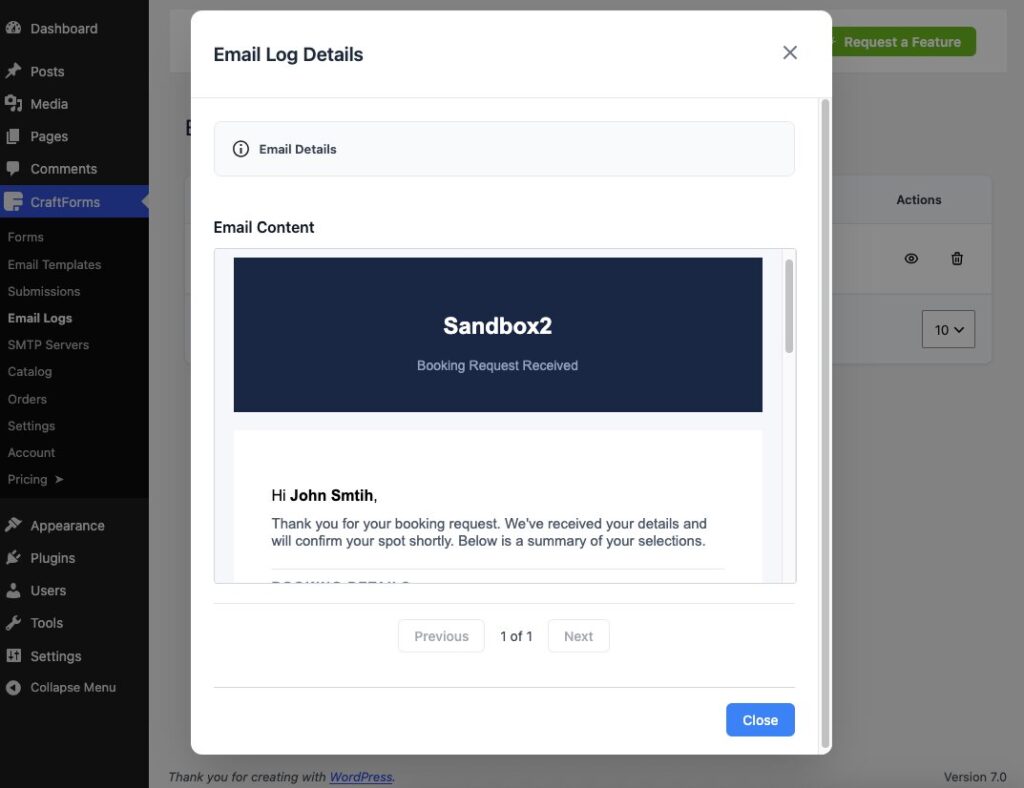
Step 6: Check the email log in CraftForms
CraftForms logs every outgoing email regardless of which transport sent it. Go to CraftForms → Email Logs.
Each row in the log shows:
- Date — when the email was attempted
- Transport — which server sent it (in this case,
SMTP: Mailtrap Sandbox) - Status — a green “Success” badge or a red “Failed” badge
- Actions — click to view the full email body and any error message
If the send failed, the error message is recorded — wrong password, port blocked by the host’s firewall, rate limit exceeded. This is significantly faster to diagnose than chasing down a missing email with no trail.
The log is a permanent audit trail of every notification your forms have sent. You can filter by status (all / success / failed), view the full HTML body of any email, and delete old entries when you’re done with them.
Going live: connect a production SMTP server
When the template looks right and test submissions are arriving cleanly in Mailtrap, the only remaining step is to switch the SMTP server in the Send Email Template action to your production sender.
If you don’t have one set up yet, our guide to the best free SMTP services for WordPress covers the main options — including Brevo (easiest to set up, 300 emails/day free), Mailgun (best deliverability for bookings and high-value confirmations), Gmail SMTP, and others. Add whichever you choose under CraftForms → SMTP Servers, then update the action to use it instead of Mailtrap Sandbox.
From that point on, every form submission sends the real branded email to the real recipient — through an authenticated SMTP server, with a delivery log you can actually read.
Summary
CraftForms’ email template builder gives you a complete WYSIWYG workflow inside WordPress:
- Design a branded template in the block editor — no HTML required
- Insert dynamic tags from the Dynamic Data panel to personalise every send
- Preview the compiled result before connecting it to anything
- Test safely with Mailtrap’s free sandbox — catch and inspect every test send in a browser inbox
- Confirm delivery in CraftForms → Email Logs — transport, status, and full body for every email
- Go live by connecting a production SMTP server when you’re ready to send to real recipients
The difference between a plain-text notification and a properly designed confirmation email is the difference between a site that processes submissions and a business that communicates.