
WooCommerce View in Room: Show Products in a Real Room Scene Before They Buy
- Category
- Article
- Published
- Updated
- Reading time
- 10 min
- Tags
“Will it look right above my sofa?” is the question behind a large share of abandoned carts in home decor. A cut-out product on a white background doesn’t answer it. A single lifestyle photo answers it once, for one colour and one size.
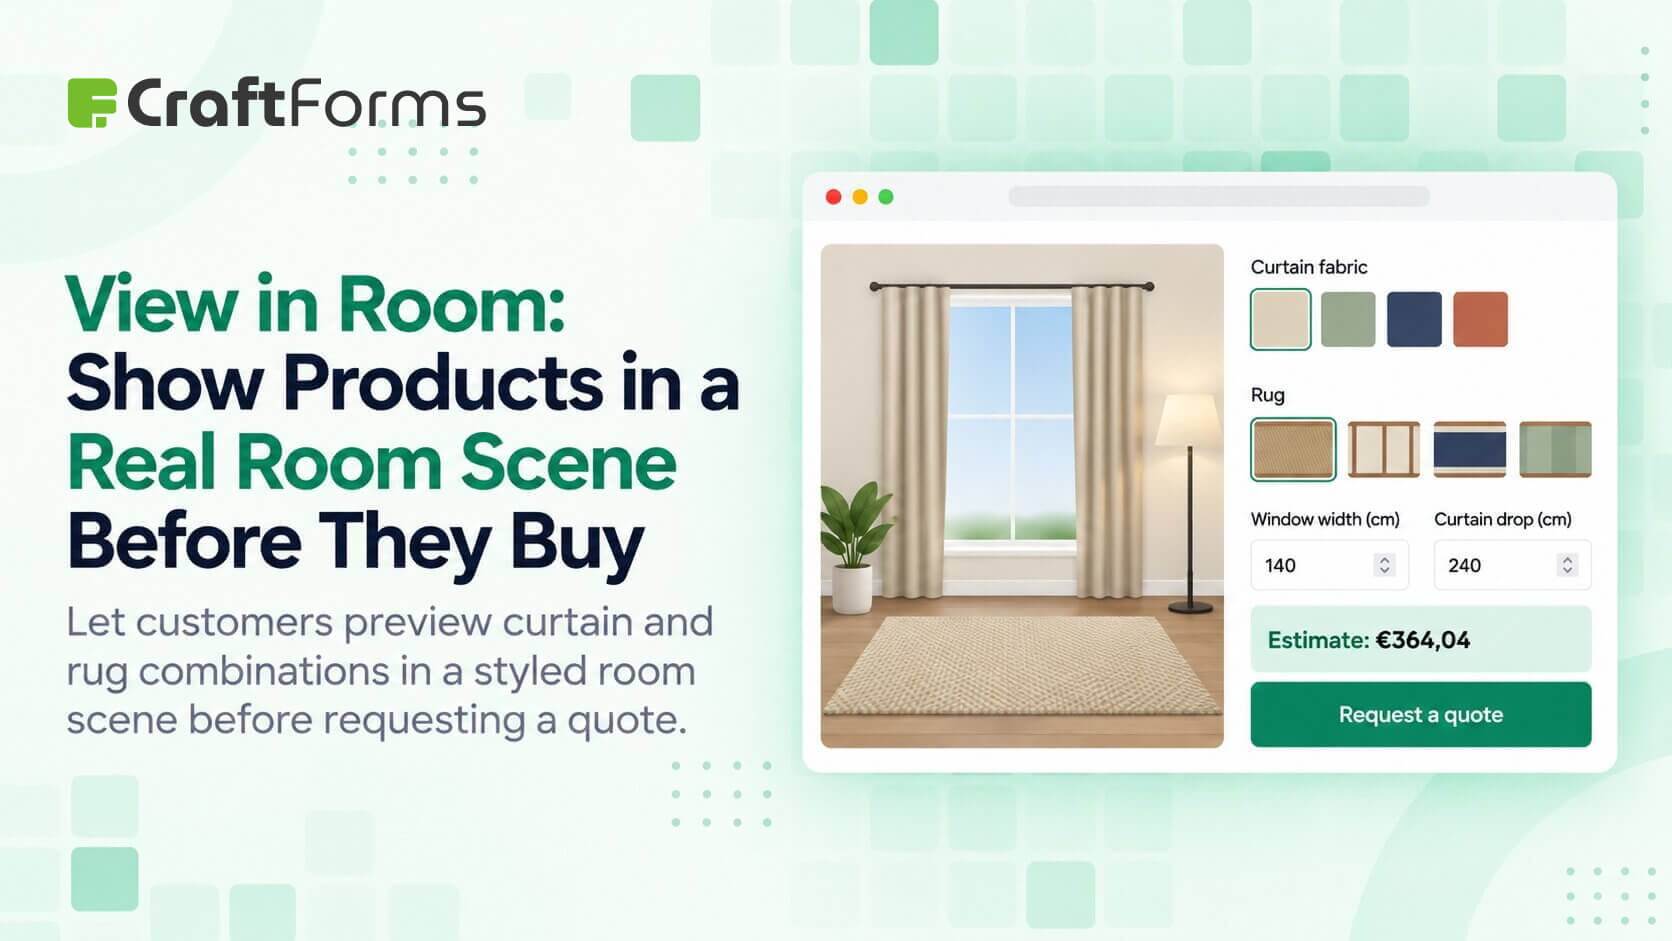
A WooCommerce view in room preview answers it for the options the shopper is actually choosing. CraftForms Pro has three elements that put a product into a scene, and each one does it differently. This guide explains which to use, then walks through setting each up.
TL;DR
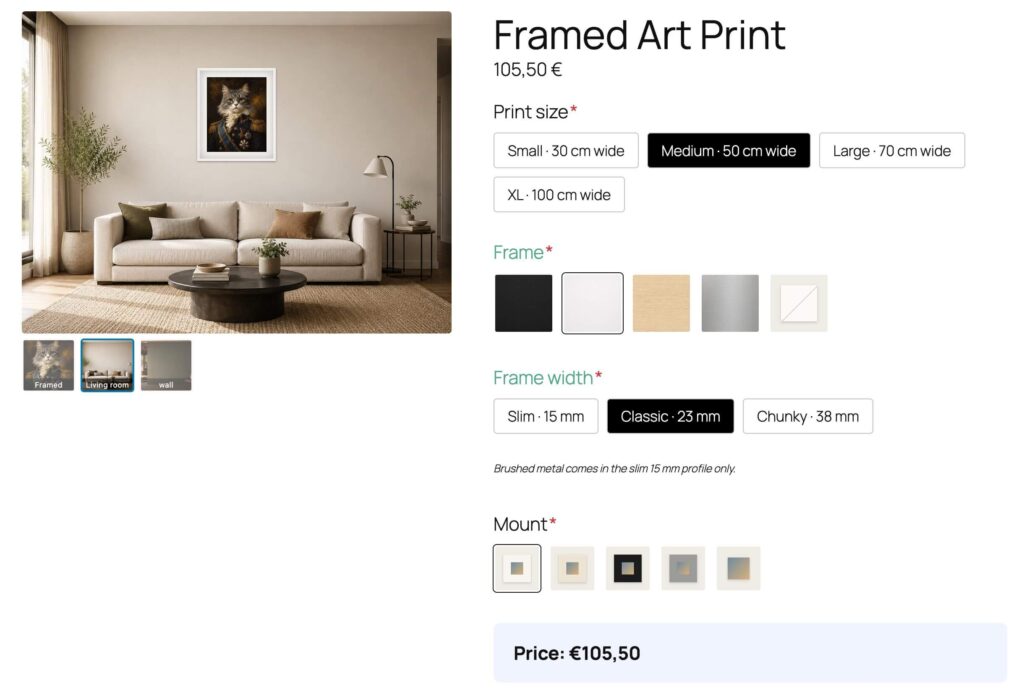
- Picture Frame → Room scenes puts framed wall art on a wall photo at true relative size. You calibrate each scene once with the real width and height of the wall.
- Ambient Scene is a background (a colour or a room photo) with rectangles you drag onto it. Each rectangle is linked to an option field and shows the picture for whatever the shopper has chosen, live. Good for mood scenes and “swap the fabric in the window” previews.
- Layered Image stacks transparent PNG layers over a background, swapping or tinting each layer by option, and saves the composite to the order.
- Ambient Scene is preview-only. It saves nothing to the order and it isn’t a product-image replacement; you place it in the form or on the page.
- All three are part of CraftForms Pro and update instantly in the browser, with no server round-trip while the shopper clicks.
Why “view in room” works
Shoppers struggle with two things when buying for their home: scale and context.
Scale is “how big is 70 × 50 cm, really?” A ruler graphic helps a little. Seeing the piece next to a sofa or a bed they recognise helps a lot more.
Context is “will this blue go with a wooden floor?” It’s the reason people bring paint chips and fabric swatches home.
Most room-preview plugins solve one of the two. Some place a gallery image on a stock room photo at a fixed size. Others are AI or AR tools that need a customer photo, a phone or a subscription. The CraftForms elements take a different route: the room photos are yours, the previews are driven by the same form that prices the product, and nothing is uploaded or rendered on a server while the shopper browses.
Three ways to put a product in a room
| Picture Frame room scenes | Ambient Scene | Layered Image | |
|---|---|---|---|
| Best for | Wall art, framed prints, mirrors | Mood scenes, fabrics, finishes, “swap this area” | Products built from parts, shown over a background |
| What changes live | Frame, mount, print size, placed on the wall | The picture inside each region you drew | Each PNG layer (swap image or tint a mask) |
| True-to-size | Yes, once calibrated | No | No |
| Saved to the order | The framed picture (not the room) | Nothing | Yes, the full composite |
| Replaces the WooCommerce product image | Yes (Active Element) | No, placed in the form or page | Yes (Active Element) |
1. Picture Frame room scenes: true size on a real wall
If you sell anything that hangs on a wall, start here. The Picture Frame element draws a live frame and mount around your product image with every measurement in centimetres. Under Room scenes (view in a room), you add wall photos. Each scene becomes an extra thumbnail under the main preview.
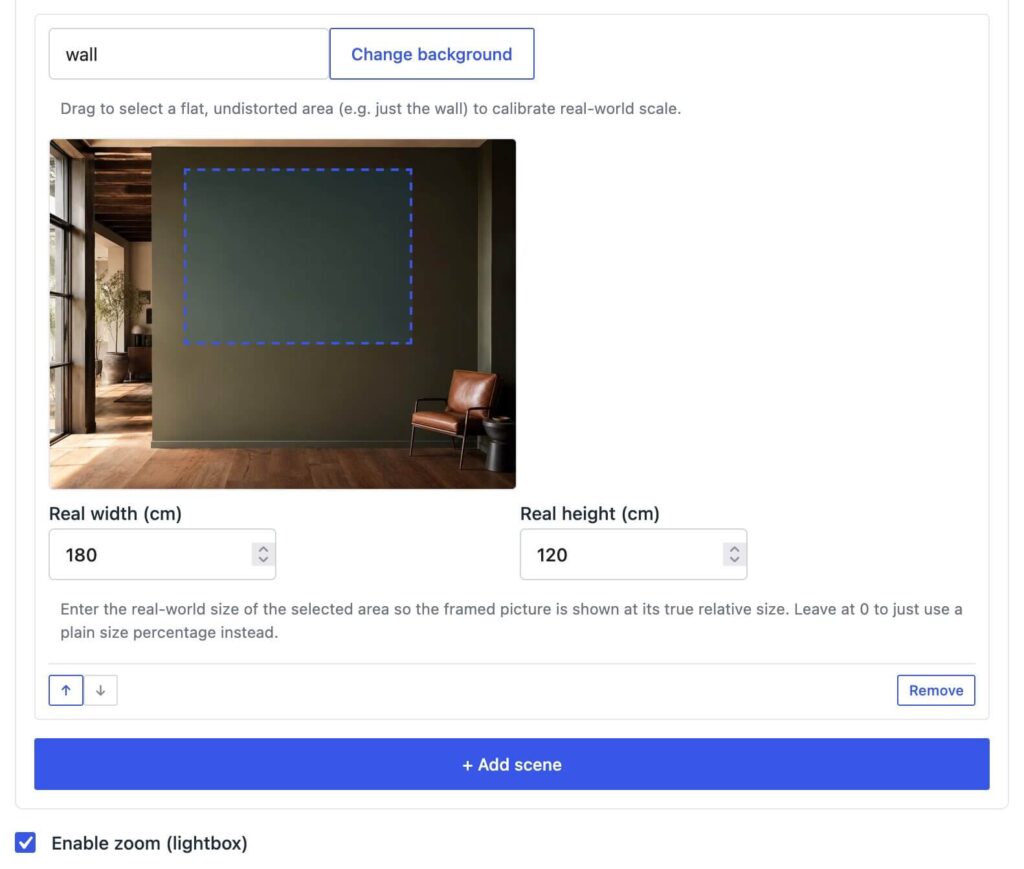
The part that matters for “view in room” is calibration. In each scene you drag a rectangle over a flat, straight-on part of the wall and enter its Real width (cm) and Real height (cm). From then on, the framed piece is drawn at its real size relative to that wall. A 30 cm print in a 2 cm frame looks small above a 200 cm sofa. A 100 cm print fills the space. When the shopper switches from 50 cm to 70 cm, the piece on the wall grows by the right amount.
Scenes are preview-only. The image that goes to the cart and order is the framed picture itself, which is what your workshop needs. For the full framing setup, see our picture frame configurator guide and the Minted-inspired framed picture build.
2. Ambient Scene: swap what’s inside part of a room photo
Ambient Scene is simpler and more general. You give it a background, either a Solid color with an aspect ratio or an Image such as a room photo, and then add regions. A region is a rectangle you drag onto the scene. Each region is linked to one option field (a Radio, Select or Checkboxes field), and for each option you choose a picture. As the shopper changes that option, the region shows the matching picture straight away.
Some honest details about what it does and doesn’t do:
- Regions are rectangles, and each picture fills its rectangle with a cover-crop. There’s no perspective warping. For a slanted surface, prepare the option pictures so they already have the right angle.
- The cleanest trick is to photograph the same scene once per option (the same armchair in each fabric, the same window with each curtain) and let each region show the matching crop. The swap then looks like one photo changing.
- You can have several regions in one scene, each linked to a different field: wall colour in one, sofa fabric in another, rug in a third.
- If a Checkboxes field has several ticks, the region shows the first ticked option.
- If a field has no fixed options (a text field, say), it can’t drive a region.
- It’s preview-only. Ambient Scene saves no image to the submission or order, and it isn’t a WooCommerce Active Element. You place the block inside your form (or anywhere on a page, pointed at the form with Connected form), and it sits wherever you put it.
3. Layered Image: a room composite that goes with the order
When the shopper’s choices should be recorded as a picture, not just previewed, use Layered Image. It shows your normal product gallery plus a live Preview made from a Preview Background (none, a solid colour, or an image) and transparent PNG layers stacked on top. Each layer is linked to a field in one of two modes:
- Image — swap PNG per choice: a different PNG for each option.
- Color — tint a mask PNG per choice: one mask PNG whose visible pixels are recoloured to the chosen colour. That’s 20 fabric colours from one PNG.
Use a room photo as the Preview Background and full-size PNG layers of the sofa, the lamp or the cabinet fronts, and you get a room composite that’s saved to the cart and order when Save composited preview on submit is on. Our bean bag configurator uses the same layering idea.
Industry examples
1. Art print and poster shop. Three calibrated scenes (living room, bedroom, home office) on every product through the Picture Frame element. Shoppers switching from 40 to 70 cm see the print grow above the same sofa. One set of scenes serves every artwork, because the scenes live in the frame settings and the artwork is each product’s featured image.
2. Curtain and blinds maker. An Ambient Scene with a room photo and one region over the window. The region follows the fabric field, and each option shows a photo of the same window dressed in that fabric. The pricing form (width × drop × fabric) is the same one that drives it. See our roller blinds configurator with live pricing.
3. Upholsterer or furniture maker. A Layered Image with a showroom photo as the background, a colour-mode mask layer for the sofa body and an image-mode layer for leg finishes. Every order arrives with a picture of the exact sofa ordered, in the exact fabric.
4. Interior designer’s mood board. An Ambient Scene with a Solid color background at 4 / 3 and six regions laid out as a board: wall paint, flooring, sofa fabric, cushion, lamp, art. Clients click through options on a proposal page and see the whole board change. Since nothing needs to be saved, Ambient Scene’s lightness is a plus.
5. Wallpaper or mural shop. An Ambient Scene with a straight-on photo of a wall behind a bed and one region covering the wall, linked to the pattern field. For made-to-measure murals, the order side is handled by the Image Cropper, covered in our WooCommerce photo upload and crop guide
How to set up a room-scene preview in CraftForms
Picture Frame room scenes (wall art)
- Open the product, go to the CraftForms tab, turn on Connect a CraftForms form to this product and pick the form.
- In Product Image / Interactive Preview, set Active Element to Picture Frame and configure Print width, Frame and Mount / mat.
- Under Room scenes (view in a room), click + Add scene, Set background image, and enter a Scene label such as “Living room”.
- Drag a rectangle over a flat part of the wall and enter Real width (cm) and Real height (cm). Measure the real room, or use a known object: a standard door is about 80 × 200 cm.
- Save and switch between the scene thumbnails on the product page.
Ambient Scene (option-driven regions)
- Open your form in the CraftForms form editor and insert the Ambient Scene block where the preview should appear. Inside a form it connects automatically. Elsewhere, choose the form under Connected Form.
- In Background, set Type to Image and Select image, or use Solid color with an Aspect ratio like
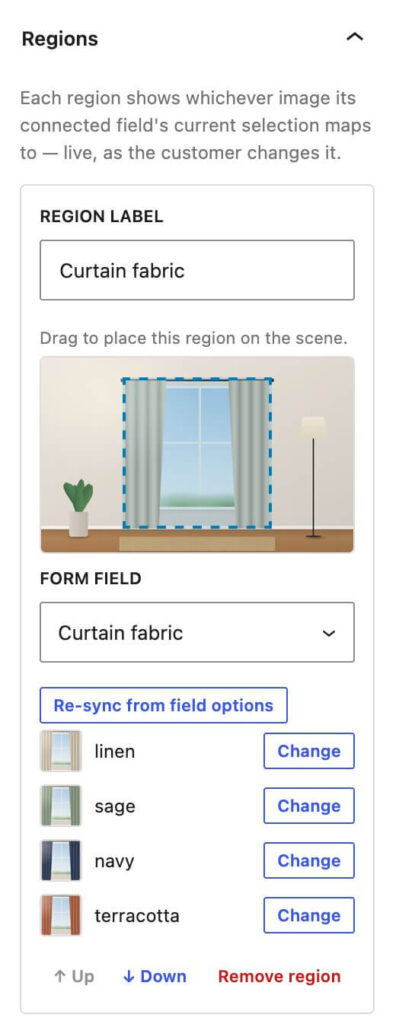
16 / 9. - In Regions, click + Add region, give it a Region label (“Curtain fabric”), and drag on the small stage to place it.
- Pick the Form field that drives it and click Fill from field options. You get one row per option. If the field uses Image Swatches or cards, their images come across automatically. Otherwise, click Select on each row and choose a picture.
- Repeat for each region. Use ↑ Up / ↓ Down to reorder them. After adding options to the field later, Re-sync from field options.
Layered Image (saved composite)
- In the product’s CraftForms tab, set Active Element to Layered Image.
- Set Preview background to Image and choose the room photo.
- Add layers, pick each layer’s Connected field and Mode, and assign a PNG or colour per option. Export all layer PNGs at the same pixel size as the room photo so they line up.
- Keep Save composited preview on submit and Auto-switch to Preview on option change on.
Tips for room photos that convert
- Shoot straight on. Both calibration and Ambient Scene regions assume a flat, front-facing surface.
- Leave space. Choose photos with an empty wall or plain area where the product will go. Busy walls fight with the art.
- Keep scenes light. A 2,000 px wide JPEG is plenty. Huge backgrounds slow the page, and for Layered Image they also make the saved composite heavy.
- Match your buyers. A studio flat and a family living room answer “will it fit?” for different people. Two or three scenes are usually enough.
- Reuse. One form and one set of scenes can serve a whole catalogue. See reusing one form across many products.
FAQ
How do I add a “view in room” preview to WooCommerce?
For wall art, set the product’s Active Element to Picture Frame in its CraftForms tab and add scenes under Room scenes (view in a room). For other products, add an Ambient Scene block to the product’s form, or use Layered Image if the scene should be saved with the order.
Can the room preview show the product at its real size?
Yes, with Picture Frame room scenes. Drag over a flat part of the wall and enter its real width and height in cm. The framed piece is then drawn at true relative size and changes as the shopper picks a bigger or smaller print.
Can shoppers upload a photo of their own room?
Not currently. The room photos are ones you upload in the admin. That keeps the previews fast and predictable, with no customer image processing.
Is the room preview saved with the order?
It depends on the element. Layered Image saves the full composite. Picture Frame saves the framed picture but not the room. Ambient Scene saves nothing, because it’s a live preview only.
Can one scene show several options at once, like wall colour and sofa fabric?
Yes. In Ambient Scene, add one region per option field. In Layered Image, add one layer per field.
Do I need 3D models or AR?
No. All three elements work with ordinary photos and PNGs, and update in the browser as the shopper clicks.
Show it where it will live
Pick your best-selling product and one good room photo, and build the scene today. Get CraftForms Pro to use Picture Frame, Ambient Scene and Layered Image. If you’re still comparing tools, our WooCommerce product configurator roundup puts them side by side.