
WooCommerce Photo Upload and Crop: Let Customers Crop Their Photo to the Exact Print Size
- Category
- Tutorial
- Published
- Updated
- Reading time
- 11 min
- Tags
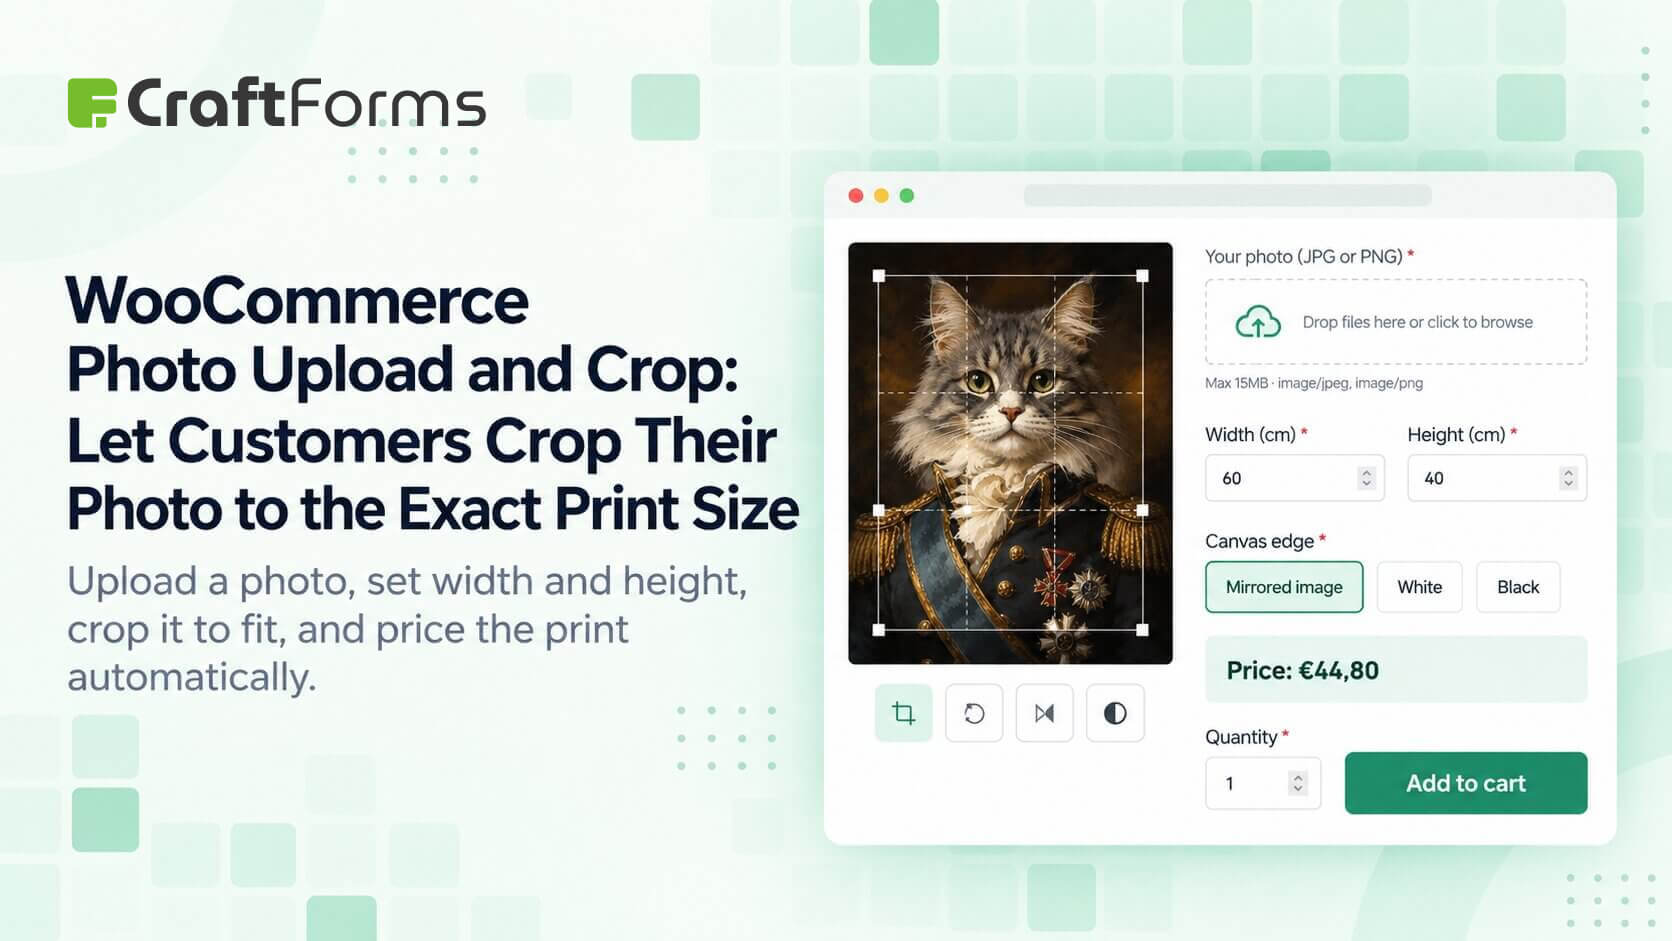
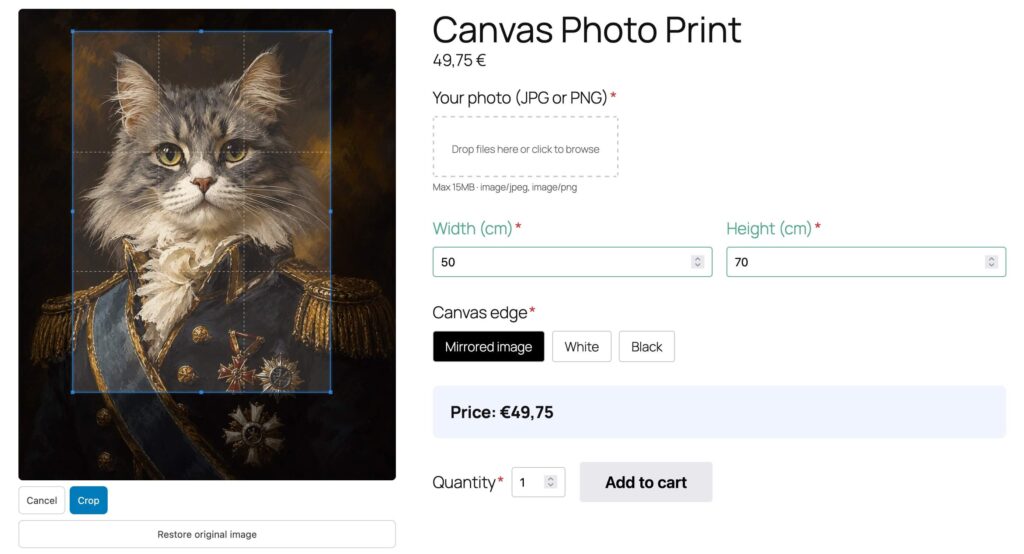
A print shop in Slovakia sells fotoobraz na plátne, a canvas printed from your own photo. On their product page the customer types a width and a height in centimetres, uploads a photo from their phone, and drags a crop box that is already locked to the shape they just typed. If they change 60 × 40 to 50 × 70, the crop box turns from landscape to portrait. The price updates at the same moment, and the order arrives with the cropped result and the original file.
That’s what WooCommerce photo upload and crop should look like, and this guide shows you how to set it up with the Image Cropper element in CraftForms Pro.
TL;DR
- Most upload add-ons crop to one aspect ratio that you set per product. If you sell custom sizes, that ratio is almost always wrong.
- In CraftForms the Image Cropper reads the crop ratio from your own form fields (for example
widthandheight), so the crop box follows whatever size the customer types. - Point the cropper at a File Upload Field and the customer’s photo replaces your sample image. The raw file is still submitted as a normal upload, so you keep the full-resolution original.
- The same width and height drive your price formula, so the crop and the price can’t disagree.
- Extras: flip, black & white, sepia, and stripe guides for prints produced in fixed-width panels such as photo wallpaper.
- Image Cropper is part of CraftForms Pro.
Why a fixed crop ratio breaks custom-size photo prints
The standard setup for customer image uploads in WooCommerce is an upload field plus an optional crop step. You pick a ratio in the product settings (say 3:2) and every customer crops to 3:2.
That’s fine when you sell three fixed sizes. It stops working when the customer chooses the size:
- A 100 × 50 cm panorama canvas is 2:1. A 40 × 40 cm cushion print is 1:1. Both can be the same product.
- If the customer crops at 3:2 and then orders 2:1, someone at your shop has to re-crop by hand, or the print gets stretched, or the customer’s framing gets thrown away.
- If you skip the crop step completely, you find out at print time that the dog’s ears are cut off.
What you actually need is a crop ratio that comes from the order itself: the width and height the customer is paying for.
How the CraftForms Image Cropper works
The Image Cropper takes the place of the product image on a WooCommerce product (or sits as a block inside any CraftForms form). It shows an image with a small toolbar: crop, flip horizontal, black & white, sepia, and a toggle for stripe guides. When the customer opens the crop tool, the crop box is locked to the ratio of two values from your form:
- Width form field/variable
- Height form field/variable
Those can be plain Number inputs or smart variables you calculate (for example, a size preset that sets both). A smart variable needs Expose switched on, or the cropper can’t see it. If they’re empty, the crop box falls back to the photo’s own proportions.
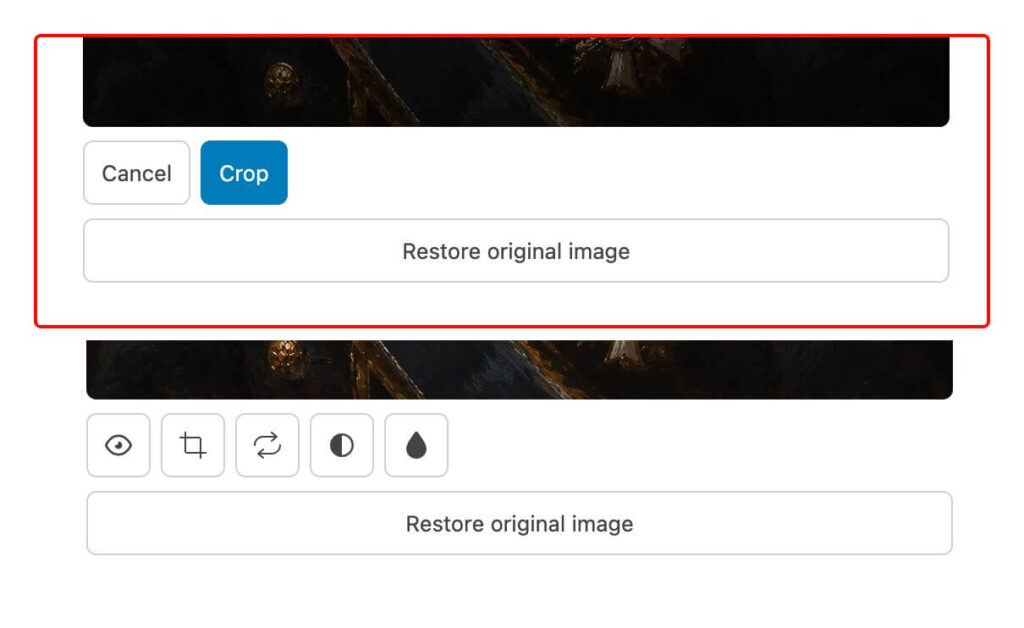
While the crop box is open, it reacts live. If the customer changes the width, the box reshapes on the spot. After they press the crop button to confirm, the result is fixed. If they change their mind about the size later, Restore original image puts the full photo back and they can crop again.
The customer’s own photo, not yours
On its own, the Image Cropper crops an image you choose: the product’s featured image, or a Source Image from the Media Library. To make it crop the customer’s photo, connect a File Upload Field from the same form: under Customer’s photo (File Upload field) in the product’s cropper settings, or in the block’s Connected Upload panel. When the customer picks a file, the cropper swaps to it straight away, in the browser, with no upload round-trip before they can start cropping.
A few details worth knowing:
- You still set a Source Image. It’s what shoppers see before they upload, so use a sample photo that shows the product off. If the customer clears their file, the cropper goes back to it.
- The cropper accepts JPG and PNG, and it enforces that on its own even if your File Upload Field allows other types (say, PDFs for a different purpose).
- If the File Upload Field allows several files, only the first one is used as the crop source.
- The File Upload Field keeps doing its normal job: the original file is uploaded with the order. So you get both the untouched full-resolution photo and the customer’s crop to guide production.
What you receive with the order
The processed image (cropped, flipped, filtered) is saved with the order under croppedImg. On a WooCommerce product that happens automatically; with the block, switch on Save submission data. On the server it’s written to a file in CraftForms’ protected storage, not the public Media Library, because it’s built from a customer’s private photo. You’ll find it under CraftForms → Files and on the order. The export is a JPEG at about 85% quality: fine as a production reference, much lighter than a PNG.
Two guardrails keep crops usable for print. The crop box can’t be dragged smaller than about 600 px of the original photo’s width, so nobody orders a 100 cm canvas from a thumbnail-sized crop. And a photo gets one tone filter, either black & white or sepia, not both stacked.
On a WooCommerce product with the cropper as the Active Element, the customer’s crop also becomes the cart and order picture. If they upload but skip cropping, their photo as uploaded is used, so the cart always shows their picture. The crop can also go into your emails and PDFs with {{email.croppedImg.image_url}}, for example a production sheet with the crop and a download link to the original.
Industry examples: who uses photo upload and crop
1. Canvas and photo print shop (the Slovak example). Two Number fields, width and height in cm, a File Upload Field for the photo, and the cropper connected to both. Price is per square metre with a small base fee, for example 29 + width * height / 10000 * 45 (€29 setup plus €45/m²). A 60 × 40 canvas comes to €39.80, and a 100 × 70 comes to €60.50. Add a Radio Field for the edge (mirrored, white, black), with a surcharge.
2. Wedding photographer upsell. After the gallery goes live, the photographer sends clients to a “Print your favourite” page. Size presets (30 × 20, 40 × 30 and a 30 × 30 square) sit in a Select Field. Two Table smart variables, crop_w and crop_h, each hold one column of numbers with a row per preset (Fill from options adds the rows for you), and the cropper reads them as its width and height. Picking the square preset turns the crop box square on the spot. The client uploads the file from their gallery and crops. Black & white and sepia are switched on because couples ask for them. Every order arrives with the original file and a crop the photographer can check against the edit.
3. Pet-portrait and gift shop. Mugs and phone cases have one fixed print area, so the width and height are fixed values rather than inputs, for example a smart variable of 20 and 9 for a mug wrap. The customer still uploads and crops, but can’t pick a shape that won’t fit. Flip horizontal helps when a pet photo faces away from the handle.
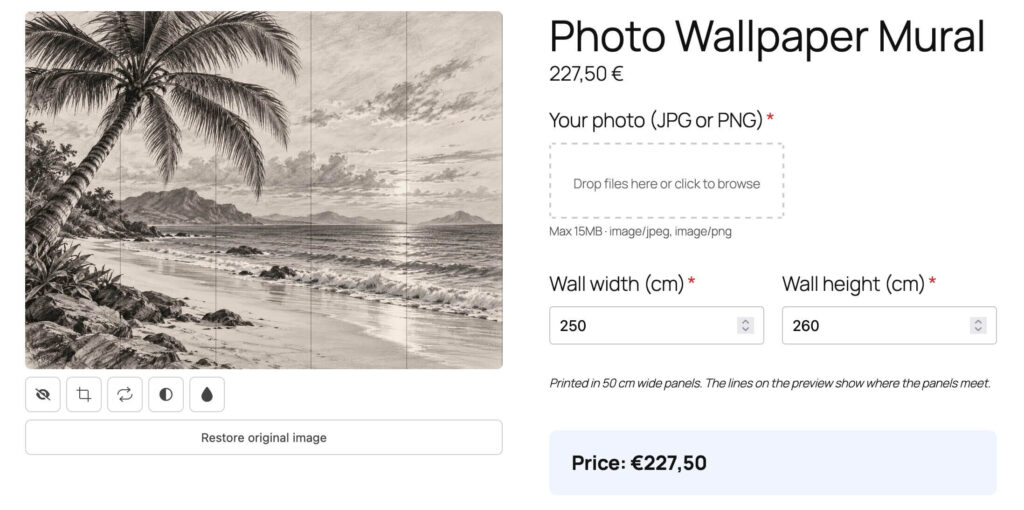
4. Photo wallpaper and multi-panel prints. Large wall murals are printed in vertical strips (drops) of a fixed width, often 50 cm. Turn on Display stripes, set the stripe width, and the cropper draws the panel seams over the photo so the customer can keep a face off a seam. The live stripe count goes into a smart variable you can price with: ceil(width / stripe width) panels at a price each. The same guides work for a triptych canvas built from equal-width panels. We used the same idea in our custom wallpaper configurator inspired by Happywall.
How to set up photo upload and crop in CraftForms
This walkthrough builds the canvas-print product. You need CraftForms Pro and WooCommerce.
Step 1: Build the form fields
Create a new form under CraftForms → Forms and add:
- A Text Input Field set to type Number, named
width(label “Width (cm)”). Give it a sensible min and max, e.g. 20–150. - A second Number field named
height. - A File Upload Field named
photo. Keep its allowed types to images and set a max file size your hosting can handle. Phone photos are often 5–12 MB. - Optionally, a Radio Field for the canvas edge, displayed as Cards or Image Swatches.
Step 2: Put the cropper on the product
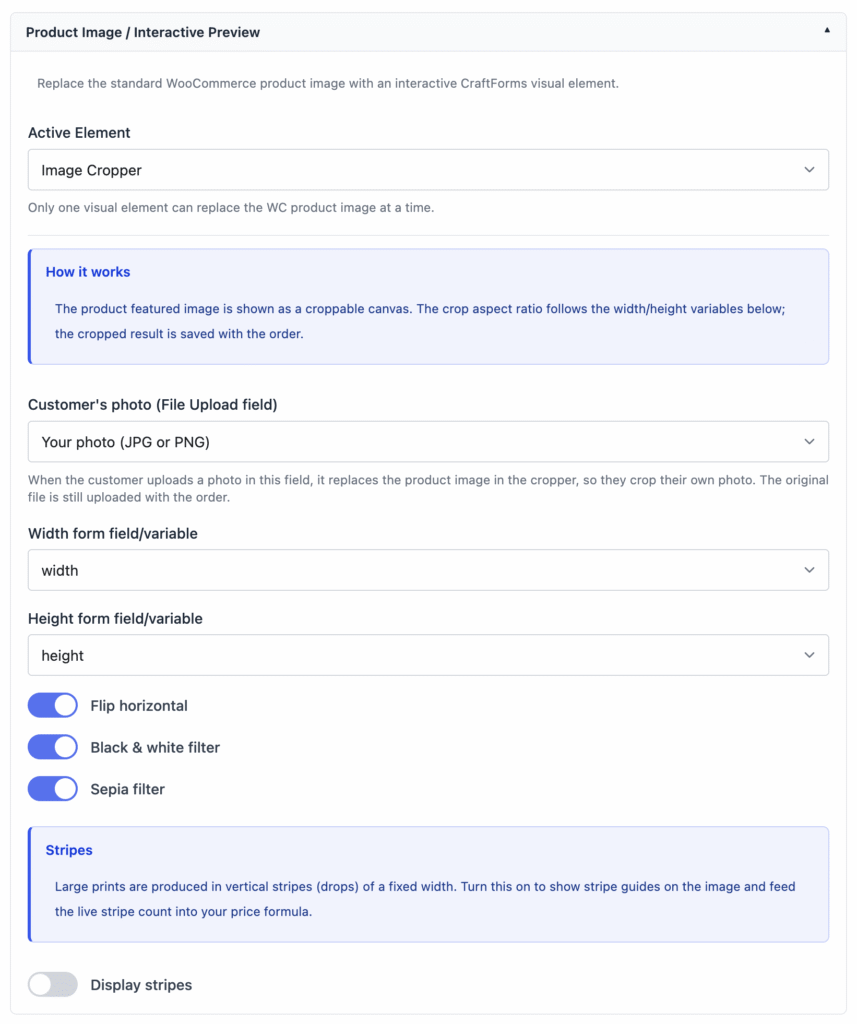
Create a simple product with a nice sample photo as its featured image; that’s the placeholder shoppers see before uploading. Open the CraftForms tab, turn on Connect a CraftForms form to this product, pick your form under CraftForms Form, then in Product Image / Interactive Preview set Active Element to Image Cropper:
- Width form field/variable:
width - Height form field/variable:
height - Customer’s photo (File Upload field):
photo - Tools: toggle Flip horizontal, Black & white filter and Sepia filter to suit the product.
The cropper replaces the normal product gallery, and the result is always saved with the order.
Not using WooCommerce? Put an Image Cropper block inside the form instead: set a sample Source Image, the same Crop Variables, Connected Upload → File Upload field: photo, and turn on Save submission data.
Step 3: Price it from the same numbers
In the same CraftForms tab, in Item Pricing, enter the formula:
29 + width * height / 10000 * 45
Because the price and the crop read the same two fields, a customer can’t crop for 60 × 40 and pay for 30 × 20. If you want more pricing logic, such as tiers, edge surcharges or minimums, our guide to complex WooCommerce pricing without hundreds of variations covers the formula side.
Step 4 (optional): Stripes for panel prints
In the cropper’s Stripes panel, turn on Display stripes, pick Stripe width source (a Static value like 50, or a form field), and name a Stripe-count smart variable. Create that smart variable first with a placeholder expression like 0. The cropper overwrites it with the live panel count, and you can use it in your price formula.
Step 5: Test like a customer
Open the product page on your phone. Upload a portrait photo, type a landscape size, crop, then add to cart. Check the order in WooCommerce: you should see the uploaded original and the saved crop.
One server setting to check: the cropped image travels inside the normal add-to-cart request, not as a file upload, so it counts against PHP’s post_max_size. On hosts that still default to 8 MB, a big crop can push the request over the limit. PHP then drops the request body without any error message. If saved crops go missing, raise post_max_size to 32M or 64M.
How this compares with product-designer plugins
Tools like Fancy Product Designer and Lumise give customers a full design canvas: text, clipart, layers, templates. If you sell T-shirts where people build a design from scratch, that’s the right category.
A photo print shop usually needs something narrower: one photo, one crop, the right shape, the right price. Upload add-ons such as Add-Ons Ultimate or Customer Upload Files cover the upload and can crop to a ratio you define in settings. The difference with CraftForms is that the ratio comes from live form values, and the same values drive pricing, stock and shipping formulas. The whole thing is also a native block, so there’s no heavy designer app loading on the product page. For a wider look at the options, see our WooCommerce product configurator roundup.
FAQ
How do I let customers upload and crop an image in WooCommerce?
Add a File Upload Field to a CraftForms form and connect the form to your product in the product’s CraftForms tab. Set Active Element to Image Cropper and choose the upload field under Customer’s photo. The customer’s photo loads into the cropper as soon as they pick it, and their crop becomes the cart picture.
Can the crop ratio change with the size the customer chooses?
Yes. Set Width form field/variable and Height form field/variable to your size fields. The crop box locks to width ÷ height and reshapes live while it’s open. After a crop is confirmed, Restore original image lets the customer crop again for a new size.
Do I get the original, full-resolution photo?
Yes. The File Upload Field uploads the original file as usual. The cropper’s result (a JPEG at roughly 85% quality) is saved separately as a reference for how the customer wants it framed.
Can customers make the photo black and white or sepia before ordering?
Yes, one or the other. Black & white filter and Sepia filter are toggles in the cropper’s settings (the block’s Tools panel, or the product’s cropper settings), and Flip horizontal is there too. Once a customer applies one tone filter, both filter buttons hide. Restore original image starts over.
Does it work for mugs, phone cases and other fixed print areas?
Yes. Set the width and height to fixed values (smart variables) instead of customer inputs. The crop box then always matches the print area.
Is the Image Cropper free?
No, it’s a CraftForms Pro element. In the free version the block shows an upgrade placeholder in the editor and renders nothing on the site.
Try it on your own product
If you sell photo prints, canvases, murals or photo gifts, the quickest test is one real product: two size fields, one upload, one cropper, one formula. Get CraftForms Pro and build it in under an hour. If your products also need stock per option, the inventory-by-option guide builds on the same form.