
Flower Delivery Order Form With a Branded Confirmation Email
- Category
- Tutorial
- Published
- Updated
- Reading time
- 11 min
- Tags
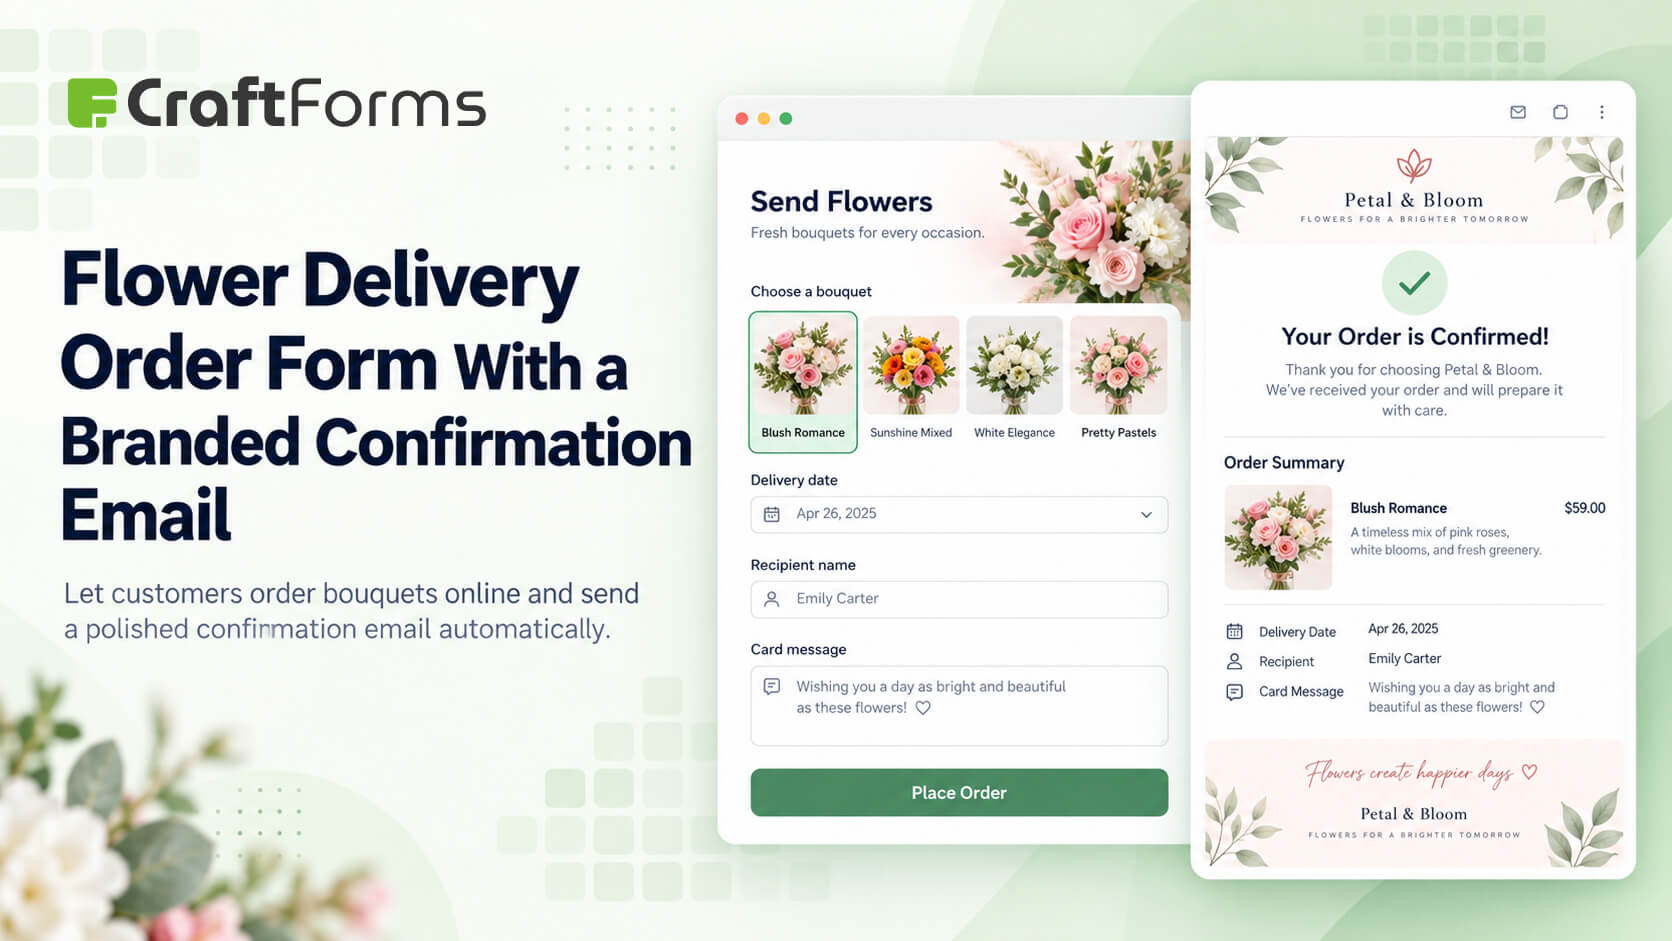
Short answer: in WordPress you can build a flower delivery order form (bouquet, size, delivery date, card message) and send a confirmation email in your shop’s own design, with no email-marketing tool and no HTML. CraftForms has an email template builder that runs in the WordPress block editor. You design the email with blocks, or generate a design with AI and paste it in. The customer’s bouquet, delivery date and card message fill in automatically when they order.
This guide builds both for an example flower shop, Bloom & Co.: the order form, a branded confirmation for the customer, and a work order for the shop with everything the florist needs to make the bouquet.
Why a florist needs a designed confirmation email
Flowers are bought for someone else, usually against a deadline: a birthday, an anniversary, a funeral. The customer’s worry after paying is always the same: will it arrive on the right day, and did they get my message right?
A plain email that just lists the fields (“field_7: Peonies, field_9: 2026-10-14”) answers that question, but it doesn’t look like it came from a florist. A confirmation that repeats the delivery date and card message, in the shop’s colours and with a photo of the bouquet style, removes the worry and looks like the shop the customer thought they were buying from.
This is where most WordPress form plugins are weak. Their notification emails are a text box with merge tags. To send a designed email you need an email-marketing tool, an email-template plugin, or someone who writes table-based HTML by hand.
What we’re building
| Piece | Where it lives | Plan |
|---|---|---|
| Order form: bouquet style, size, colour palette, delivery date, delivery zone, recipient, card message | CraftForms → Forms | Free, except the delivery-date picker (Pro) |
| Customer email: “Your flowers are booked for {date}” | CraftForms → Email Templates | Free |
| Shop email: work order with recipient address and card message | CraftForms → Email Templates | Free |
| Payment + live price by size and zone | Catalog item / Payment block | Pro |
Step 1: Build the order form
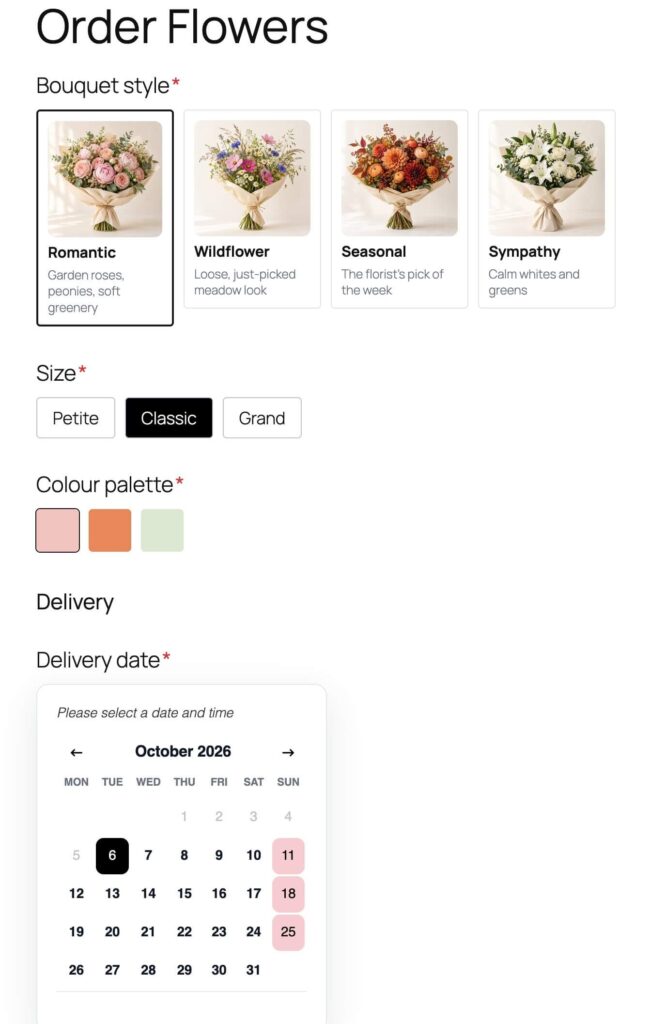
Create a form under CraftForms → Forms → Add New. The fields, with the names we’ll use as merge tags later:
| Field | Block | Name (merge tag) |
|---|---|---|
| Bouquet style (Romantic / Wildflower / Seasonal / Sympathy) | Radio, Card option style (a photo and a short description per option) | bouquet |
| Size (Petite / Classic / Grand) | Radio, Text option style, with a price on each option | size |
| Colour palette (Blush / Sunset / White & green) | Radio with the Color option style (swatches) | palette |
| Delivery date | Booking datepicker (Pro), whole days only (no time slots), with Sundays and past dates closed by its Catalog item | delivery_date |
| Delivery zone (City centre / Suburbs / Out of town) | Select, with a price on each option | zone |
| Recipient name, phone, address | Text inputs | recipient_name, recipient_phone, recipient_address |
| Card message | Textarea (limit to about 200 characters so it fits the card) | card_message |
| Your name, email | Text inputs | name, email |
Tip: name your fields before building the email. The email’s Dynamic Data panel reads the form’s field names, so good names now mean readable tags later ({{email.card_message}}, not {{email.textarea_3}}).
Pro: live price. Give each size and zone option a price (e.g. Petite 35 / Classic 55 / Grand 85, plus 0 / 7 / 15 for delivery), add two Linked smart variables (size_price, zone_price) and set the price formula to size_price + zone_price. The customer sees the total update live, and the email gets {{email.price}} (the number, in your number format) and {{email.currency}} (the symbol).
Readable dates: a delivery date reaches the email as 2026-10-14. To print Wednesday, 14 October 2026, add an exposed smart variable delivery_day with the expression is_empty(delivery_date) ? '' : date('l, j F Y', delivery_date.date) and use {{email.delivery_day}} in the email. Leave its submission label empty so it doesn’t appear as an extra row in All Form Data.
Step 2: Design the confirmation email in the block editor
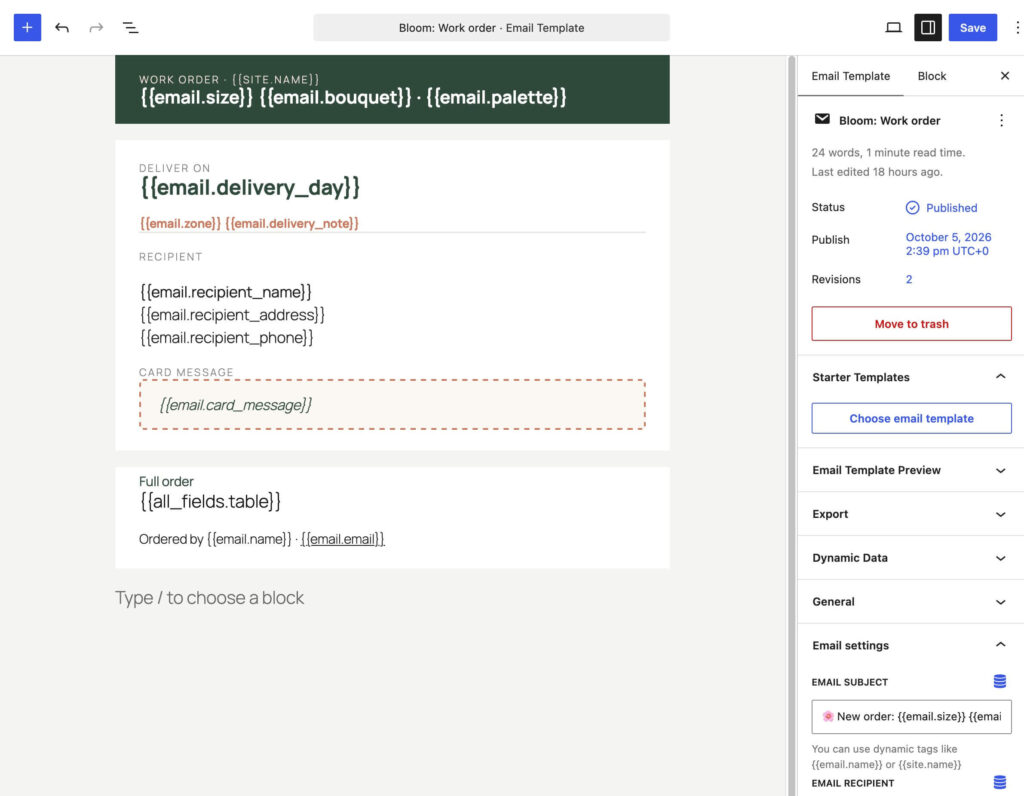
Go to CraftForms → Email Templates → Add New. This is the regular WordPress block editor, limited to blocks that render reliably in email clients: headings, paragraphs, images, buttons, lists, separators, spacers, groups (with Row/Stack layouts for side-by-side content), quotes, and CraftForms’ All Form Data block.
Side-by-side layouts: there’s no Columns block in email templates, but a Group block set to the Row layout puts blocks next to each other (e.g. a bouquet photo left, the order details right), and Stack puts them in a column. Check the result in Email Template Preview. Most modern mail apps show a Row side by side; older desktop Outlook stacks it, which still reads fine.
You have three ways to start:
- Starter Templates panel → Choose email template. Pick Florist Order Confirmation (the design in this guide) or another starter, and change it.
- Design from scratch with blocks.
- Generate a design with AI and paste it in (next section). This is the fastest way to get something that doesn’t look like a template.
A layout that works for flower orders
- Header group: brand colour background, shop name (
{{site.name}}) or a logo image, one line: “Your flowers are booked.” - Hero image: a photo of the bouquet style. Upload one to the Media Library. Email clients need an absolute image URL, and Media Library images already have one.
- The two answers the customer wants, in large type:
Delivering on{{email.delivery_day}}to{{email.recipient_name}} - Their card message, quoted: use a Quote block containing
{{email.card_message}}. Seeing the message in print is what reassures people. - Order details: bouquet, size, palette and zone as a short list, or drop in the All Form Data block to print every answer as a table. It skips empty fields automatically.
- Total (Pro):
{{email.currency}}{{email.price}}.{{email.price}}on its own is only the number. - Button: “Questions? Reply or call us”. Link to
tel:or your contact page. - Footer: address, opening hours, a note about the delivery window.
The email’s background colour is set in the Styles panel. Use Email Template Preview → Open the preview at any point to see the compiled, CSS-inlined version exactly as it will be sent.
Subject and recipient live on the template
Open Email settings in the sidebar:
- Email Subject:
Your {{email.bouquet}} bouquet is booked for {{email.delivery_day}} - Email Recipient:
{{email.email}}(the customer’s email field)
Because subject and recipient are part of the template, the customer email and the shop email are two templates. That’s the next step.
Step 3 (the AI part): generate the design, then edit it visually
The editor stores every template as block markup, the HTML-with-comments format WordPress saves posts in. An AI model can write block markup, and you can paste it into the editor.
- In the email template editor, open the ⋮ menu (top right) → Code editor.
- Paste the AI’s output, then Exit code editor. The design is now normal blocks you can click and edit.
- Save. CraftForms compiles it to email-safe HTML.
A prompt that works (fill in your brand):
You are designing a transactional email for a WordPress block editor (Gutenberg).
Output ONLY WordPress block markup (<!-- wp:... --> comments + HTML), no <html>/<body>, no <style> tags.
Allowed blocks ONLY: core/group, core/heading, core/paragraph, core/image, core/buttons,
core/button, core/list, core/list-item, core/separator, core/spacer, core/quote.
No core/columns. For side-by-side content use core/group with layout {"type":"flex","flexWrap":"nowrap"} (Row).
No CSS grid. All styling via block attributes that WordPress
serializes to inline (colors as hex, font sizes in px, padding in px).
Max content width 600px.

Brand: "Bloom & Co.", a neighbourhood florist. Mood: soft, editorial, romantic.
Palette: blush #F6E3E0, deep green #2F4A3A, cream #FBF7F2, accent terracotta #C9785D.
Headings in a serif (Playfair Display, fallback Georgia), body in a sans (Inter, fallback Arial).

Content (keep these merge tags exactly, including the double braces):
- Header: {{site.name}} and the line "Your flowers are booked."
- Big line: "Delivering on {{email.delivery_day}} to {{email.recipient_name}}"
- Card message in a quote block: {{email.card_message}}
- Order details list: Bouquet {{email.bouquet}}, Size {{email.size}}, Palette {{email.palette}}, Zone {{email.zone}}
- Total: {{email.currency}}{{email.price}}
- Button "Questions? Call us" linking to tel:+10000000000
- Footer with address placeholder and "We deliver between 9:00 and 17:00."
To compare against what your AI produces, the same design ships as the Florist Order Confirmation email starter.
What to check after pasting:
- If a block shows “This block contains unexpected or invalid content”, click Attempt recovery. AI output sometimes gets the comment attributes and the HTML slightly out of sync. Recovery rebuilds the HTML from the attributes.
- Every
{{tag}}is still intact (some models “helpfully” remove the braces). - Images point to your own Media Library URLs, not placeholders.
- Web fonts: many email clients (Outlook desktop, some webmail) ignore custom fonts and use the fallback. Always give a safe fallback (Georgia, Arial) and design so the fallback still looks right.
Step 4: The shop’s work order (second template)
Duplicate the idea with a plainer design aimed at the florist, not the customer. This one should be quick to read at the workbench:
- Email Subject:
🌸 New order: {{email.size}} {{email.bouquet}} for {{email.delivery_day}} ({{email.zone}}) - Email Recipient: your shop inbox
- Body: the All Form Data block (everything, as a table), then the recipient address and phone large, and the card message in a bordered box so it’s easy to copy onto the card.
Next step for the shop: instead of copying the message onto a card by hand, attach a printable card PDF to this email with the action’s Attach PDF(s) setting. It’s a PDF template with a Custom page size of 105 × 148 mm (A6), with the message in a script font, generated for each order. PDF templates are built in the same block editor as email templates.
Step 5: Connect both templates to the form
In the form editor, open the submit actions and add:
- Save Submission, so every order is kept under CraftForms → Submissions.
- Send Email (Template) → Email Template: Bloom: Order confirmation (goes to the customer, because the template’s recipient is
{{email.email}}). - Send Email (Template) → Email Template: Bloom: Work order (goes to the shop).
Optionally tick Use custom SMTP server on each and choose a real sending service. Florists’ confirmations often land in spam when sent from a shared host’s PHP mail, and a proper SMTP server fixes that (see Best free SMTP services for WordPress). While testing, point both at a Mailtrap sandbox so no real customer gets a half-finished email (how).
Place an order. Then check CraftForms → Email Logs. Each send appears with the transport used, success or failure, and the full body.
Limits worth knowing
- No “if empty, hide this” logic inside templates. A tag whose field was left empty simply disappears. Write labels so an empty value still reads fine (the All Form Data block already skips empty fields). If you need text that depends on an answer, create an exposed Conditional smart variable in the form (e.g.
delivery_note: whenzone == 'out-of-town', the value is “Deliveries outside the city arrive after 14:00.”) and put{{email.delivery_note}}in the email. - Send different emails for different answers with “Run only if”. Every submit action has a Run only if rule based on a choice field (dropdown, radio, checkboxes, colour). For example, send an extra “out-of-town delivery” template only when
zoneis Out of town. - No scheduled sends. The confirmation goes out at submission time. A “remind the customer the day before” email isn’t built in yet.
- Templates compile on save. Edit → Update → then test. The preview shows the last saved version.
FAQ
Can I design a WordPress form email without writing HTML? Yes. CraftForms’ email templates are built in the WordPress block editor. You arrange blocks visually, and CraftForms compiles them into email-safe HTML with inline CSS when you save.
Can I use AI to design my WordPress email template?
Yes. Ask an AI model for WordPress block markup using only email-safe blocks, paste it into the template’s Code editor, and switch back to the visual editor to adjust it. Keep the {{merge.tags}} intact.
How do I show the delivery date and card message in the confirmation email?
Use merge tags built from your field names, e.g. {{email.delivery_date}} and {{email.card_message}} (or {{email.delivery_day}} for the readable date, see Step 1). The template’s Dynamic Data panel lists every tag for the form you select.
Can the customer and the shop get different emails? Yes. Create two email templates (each has its own subject and recipient) and add two Send Email (Template) actions to the form.
Do I need a paid plan? The email template builder and both emails are free, and so are most of the form’s fields. The delivery-date picker, the live price and taking payment by card are Pro.
Try it
- CraftForms → Forms → Add New: build the order form with the field names above.
- CraftForms → Email Templates → Add New: paste the AI design (Code editor), adjust, set subject and recipient under Email settings, save.
- Repeat for the shop’s work order.
- On the form: Save Submission → Send Email (Template) ×2.
- Place a test order, then check your inbox and Email Logs.
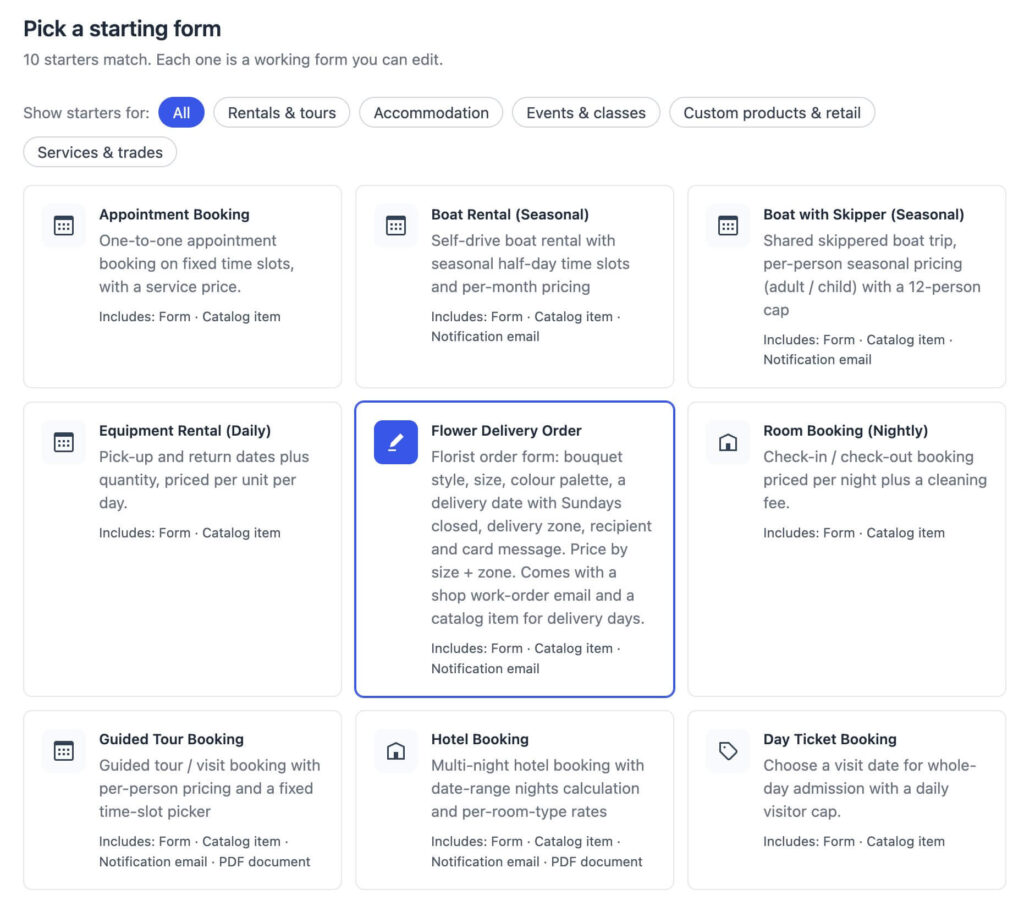
Starter included: in CraftForms → Getting Started, choose Take bookings and pick Flower Delivery Order. It creates the form, the shop’s work-order email and a Flower Delivery Days catalog item (Monday to Saturday from the next day, Sundays closed). The customer confirmation is in the email template starters as Florist Order Confirmation.
Related: Branded email templates + Mailtrap · Online order form for small business