
Build a Picture Frame Configurator for Your Custom Framing Website
- Category
- Tutorial
- Published
- Updated
- Reading time
- 10 min
- Tags
Framing is hard to sell with a flat product photo. A 2 cm black frame looks thin on a 70 cm poster and heavy on an A5 print. A 6 cm white mount can make a small photo look expensive or swamp it. Customers know this from walking into a frame shop, which is why so many of them email to ask “what would it look like with the oak?”
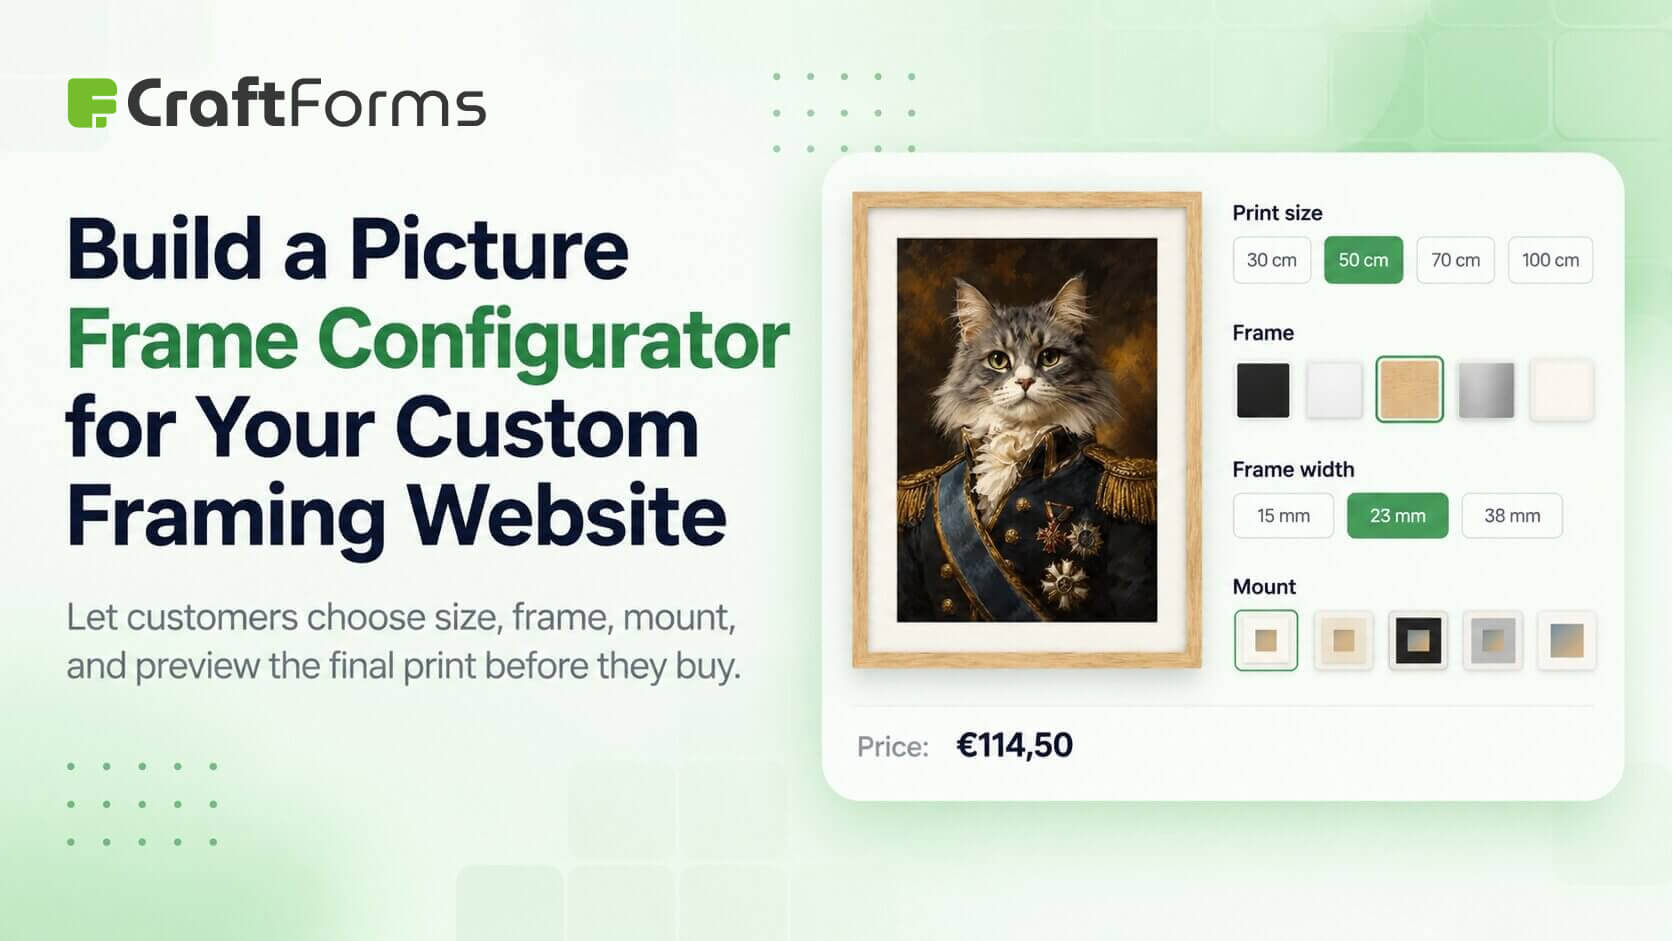
A picture frame configurator answers that question on the product page. This guide shows how to build one for a custom framing website with the Picture Frame element in CraftForms Pro: a live, mitered frame drawn to real centimetres, an optional mount, a “view in a room” preview that keeps the true scale, and a price that follows the size.
TL;DR
- The Picture Frame element draws a mitered frame and an optional mount (mat) around your product image, live, from the customer’s choices.
- Frame width, mount width and print width are all set in real centimetres, so a 3 cm frame really looks like 3 cm on a 50 cm print, and thinner on a 100 cm one.
- Each frame option can have its own texture (a wood or metal photo) and base colour. Any option can be marked No frame for this option for unframed prints.
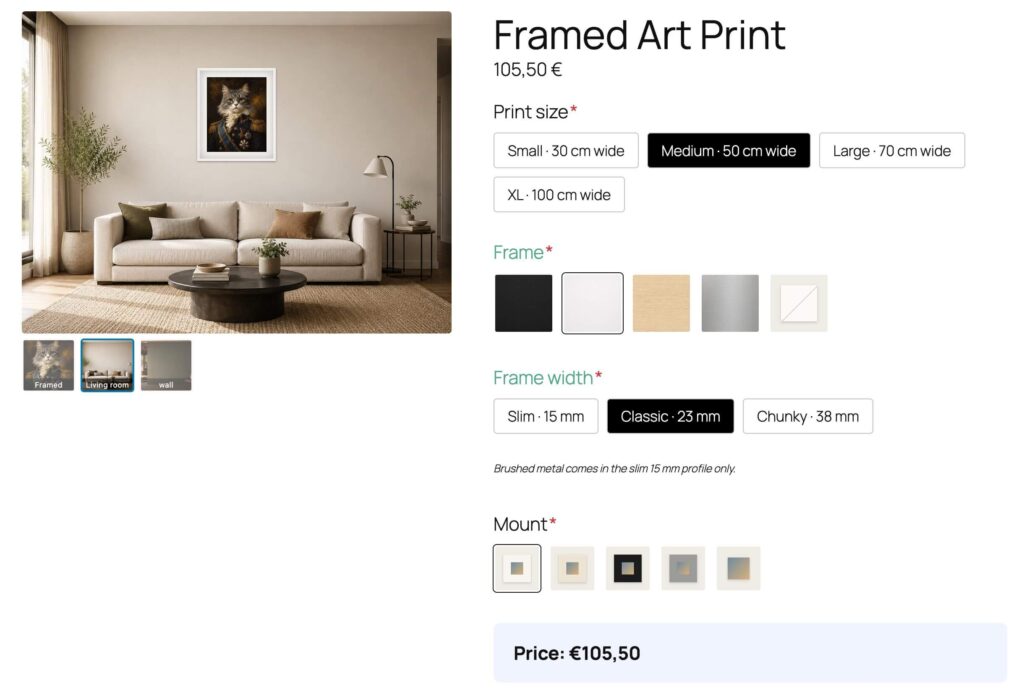
- Room scenes show the framed piece on a wall. Calibrate a scene once with the real size of the wall area and bigger prints genuinely look bigger.
- The framed composite is saved to the cart and order, so your workshop sees exactly what was chosen.
- Picture Frame is part of CraftForms Pro, and there’s a Photo Frame Configurator starter to begin from.
What customers expect from a custom framing website
Most people shopping for framing online are comparing it with a frame shop counter. At the counter they hold corner samples against the art and the framer quotes a price based on size. Online, the usual substitutes fall short:
- One photo per variation. Photograph every frame × mount × size combination. With 6 mouldings, 3 widths, 4 mount colours and 5 sizes, that’s 360 images to shoot and keep up to date.
- Image swap per swatch. Pick “oak” and the main image switches to an oak mock-up. Better, but the mock-up is one size, so the proportions are wrong for every other size.
- Layered PNG configurators. You prepare a transparent PNG of each frame part per choice. Flexible, but frame thickness is baked into the artwork, so it can’t scale with the print.
What the customer needs is closer to the counter: the frame drawn around this print, at this size, in proportion.
How the CraftForms Picture Frame element works
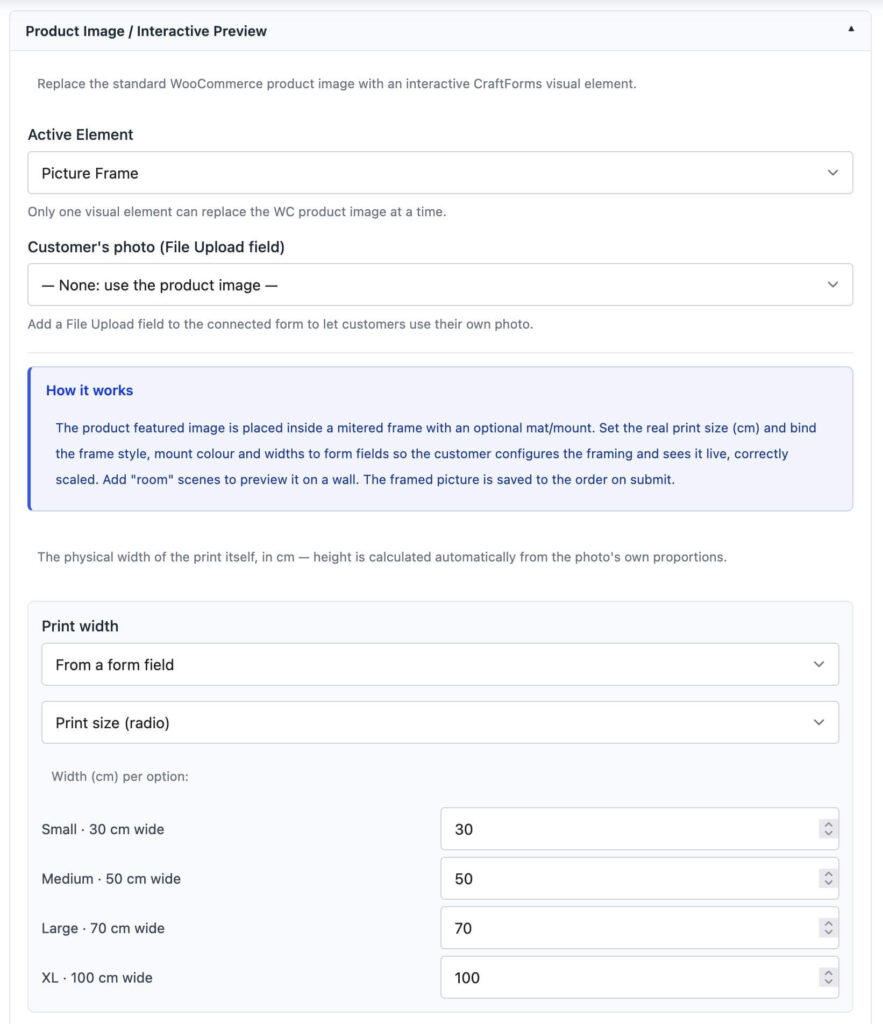
Picture Frame replaces the WooCommerce product image with a live preview. It uses the product’s featured image as the artwork and builds the frame around it with four mitered strips, like real moulding, plus an optional mount between the frame and the art.
Everything is measured in centimetres:
- Print width: the physical width of the artwork. You don’t set the height; it’s calculated from the image’s own proportions, so the art is never cropped.
- Frame width: the moulding face width.
- Mount width: the border of the mat board.
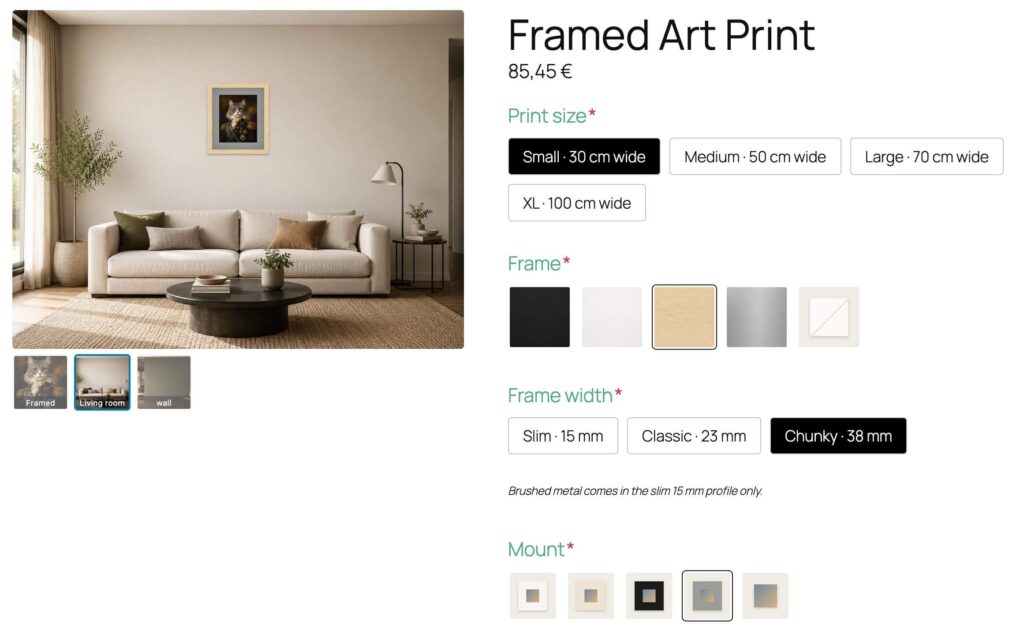
The preview adds print + 2 × mount + 2 × frame to get the outer size and scales that to the space available on the page. Pick a larger print size and the frame gets proportionally thinner, just as it would on your wall.
Each of these can be a Fixed value or From a form field. With a field that has options, you get Width (cm) per option, e.g. Slim → 1.5, Classic → 3, Chunky → 5. With a plain number field, the value is used directly as centimetres.
Frame styles with real textures
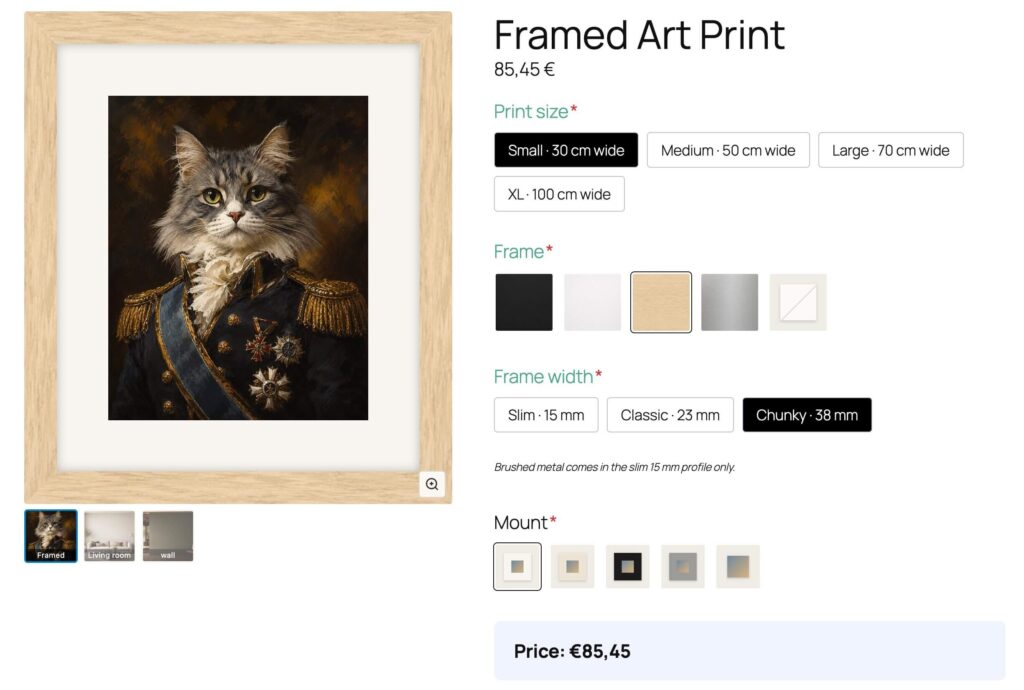
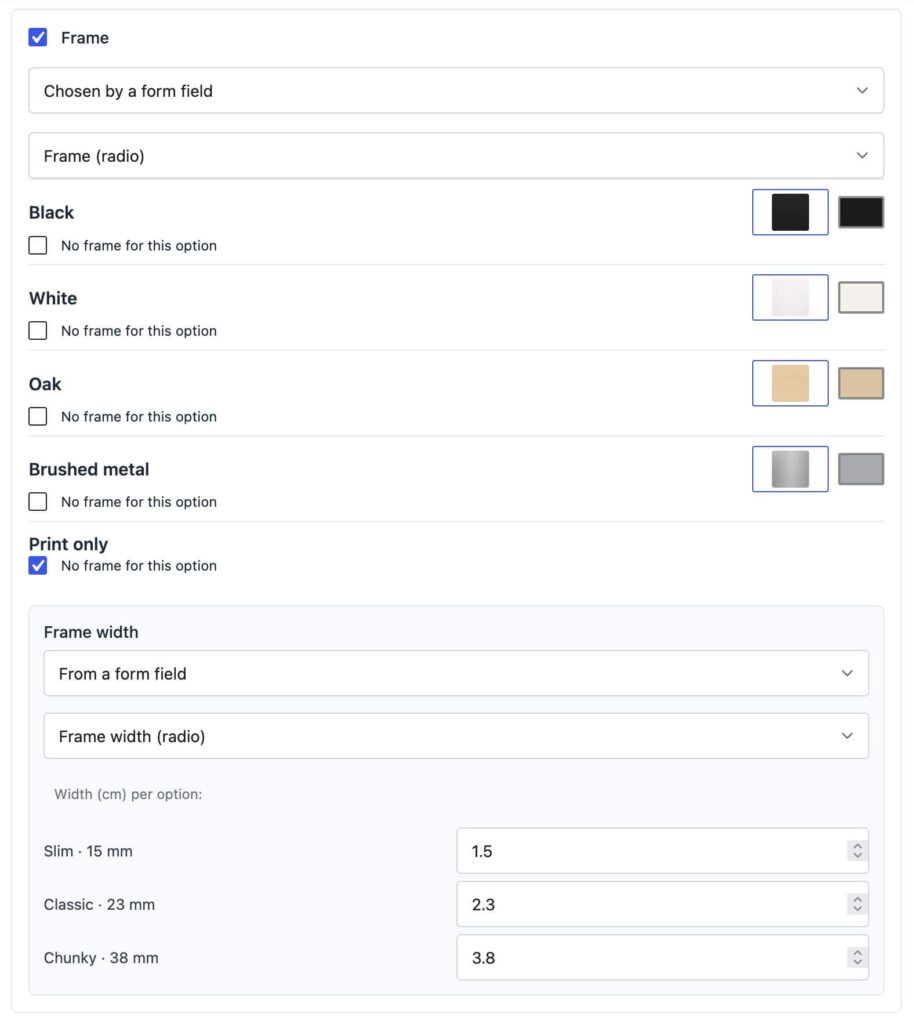
Under Frame, choose Chosen by a form field and pick the field that lists your mouldings. Each option then gets:
- Set texture: an image of the moulding surface (a tileable wood grain, brushed aluminium, gold leaf).
- Base colour: shows through any gaps in the texture and stands in for it when there’s no texture.
- No frame for this option: for “Print only” or “Canvas, unframed”.
If your frame field uses Image Swatches or Color Swatches, the options come pre-filled from those swatch images and colours, so you don’t upload them twice.
Mounts
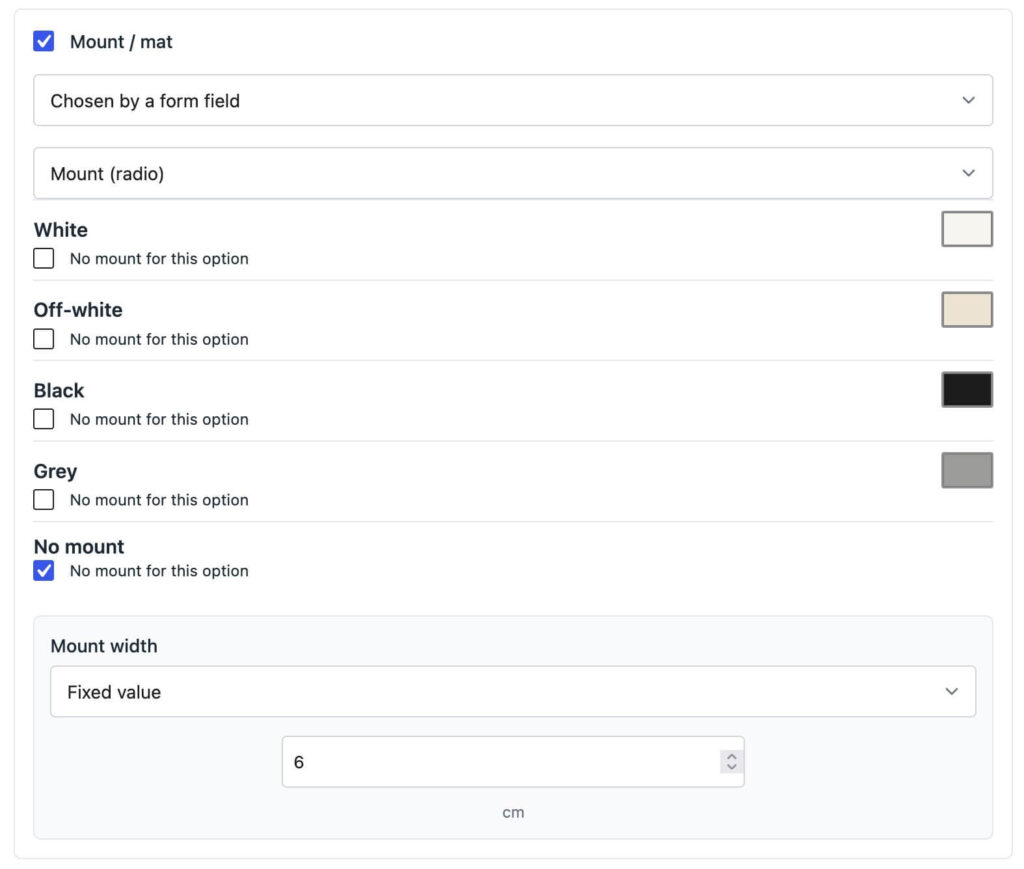
Mount / mat works the same way with a colour per option (white, off-white, black, grey) and its own No mount for this option. Mount width can be fixed or come from a field, so a customer can choose a 5 cm or a 10 cm border.
“View in a room” at real scale
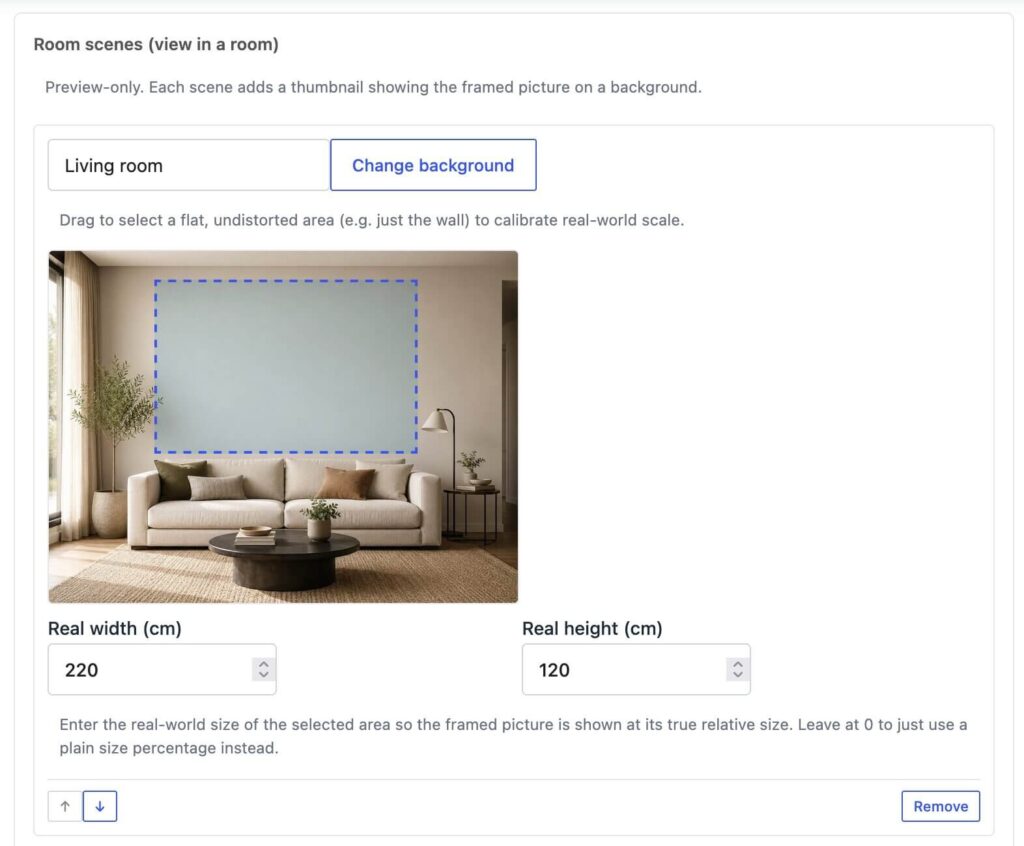
Under Room scenes (view in a room), + Add scene and Set background image with a photo of a wall, a sofa or a hallway. Each scene becomes an extra thumbnail below the main preview.
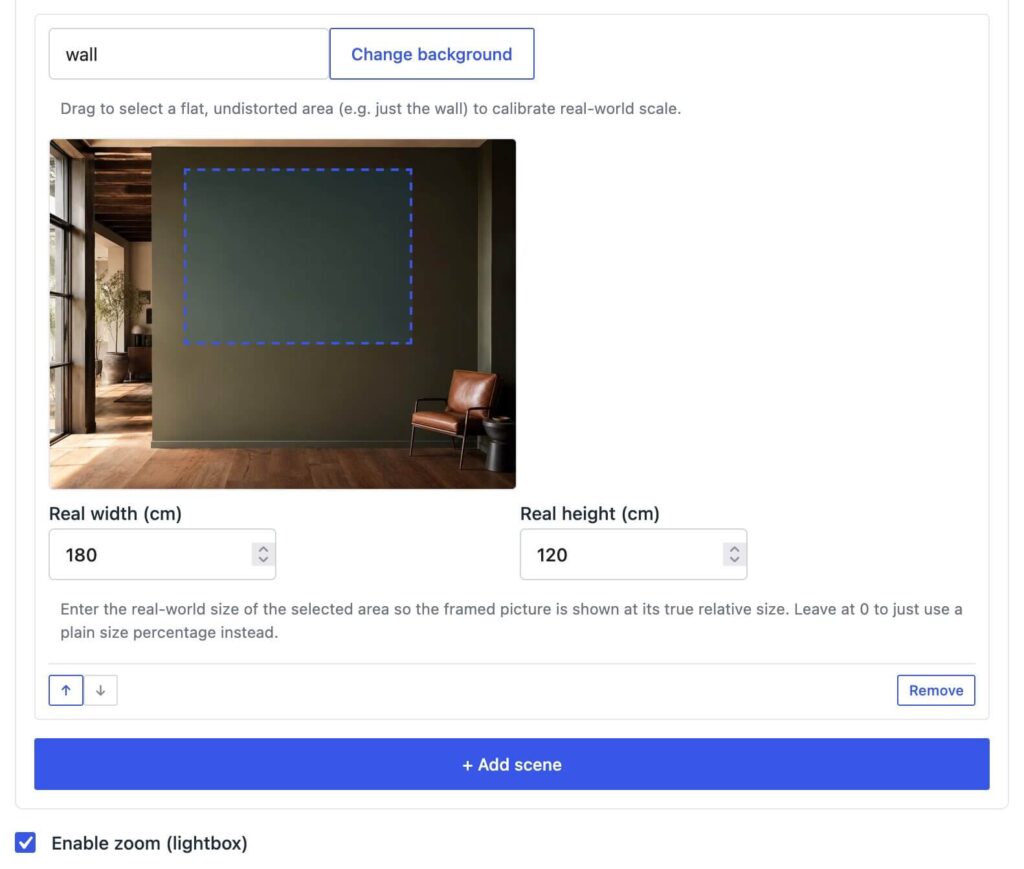
The key step is calibration. Drag a rectangle over a flat, undistorted part of the photo (just the wall) and enter its Real width (cm) and Real height (cm). For example, if the wall section above the sofa is 200 × 120 cm, the framed picture is then placed at its true size relative to that wall. A 40 cm print looks small above a 200 cm sofa. A 100 cm print fills the space. That’s the question customers are really asking.
Room scenes are preview-only. The image saved to the order is the framed picture itself, not the room.
Industry examples
1. Independent frame shop going online. A framer with 12 mouldings lists “Custom framing: send us your art.” The frame field has 12 Image Swatches with moulding textures. A Select Field has standard sizes plus a width/height pair for custom sizes. The price covers moulding by the metre, glass by area and the mount. Customers post or drop off the artwork, and the order already records frame, width and mount.
2. Photographer or artist selling framed prints. Each artwork is a WooCommerce product whose featured image is the print. One shared form offers 3 sizes, 4 frames (including No frame for this option for print-only) and 2 mount colours. Because the frame is drawn around whichever featured image the product has, the same form works for all 80 artworks. Our post on reusing one form across many products shows that pattern.
3. Gallery or museum shop. A gallery sells framed reproductions of its collection with limited moulding options that match its house style. Frame style is fixed (a single Fixed style with one texture), mount colour is a choice, and two room scenes (a living room and an office) help remote buyers judge scale.
4. Interior designer’s print collection. A designer sells curated sets for clients’ homes. Room scenes use photos of real client projects, calibrated to the real wall sizes, so a client sees the piece above their own style of sideboard.
Pricing framing by size
Frame shops price from measurements, not from a fixed list. A common structure:
- Moulding: outer perimeter × price per metre for that moulding
- Glazing: area × price per m²
- Mount: flat fee per size, or area-based
- Fitting: a fixed labour charge
In CraftForms that’s one formula over your fields and smart variables. With w and h in cm, and moulding_price looked up from the chosen frame:
2 * (w + h) / 100 * moulding_price + w * h / 10000 * 40 + mount_price + 12
A 50 × 70 cm print in a €18/m moulding comes to €43.20 moulding + €14 glass + mount + €12 fitting. If you’d otherwise need a variation for every size and frame combination, see complex WooCommerce pricing without hundreds of variations. To stop customers choosing a moulding that doesn’t come in a certain width (e.g. metal only in slim), use field conditional logic. The Photo Frame Configurator starter hides the 23 mm and 38 mm widths when “metal” is selected.
How to set up the picture frame configurator in CraftForms
You need CraftForms Pro and WooCommerce.
Step 1: Start from the starter (or build the form)
The quickest route is the Picture Frame Configurator starter: print size, frame colour, frame width (with the metal rule) and mount colour, with a price formula already wired. To build it yourself, create a form with:
- A Select Field or Radio Field
print_size(e.g. 30, 50, 70, 100 cm wide). - A Radio Field
frame_colorshown as Image Swatches, one option per moulding. - A Radio Field
frame_width(e.g. 15, 23, 38 mm). - A Radio Field
mount_colorshown as Color Swatches, including a “No mount” option.
Step 2: Connect the form to the product
Open the WooCommerce product, go to the CraftForms tab, turn on Connect a CraftForms form to this product and choose it under CraftForms Form. Set the Product image to your artwork. That image is what gets framed.
Step 3: Choose Picture Frame as the product image
In Product Image / Interactive Preview, set Active Element to Picture Frame. Then:
- Print width → From a form field →
print_size, and enter the width in cm for each option. - Frame (ticked) → Chosen by a form field →
frame_color. Check each option’s texture and base colour. Mark “Print only” as No frame for this option. - Frame width → From a form field →
frame_width, with Width (cm) per option (1.5 / 2.3 / 3.8). - Mount / mat (ticked) → Chosen by a form field →
mount_color, colour per option, “No mount” as No mount for this option. Set Mount width, e.g. a Fixed value of 6. - Keep Enable zoom (lightbox) on for close-ups of the corners.
Step 4: Add a room scene
Under Room scenes (view in a room), click + Add scene, Set background image, give it a label (“Living room”), drag a rectangle over the plain wall, and enter its Real width (cm) and Real height (cm). Use a straight-on photo. Angled walls throw off the scale.
Step 5: Price and test
Enter your formula in Item Pricing, then order a few combinations yourself. In the cart and in the WooCommerce order, the line-item image is the framed composite rather than the plain artwork, so there’s no guesswork in the workshop.
Before you go live, check the notes on request size in our 1.6 release post and the knowledge base: a very large featured image can make the saved composite heavy, and hosts with an 8 MB post_max_size may drop it without warning.
If you want the full build narrative with a real storefront as reference, our framed picture configurator inspired by Minted walks through it end to end.
One limitation to know
Picture Frame frames the product’s image, the one you uploaded. It doesn’t currently frame a photo the customer uploads on the product page. For “frame your own photo” products, add a File Upload Field so the customer’s file travels with the order, and show a representative image in the frame preview. If the product is really a custom-size photo print, the Image Cropper suits it better. See our guide to WooCommerce photo upload and crop.
FAQ
How do I show a frame preview on a WooCommerce product?
Connect a CraftForms form to the product, then set Active Element to Picture Frame in the product’s CraftForms tab. Bind frame style, frame width and mount to your form fields, and the preview updates as customers choose.
Can the frame preview stay in proportion to the print size?
Yes. Print width, frame width and mount width are all real centimetres. The preview calculates the total outer size and scales it, so the same frame looks thinner on a larger print.
Can customers see the framed picture on a wall?
Yes, with Room scenes (view in a room). Add a wall photo, drag over a flat area and enter its real width and height in cm. The framed print is then shown at true relative size.
Can I offer unframed prints and mat-less options?
Yes. Any frame option can be marked No frame for this option and any mount option No mount for this option. The preview and saved image follow that.
How do I price custom framing by size?
Use a formula in Item Pricing that combines the perimeter (moulding), the area (glass, backing) and fixed fees, reading the size and frame choice from your form.
Is the Picture Frame element free?
No, it’s part of CraftForms Pro. The free plugin shows an upgrade placeholder in the editor.
Put your mouldings online
Start with your five best-selling mouldings and three sizes, then add the rest once the flow feels right. Get CraftForms Pro, load the Photo Frame Configurator starter, and swap in your own textures.