
WordPress Event Calendar With Registration and Payments (Pie Calendar + CraftForms)
- Category
- Tutorial
- Published
- Updated
- Reading time
- 9 min
- Tags
Most event plugins make you choose. A calendar plugin shows what’s on but can’t take a booking. A full events suite takes bookings but brings venues, organisers, ticket tiers and a yearly bill you don’t need for six workshops a month. To get a WordPress event calendar with registration, you can pair two small tools instead: Pie Calendar puts your events on a calendar, and CraftForms handles the sign-up form, the seat limit, the payment and the ticket. This guide sets that up for a bakery workshop with 20 seats. We built and paid for it end to end on a test site while writing this.
TL;DR
- Pie Calendar (free) turns any post into an event and shows it on a month, week or list calendar. It has no registration form, no seat limit and no payments.
- CraftForms adds the registration form to each event post. A Catalog item with booking type Single Date (Events / Drop-ins) caps the seats and refuses the 21st sign-up on the server.
- Payment goes through your own Stripe, PayPal or Square account, right in the form. CraftForms takes no commission.
- Each attendee gets a confirmation email with a PDF ticket and a QR code.
- Pie Calendar’s core and CraftForms’ form, email and PDF features are free. Seat limits (Catalog) and online payments need CraftForms Pro. Recurring events and visitor time zones need Pie Calendar Pro.
What each plugin does here
| Job | Plugin |
|---|---|
| Show upcoming events on a calendar (month, week, day, list) | Pie Calendar |
| Mark a post as an event, with start and end date | Pie Calendar |
| Registration form (names, choices, questions) | CraftForms |
| Limit seats per event and show what’s left | CraftForms (Catalog, Pro) |
| Take payment | CraftForms (Pro) |
| Confirmation email + PDF ticket with QR code | CraftForms (free) |
They don’t overlap, so there’s nothing to switch off in either. For the full feature list side by side, see CraftForms vs Pie Calendar.
Step 1: Make the event post with Pie Calendar
Install Pie Calendar from Plugins → Add New and activate it. Then create a post for the event, say “Sourdough Workshop”.
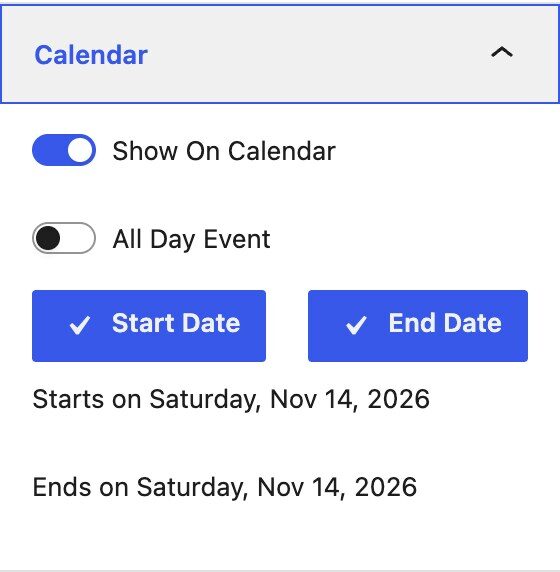
- In the editor sidebar, on the Post tab, open the Calendar panel and turn on Show On Calendar.
- Set Start Date and End Date (14 November, 10:00 to 14:00). Leave All Day Event off for a timed class.
- Write the description as usual: what to bring, where it is, who runs it.
- Optional: add the Pie Calendar Event Info block at the top. It prints “Starts on… Ends on…” from the dates you set.
Pie Calendar works with posts, pages and any custom post type that supports the editor and custom fields, so you can keep events as normal posts in a “Workshops” category.
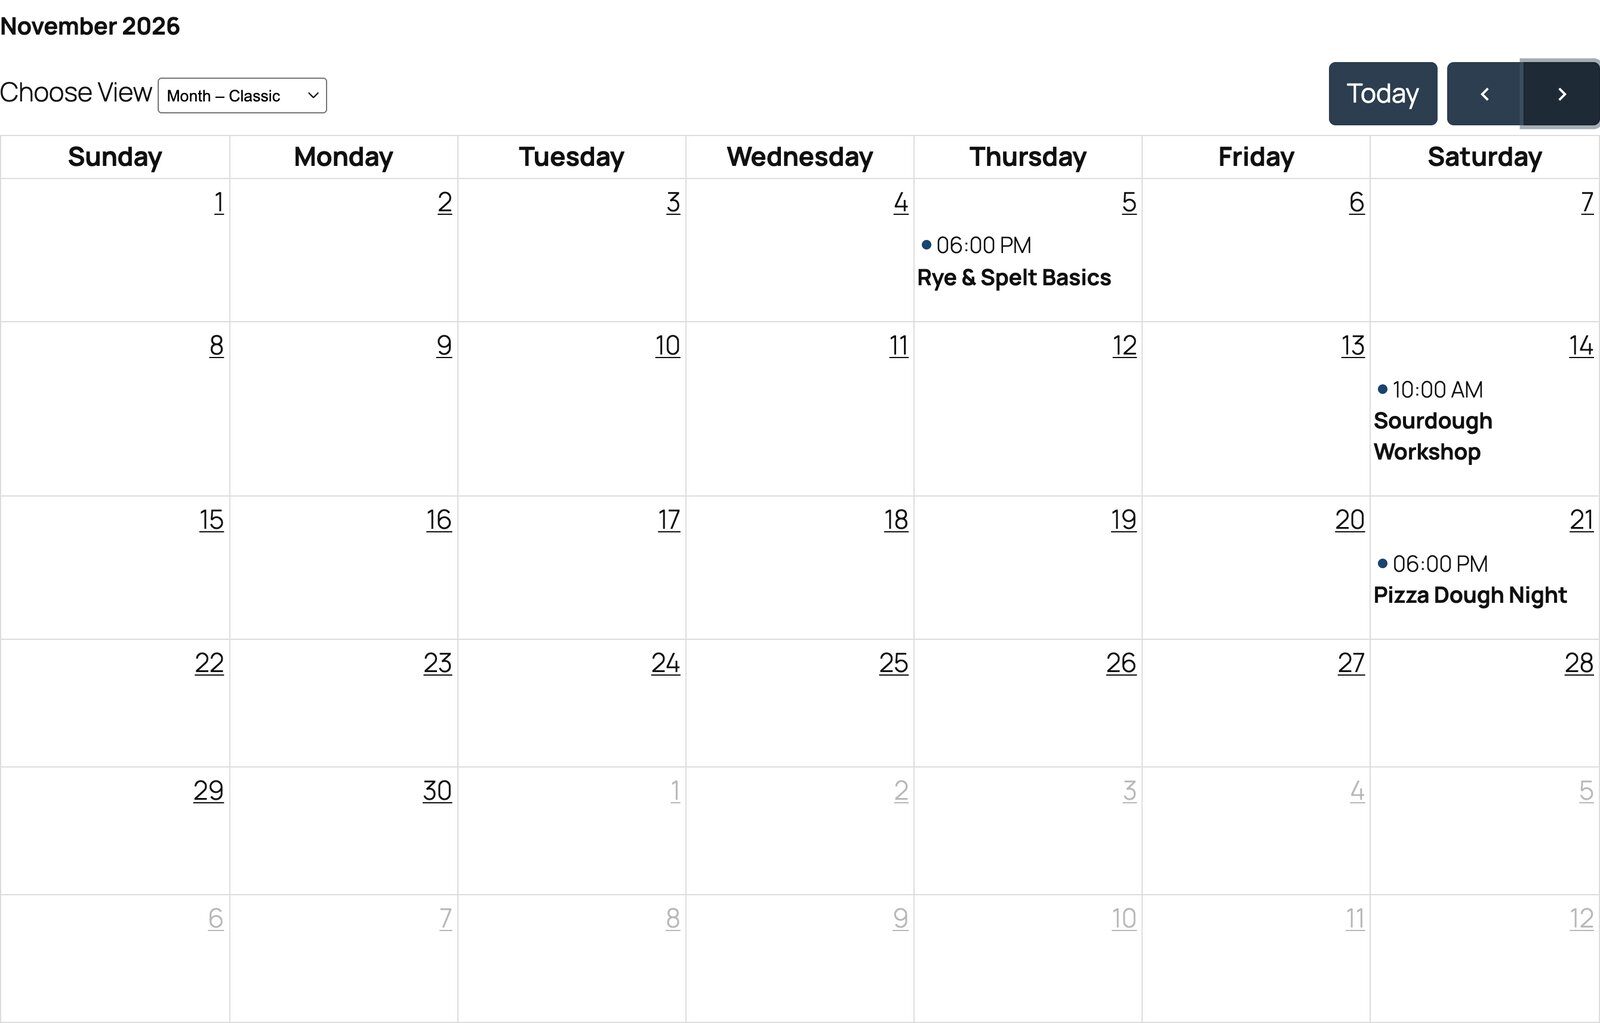
Then make the calendar page: create a page called “Events” and add the Pie Calendar block (or the [piecal] shortcode). Set the block to Wide width so the month view has room, and turn on Wrap Titles so long event names don’t get cut off.
Step 2: Build the registration form
In CraftForms → Forms, create a form. A workshop form usually needs:
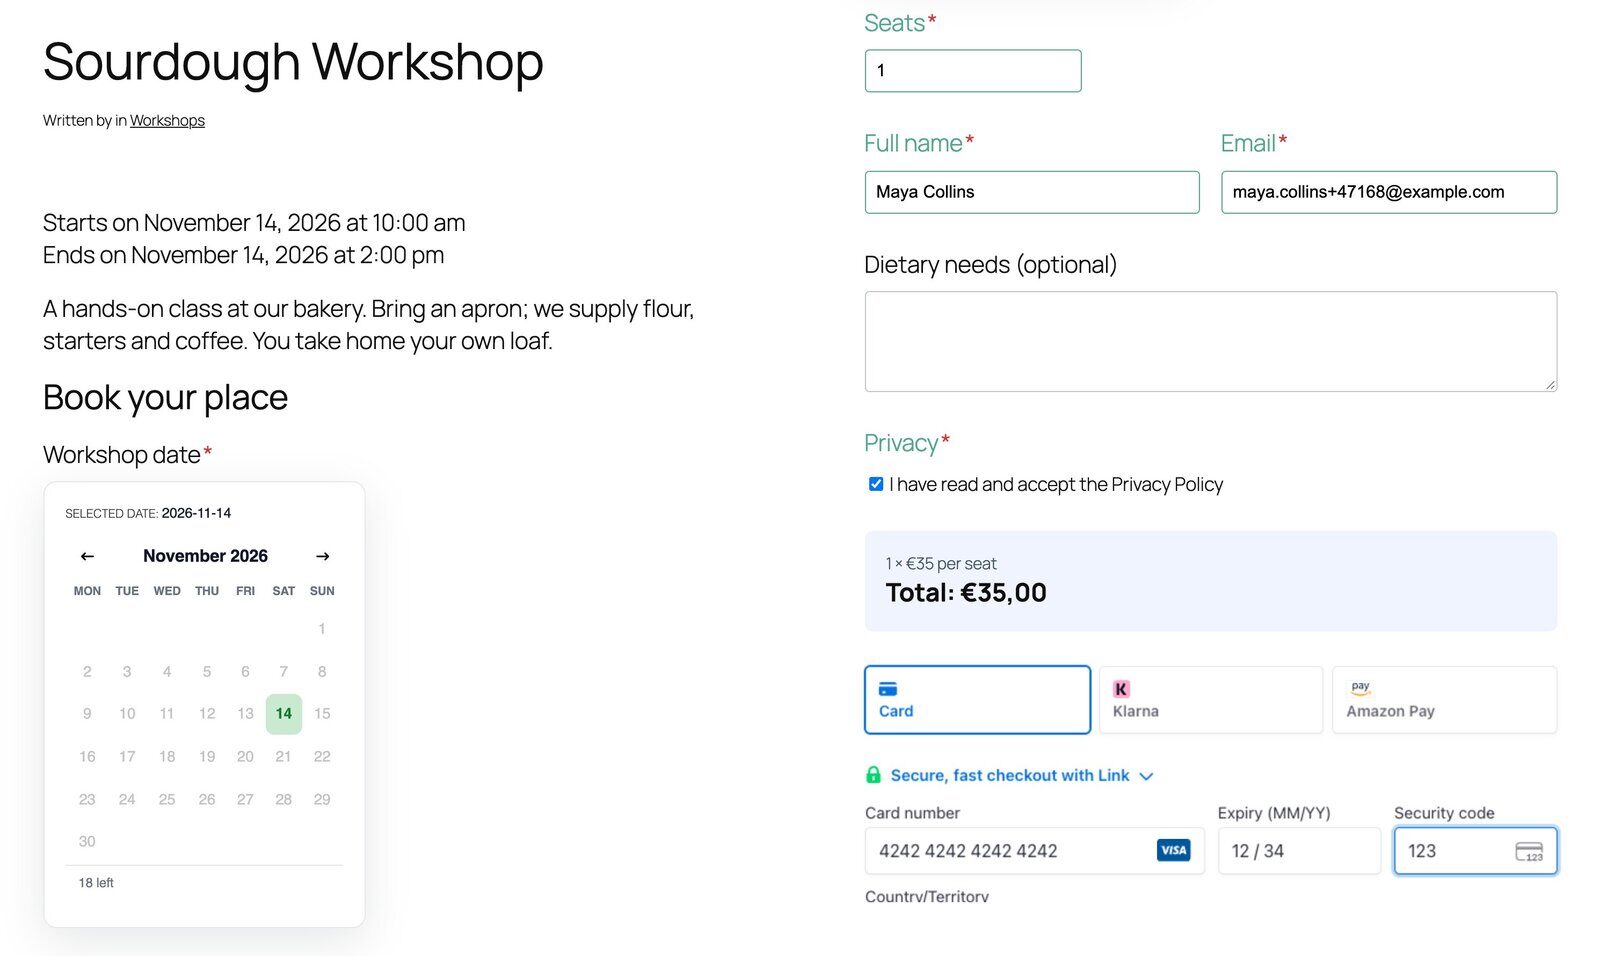
- Workshop date: a Booking Datepicker field named
event_date. In its settings, turn on Inline (always visible) and set Show remaining places to Always so visitors see how many places are left. - Seats: a number field named
seats, minimum 1, maximum 4. - Full name and Email.
- Optional: dietary needs, a privacy checkbox, questions.
- Payment block (Pro), with Mode set to Embedded Payment (inline on the form). The card fields appear in the form once the required fields are filled, and the booking is only made after the card is accepted.
Set the price as a formula on the form, for example a smart variable seat_price = 35 and the formula seats * seat_price. An info block with {{field.seats}} × €{{field.seat_price}} and {{form.price}} shows the running total.
💡 You build this form once. Every event post reuses it, and the Catalog item decides the date and the seats per event. That’s the one form, many items pattern.
Step 3: Create a Catalog item for the event (seat limit)
This is the part a calendar plugin can’t do. In CraftForms → Catalog, click Add New:
- Title: “Sourdough Workshop, 14 November”. Type: Booking. Connected form: your registration form.
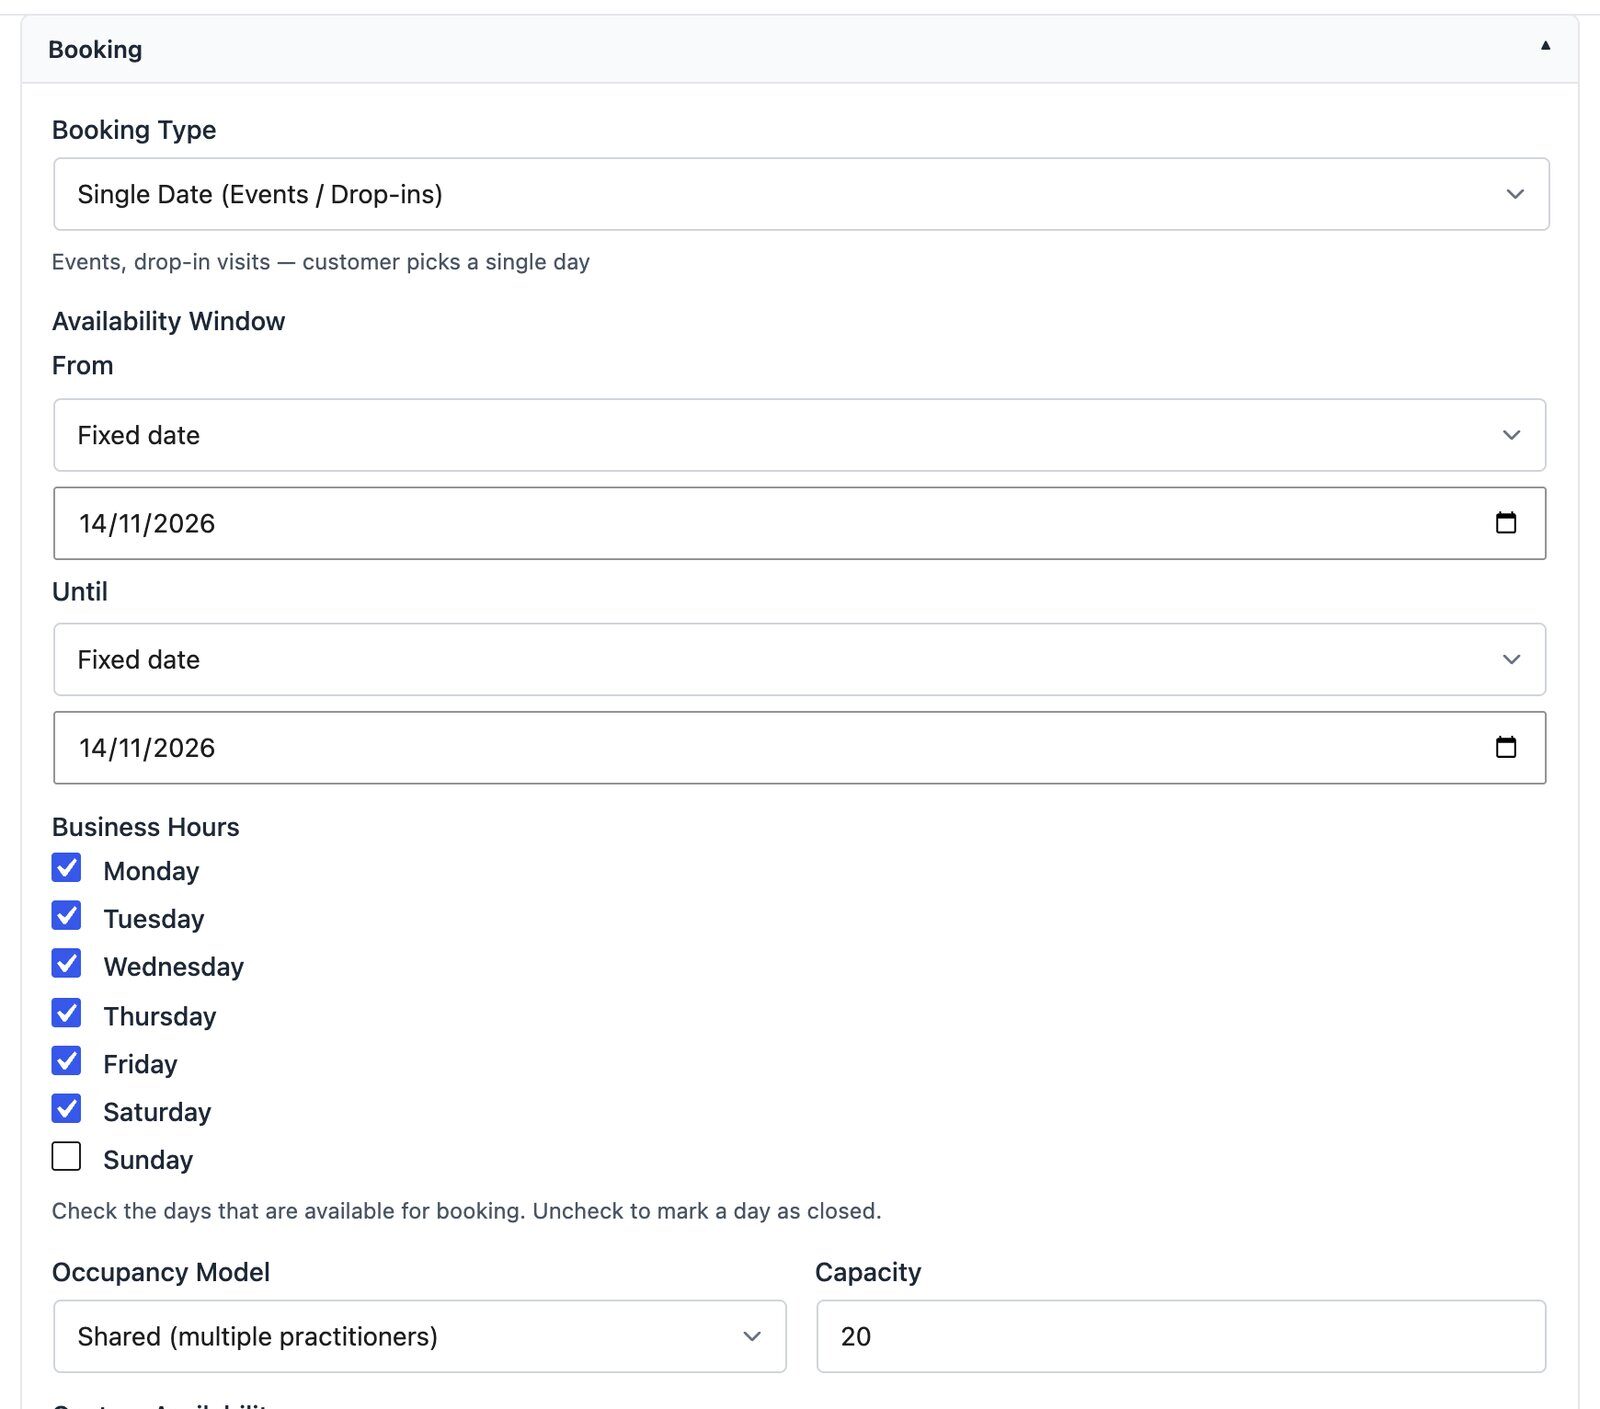
- Booking Type: Single Date (Events / Drop-ins).
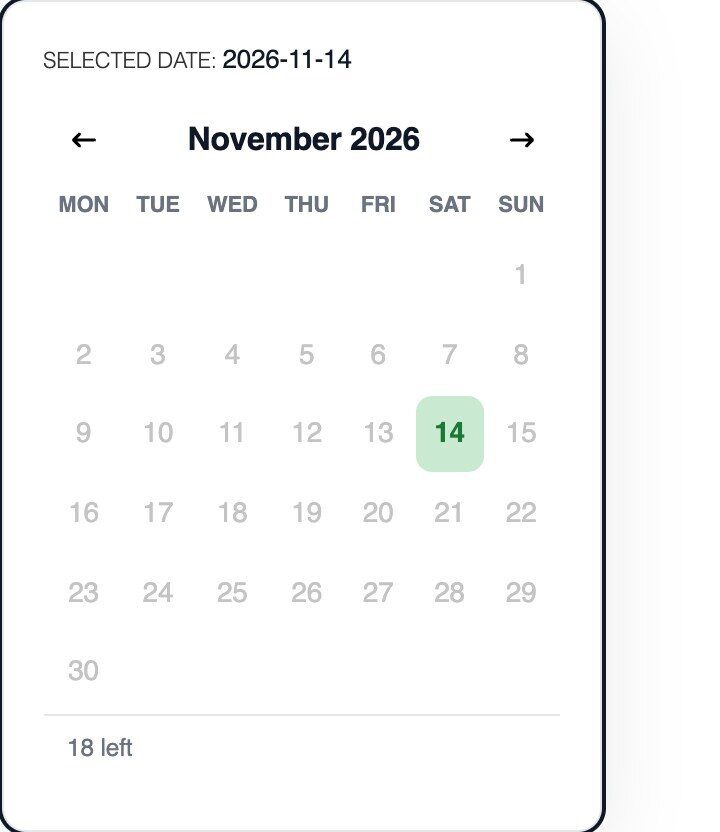
- Availability Window: set both From and Until to Fixed date and pick 14 November. Visitors can only book that one day.
- Business Hours: make sure the event’s weekday is ticked. A Saturday workshop needs Saturday ticked, or the date stays closed. (From CraftForms 2.0.3, Single Date items start with every day open and warn you when the window has no open day; earlier versions start on Monday to Friday.)
- Occupancy Model: Shared. Capacity: 20.
- Date Field Variable:
event_date, the datepicker this item controls. - Capacity Measure Variable:
seats, so a booking for 3 people takes 3 places, not 1. - Optional, under Item Pricing: a different price for this event only. Leave it empty to use the form’s formula.
Save. CraftForms now checks the seat count on the server when someone books. When the seats run out, the date shows as full and no more bookings go through.
A weekly class instead of a one-off? Leave the window dynamic and tick only the class day under Business Hours (say, Thursday). Each date gets its own 20 places. On the Pie Calendar side, a recurring event (Pro) shows the series.
Step 4: Put the form on the event post and link the item
Open the event post again:
- Insert your registration form below the description (it’s in the inserter as a CraftForms pattern).
- With the form selected, open the Post tab of the sidebar. In the CraftForms Catalog panel, choose your item under Linked Catalog Item.
- Save the post.
The block toolbar then shows the linked item’s name next to Edit original, so you can see at a glance which event a form books.
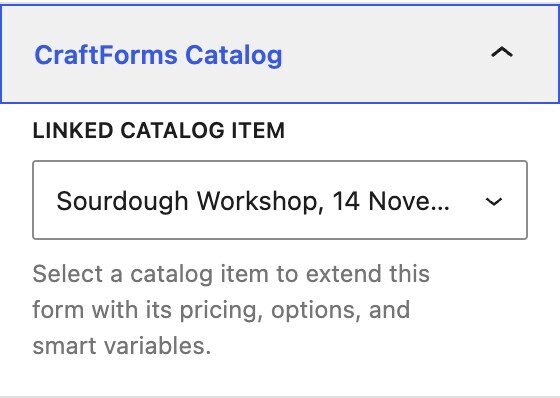

The link belongs to this placement of the form, so the next event post uses the same form with its own item. Duplicate the post for the next workshop, change the dates in the Calendar panel, and pick that workshop’s Catalog item.
Step 5: Take payment
Connect Stripe, PayPal or Square under CraftForms → Settings → Payments. You use your own account and CraftForms adds no fee on top. The amount is worked out again on the server from the formula, so nobody can edit the price in their browser and pay €1.
With Embedded Payment, the visitor pays without leaving the page, and the order and the seat reservation are created only once the payment is accepted.
Pricing patterns that work well for events:
- Per person:
seats * seat_price - Deposit now, rest on the day:
seats * seat_price * 0.3 - Add-ons: a second number field for lunches, then
seats * seat_price + lunches * 12
Step 6: Send the ticket
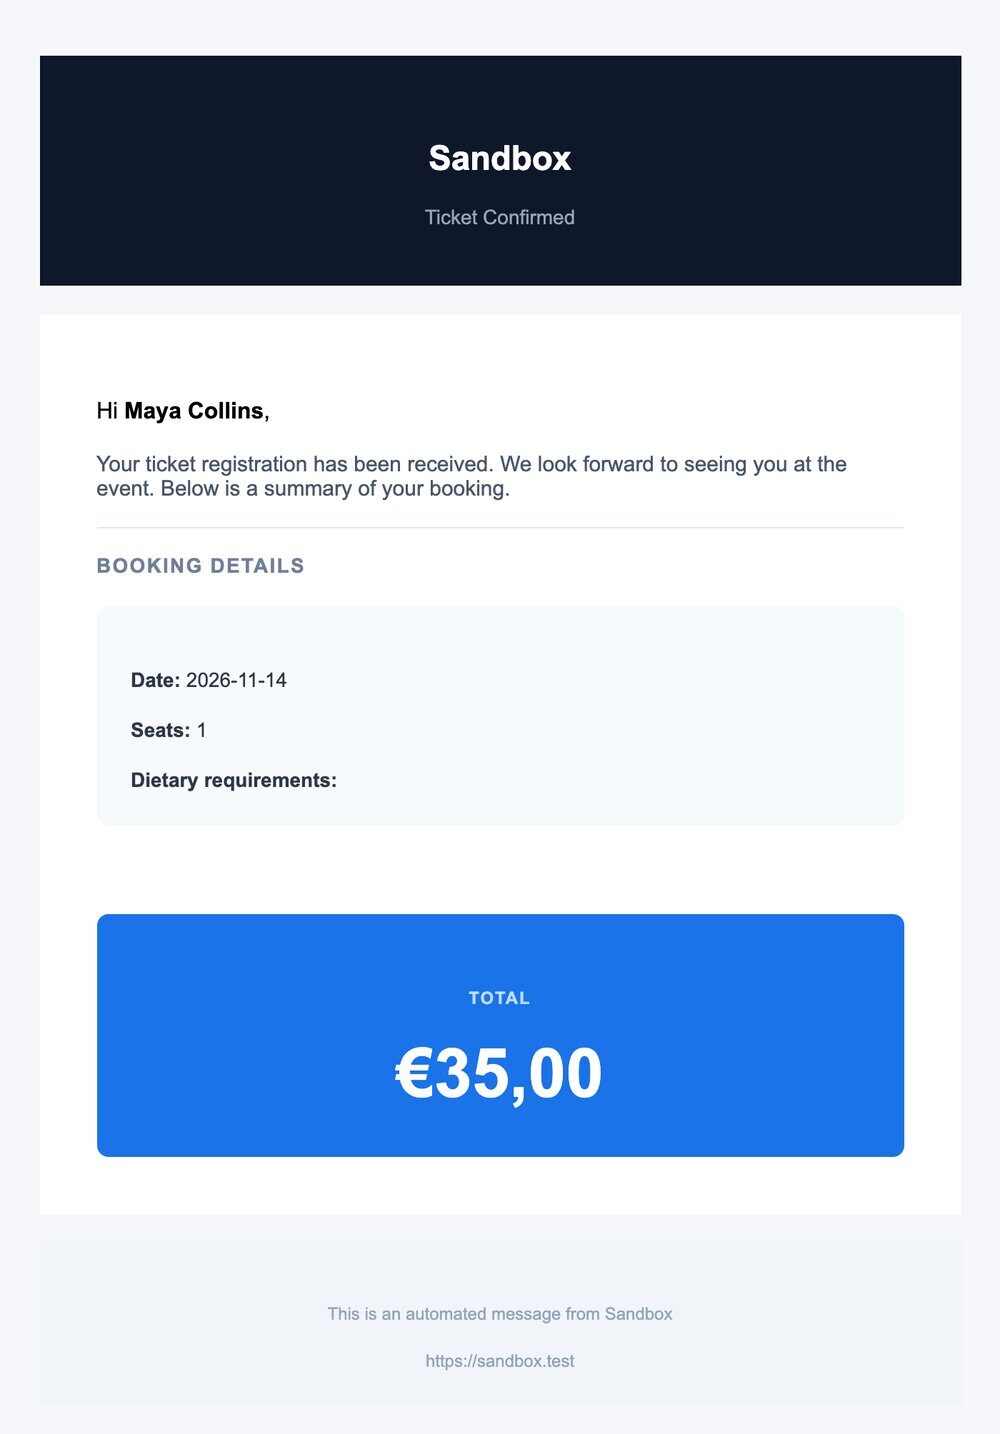
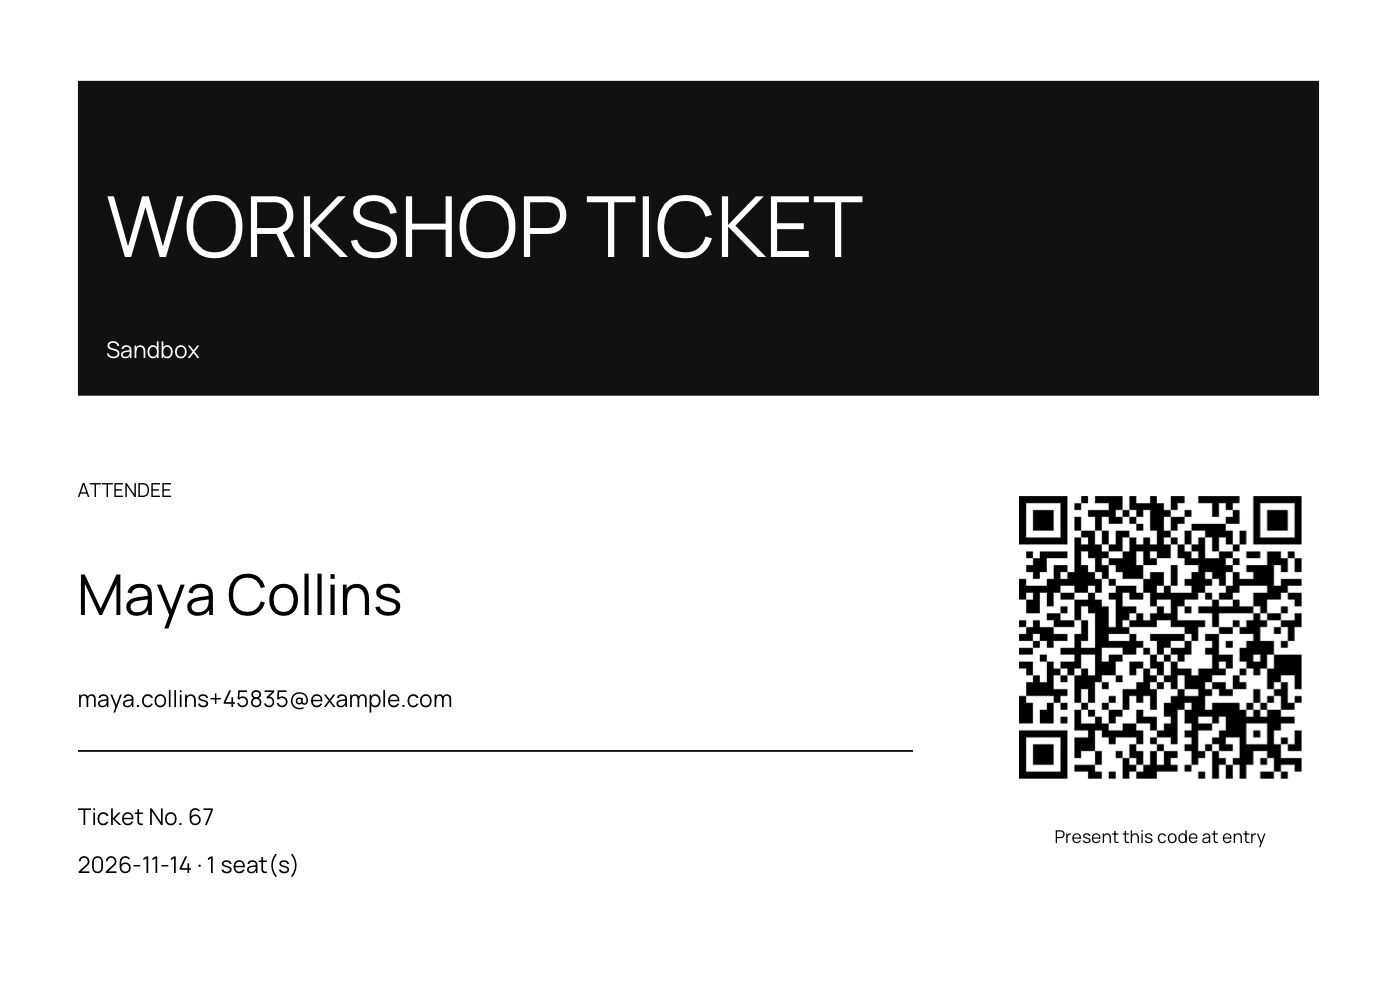
In the form’s submit actions, add Send email template. Point the template’s recipient at the attendee ({{email.email}}) and use merge tags for the details, for example Date {{email.event_date}} and Seats {{email.seats}}. Under Attach PDF(s), pick a ticket built in the PDF designer: the attendee’s name, the ticket number, the date and seats, and a QR code. Door check-in is then a phone scan. Both the email designer and the PDF designer are free. The full setup is in PDF invoices, tickets and confirmations from a WordPress form.
If you want the bookings in your own calendar too, the Catalog item has an iCal export feed you can subscribe to from Google Calendar. See sync your bookings to Google Calendar.
What visitors see
- They open Events and see the month view.
- They click “Sourdough Workshop” and land on the event post.
- They pick 14 November and see how many places are left, choose the number of seats, and see the total.
- They pay by card in the form and get the email with the ticket.
- When the 20th place is taken, the date shows as full and no more bookings go through.
Pie Calendar + CraftForms or one events suite?
| Pie Calendar + CraftForms | The Events Calendar + Event Tickets | |
|---|---|---|
| Calendar views | Month, week, day, list | Month, day, list, photo (more on paid plans) |
| Registration form | Full form builder, any field, conditional logic | Basic attendee fields; more on paid plans |
| Seat limit | Per date, checked on the server | Per ticket type |
| Payment fees | None from the plugins | 2% on Stripe/Square sales on the free tier |
| PDF ticket with QR | Free | Paid plan |
| Venues, organisers, seating charts | No | Yes (seating on the top plan) |
| Price | Free core; Pie Calendar Pro from $99/yr; CraftForms from €50.99/yr | Paid plans from $259/yr |
For a café, a studio, a school or a coach running a handful of events, the pair is lighter and cheaper. For a venue with seat maps and many organisers, a full suite earns its weight. Our CraftForms vs The Events Calendar page has the long version.
FAQ
Does Pie Calendar have registration or ticket sales? Not on its own. Pie Calendar shows events. Its Pro version can turn WooCommerce, EDD or SureCart products into events, and its Connector add-on syncs Eventbrite events, but it has no registration form or seat limit of its own. You add those with a form plugin.
How do I limit the number of registrations for an event in WordPress? Give the event a capacity that’s checked on the server. In CraftForms, create a Catalog item with booking type Single Date (Events / Drop-ins), set Capacity, and link it to the form on the event post. Bookings stop when the places run out.
Can people book several seats in one registration? Yes. Set the Catalog item’s Capacity Measure Variable to the seats field, so one booking for 3 people uses 3 places.
Can I charge a deposit instead of the full price?
Yes. The payment amount is a formula, so seats * seat_price * 0.3 charges 30% now.
Does this work for recurring classes? Yes. Use one Catalog item with the class day ticked under Business Hours; each date gets its own capacity. Show the series on the calendar with Pie Calendar Pro’s recurring events.
Do I need WooCommerce? No. CraftForms takes payments and keeps its own orders without WooCommerce.
Try it with one event
Take your next workshop, make it a Pie Calendar event, and put a CraftForms form on the post with a 20-place Catalog item. Run one test booking with Stripe in test mode. If the places left drop by the number you booked and the ticket lands in your inbox, duplicate the post for the rest of the season.