Tag: ai

  • How to Build a WordPress Form with AI — Locally, Then Ship It to Production

    How to Build a WordPress Form with AI — Locally, Then Ship It to Production

    There’s a version of “AI form building” that gets demoed a lot and used very little. You paste a key into a settings screen, type a sentence, and a form appears on your production site. It’s impressive for thirty seconds. Then you need a date picker, or a price that depends on three fields, or a repeater — and the textbox has nothing to offer, because the vendor only wired up the easy cases.

    There’s a second version that’s less flashy and considerably more useful: give a coding agent the full authoring specification for your form plugin, let it build the form on your local install, verify it, and export the result as a single file you import on production.

    That’s the workflow this article covers. It’s slower to set up and dramatically more capable, and it has a property the textbox version can never have: the agent never touches your live site. What reaches production is a file you reviewed.

    The idea in one paragraph

    01 local then ship

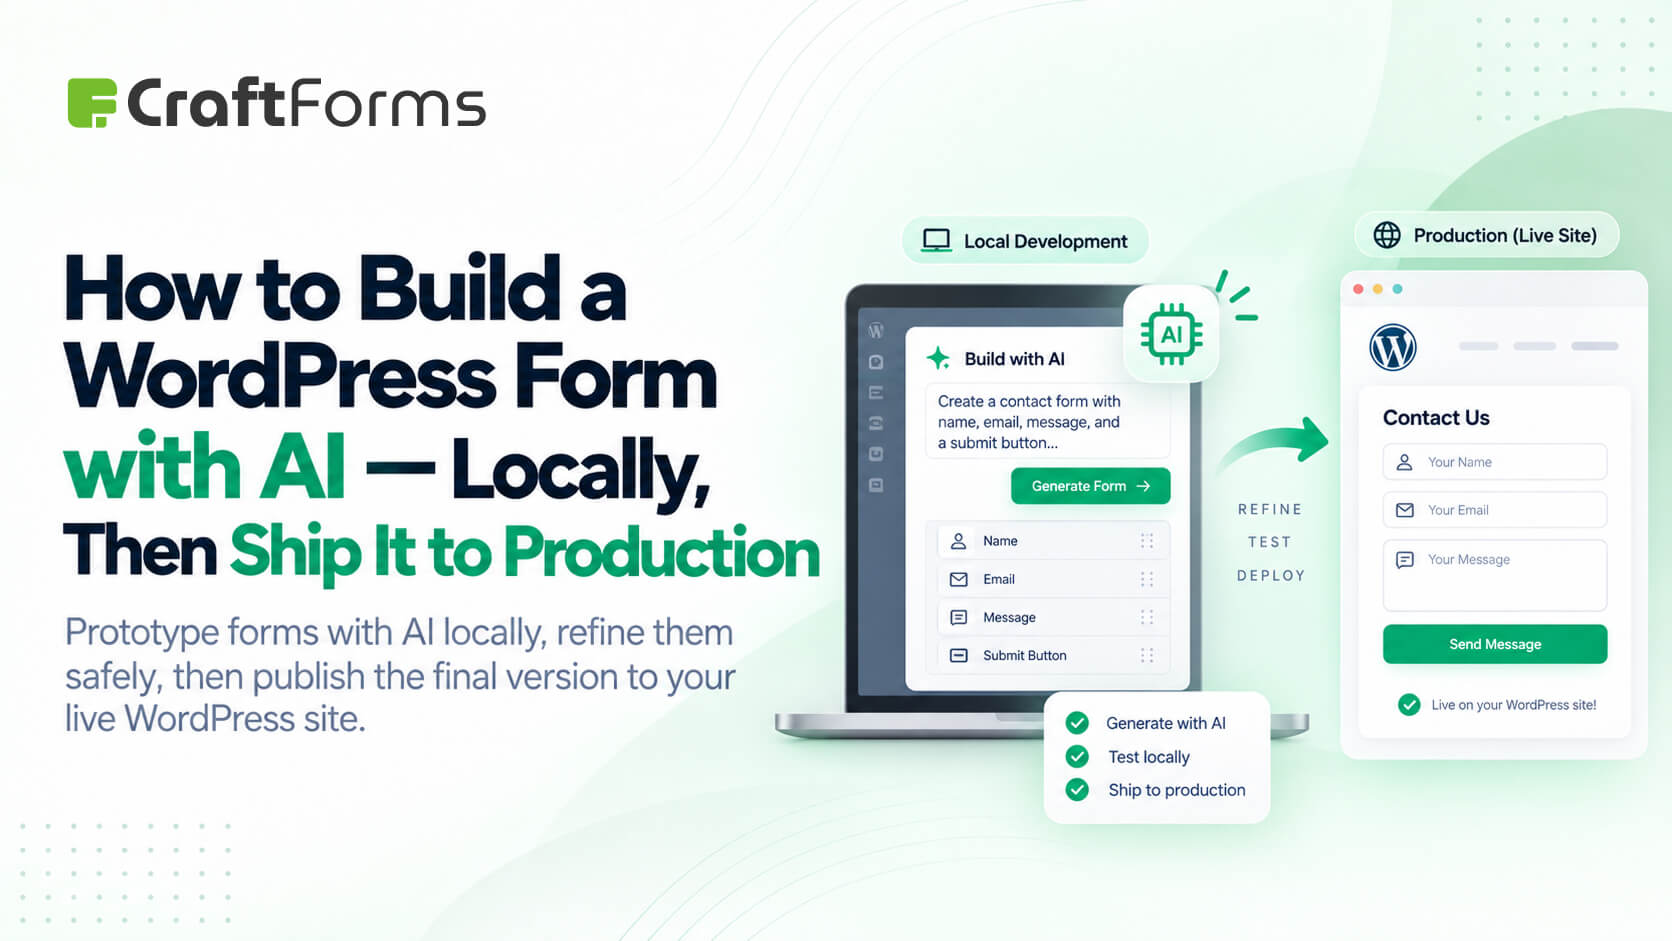
    CraftForms publishes its complete authoring specification — the AI Form Builder Guide. It’s about 12,000 words covering every block pattern, the form meta schema, conditional logic, template variables, and the WP-CLI commands to wire it all up. Hand that URL to an agent with shell access to a local WordPress install, describe the form you want, and it has everything it needs. When the form is built and verified, one button exports it to a portable file. Import that on production. Done.

    No API key. No AI feature in the plugin. The “AI” is whichever agent you already use.

    Why not just use the MCP abilities?

    Fair question, and if you’ve read our MCP guide you’ve seen the other path: WordPress 6.9’s Abilities API, exposed as MCP tools, letting an agent call craftforms/create-form and craftforms/add-field directly.

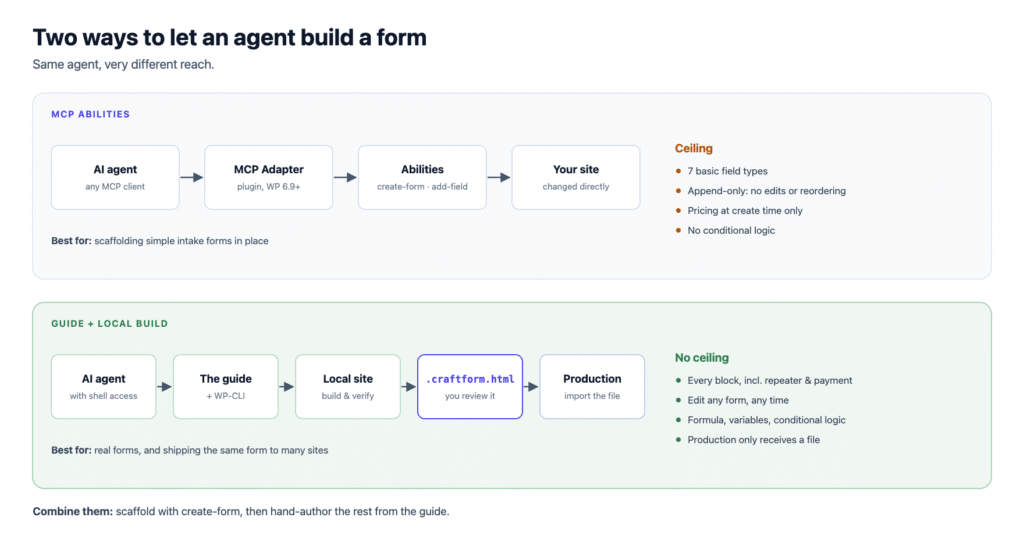
    That path is genuinely elegant, and it has a hard ceiling:

    MCP abilitiesGuide + local build
    Field types7 basic (text, email, number, textarea, select, radio, checkboxes)all of them — datepicker, file upload, repeater, range, color, payment, WooCommerce
    Editing an existing formno — append-onlyyes
    Pricing / smart variablesat create time onlyany time
    Conditional logicnoyes
    RequiresWP 6.9+, MCP Adapter pluginnothing beyond WP-CLI
    Touches productionyes, if that’s the site you connect it tono — local only
    02 mcp vs guide

    Use the abilities when you want an agent scaffolding simple intake forms in place. Use this workflow when you want a real form. In practice the two combine well: let the agent scaffold with create-form (which gets the post type and meta right with zero chance of error), then have it author the remaining blocks by hand from the guide.

    Step 1 — Give the agent the guide

    Whatever agent you’re using, the setup is the same: point it at the guide and give it shell access to a local install.

    In Claude Code, that’s one sentence:

    Read https://kb.craftformswp.com/documentation/for-developers/ai-form-builder-guide and follow it to build a CraftForms form on my local site. Ask me anything you need about the form before you start.

    Two things make this work better than it has any right to:

    The guide is written for machines. It’s not marketing documentation with a code sample at the end. It’s block-markup patterns, a meta schema reference, and a WP-CLI cheatsheet — the shape of thing an agent consumes well.

    It leads with the failure modes. The guide opens with sections marked CRITICAL, covering the ways to produce a form that looks fine and isn’t. An agent that reads them doesn’t make those mistakes. We’ll come back to these, because they’re the whole reason this workflow is reliable.

    Step 2 — Describe the form, not the markup

    The point of handing over a specification is that you get to talk about the form, not the implementation. A useful prompt is closer to a brief than a spec:

    A quote request form for a made-to-measure blinds company. Customer picks width and height in cm, a fabric from four options with different per-square-metre prices, and optional motorisation for a flat £85. Show the running total live as they change anything. Name and email required, phone optional. Email me the quote on submit.

    That’s a form with a price formula, a lookup table keyed on fabric, a conditional add-on, and a live-updating total — four things that are entirely outside what any prompt-to-form textbox will give you, and all of which are documented in the guide.

    The agent will do roughly this:

    1. wp post create --post_type=craftforms_form for the form post.
    2. Set _craftforms_form_meta with the formula, the fabric price table as a table transformation, and the email submit action.
    3. Author the field blocks into post_content following the guide’s patterns.
    4. Add an Infoblock bound to the form for the live total.

    Step 3 — The three CRITICAL rules (read these even if the agent did)

    This is the part worth understanding yourself, because it’s where a form silently breaks. All three are in the guide, and all three exist because WP-CLI bypasses the safety nets the editor and importer provide.

    Rule 1 — Forms are craftforms_form posts, never pages

    All form logic lives on the craftforms_form custom post type. A page never holds form markup directly. Saving a form auto-generates a synced pattern (CraftForms: <form title>), and the page holds only a reference to it — <!-- wp:block {"ref":PATTERN_ID} /--> — or the shortcode.

    Writing form block HTML straight into a page with --post_content produces something that renders and does nothing: the meta is detached from the block, so no formula, no validation, no submit actions.

    A related trap sits on the form post itself: its craftforms/form block needs "ref" set to the form’s own post ID. The editor adds it on first edit, so a form built entirely by CLI never gets one — and the form stays hidden on the page with no console error. The agent has to create the post, learn its ID, then write the ID back into the block. The guide covers this; it’s worth knowing why a CLI-built form can silently fail to appear.

    Rule 2 — Form meta must be an array, not a JSON string

    This is the one that catches everybody:

    # WRONG — stores a string. Frontend works. Editor shows no formula, no smart variables.
    wp post meta update 42 _craftforms_form_meta '{"formula":"width * height * price"}'
    
    # RIGHT
    wp post meta update 42 _craftforms_form_meta '{"formula":"width * height * price"}' --format=json
    

    Without --format=json, WordPress stores the raw string. The frontend happens to survive it — the submission controller decodes strings defensively — so the form appears to work. But the block editor reads the meta as an array and finds nothing, so the Price Formula and Smart Variables panels come up empty. You’d conclude the build failed when the data is right there, in the wrong shape.

    Rule 3 — Block HTML and block-comment attributes must agree

    Gutenberg validates blocks by regenerating the saved markup from the block comment’s JSON attributes and comparing. Any mismatch produces “This block contains unexpected or invalid content.”

    The canonical trap is a required message on a radio or checkbox group, which lives in two places at once:

    <!-- wp:craftforms/radio-field {"name":"fabric","required":true,"requiredMessage":"This field is required"} -->
    <div class="wp-block-craftforms-radio-field"
         data-validate-minselected="1"
         data-validate-minselected-message="This field is required">
    

    Set one and not the other, or set them to different strings, and the block fails validation. Any hand-written data-validate-*-message needs its matching block-comment attribute at the same value.

    Why this workflow is safe anyway: all three rules are checked by simply opening the form in the editor. A validation notice means rule 3. Empty formula panels mean rule 2. That’s a ten-second check, and it’s the reason building locally matters — you find these on your machine, not on a client’s site.
    03 export file anatomy

    Step 4 — Verify, then export

    Open the form in the block editor. No validation notice, formula and variables visible in the panels, fields render — that’s the build confirmed.

    Now, in the form editor sidebar, open the Export panel and click Export Form. You get form-{id}.craftform.html.

    Do not let the agent hand-write this file. Export it. The distinction is not stylistic — the export pipeline is a normalisation pass that fixes things:

    • It repairs string meta. If rule 2 was violated, export decodes the string and writes clean JSON into the file. The imported copy comes back as a proper array. Export literally heals the most common mistake in this workflow.
    • It strips the ref attribute from the form block. ref is the form’s own post ID and is meaningless on another install; import re-assigns it.
    • It embeds images as base64 in a <!--craftforms-assets--> block, so the file is self-contained and images sideload (deduplicated) on import.
    • It re-serialises from the database, so the file reflects what the editor actually read — not what you hoped you wrote.

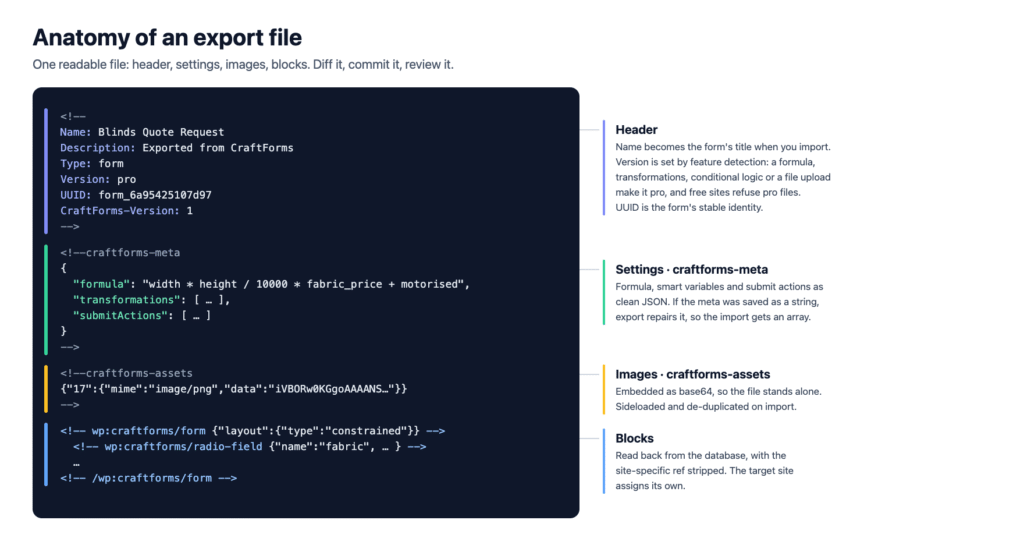
    The result is one readable file:

    <!--
    Name: Blinds Quote Request
    Description: Exported from CraftForms
    Type: form
    Version: pro
    UUID: form_6a95425107d97
    CraftForms-Version: 1
    -->
    <!--craftforms-meta
    {
        "sendEmails": true,
        "createEntries": true,
        "formula": "width * height / 10000 * fabric_price + motorised",
        "transformations": [ ... ],
        "submitActions": [ ... ]
    }
    -->
    <!-- wp:craftforms/form {"layout":{"type":"constrained"}} -->
    ...
    
    04 symptom check

    Treat a clean export as your conformance check. If it exports and the file looks right, it will import.

    One portability gotcha: the Version line

    Version: is set by feature detection, not your licence. A form is tagged pro if it has a price formula, transformations, conditional-logic rules, a user-registration or create-post submit action, or a file-upload field. Otherwise free.

    A pro file is refused on import into a free install. So the blinds form above — which has a formula — is not portable to a free site no matter where it was exported from. Worth knowing before you promise a client a file.

    Step 5 — Import on production

    On the target site: CraftForms → Add New Form, then Import from file in the starter modal. Same UI that installs the bundled starters, because it’s the same format.

    The importer loads the blocks and the <!--craftforms-meta--> settings into the new form and sideloads any embedded images into the media library. Publish it, then place it on a page by inserting its synced pattern (CraftForms: Blinds Quote Request) or with the shortcode, and you’re live.

    The new form takes its name from the file, so there’s nothing to retype.

    To ship a new version later, don’t create another form. Open the existing form on production, find Starters & Import in the sidebar, click Choose starter or import, and import the new file. It replaces that form’s blocks and settings in place and keeps the same form, so every page that embeds it picks up the change as soon as you click Update.

    That’s what makes this a repeatable deployment path rather than a one-shot migration: iterate locally, re-export, import over the form on production.

    Why this beats the textbox

    Nothing proprietary in the chain. The guide is a public document. The agent is whichever one you already pay for. Swap models freely; the specification doesn’t care.

    The deliverable is a file. You can read it, diff it, commit it, code-review it, and roll it back. Compare that with an AI feature that mutates your production database and leaves you an undo button.

    No ceiling. Anything documented in the guide is in scope, which is everything the plugin does.

    It scales sideways. Ten department contact forms for one client, or the same intake form across fifteen sites, is one build and fifteen imports. Drop the file into the plugin’s starters/forms/ folder and it shows up as a starter in the UI — but that folder lives inside the plugin, so a plugin update replaces it. Keep your copies in version control.

    Production stays clean. The agent works on localhost. A human reviews a file. That’s a review gate no in-plugin AI feature gives you.

    The honest limits

    • You need a local WordPress install with WP-CLI, and an agent that can run shell commands. That sounds like more than it is. Claude Code, Cursor, and similar coding agents run shell commands out of the box, and most local dev tools (Local, DDEV, wp-env) include WP-CLI. If you already have a coding agent and a local site, you have the whole setup. If you don’t, the MCP path or the editor is a lower bar.
    • The agent still needs supervision. It won’t produce invalid markup if it follows the guide, but it can absolutely build the wrong form correctly. Read the brief back before you accept it.
    • Complex pricing deserves a real test. Submit the form once on local and confirm the total. CraftForms recalculates price server-side rather than trusting the browser, so a formula wrong in both places is still wrong.
    • Free/Pro portability is feature-detected, per the Version note above.
    • This is a build workflow, not a sync workflow. Importing over an existing form updates it in place, but there’s no continuous two-way sync between environments.

    Try it

    1. Local WordPress with CraftForms and WP-CLI.
    2. Tell your agent: read the AI Form Builder Guide and build me a form that does X.
    3. Open the form in the editor — no validation notice, formula visible.
    4. Export Form in the sidebar.
    5. Import the file on production.

    The interesting thing isn’t that an AI built a form. It’s that the output is a file you own, produced by an agent you chose, from a specification anyone can read.


    Related: How to Use MCP to Build and Fill WordPress Forms · AI Form Builder Guide (docs)

  • How to Use MCP to Build and Fill WordPress Forms (2026 Guide)

    How to Use MCP to Build and Fill WordPress Forms (2026 Guide)

    Most “AI form builder” features shipping in 2026 work the same way: you paste an API key into a settings screen, type a sentence into a textbox, and the plugin’s own server round-trips your prompt to a model and hands back a form. It works, sometimes. But the AI is a feature inside the plugin. It can’t be swapped, it can’t be scripted, and it can only do what the vendor exposed in that one textbox.

    WordPress 6.9 opened a different path. It shipped the Abilities API — a core registry where any plugin can declare typed, permission-checked operations. And in February 2026 the WordPress AI team shipped the MCP Adapter, which takes those registered abilities and exposes them as Model Context Protocol tools that any MCP client can discover and call.

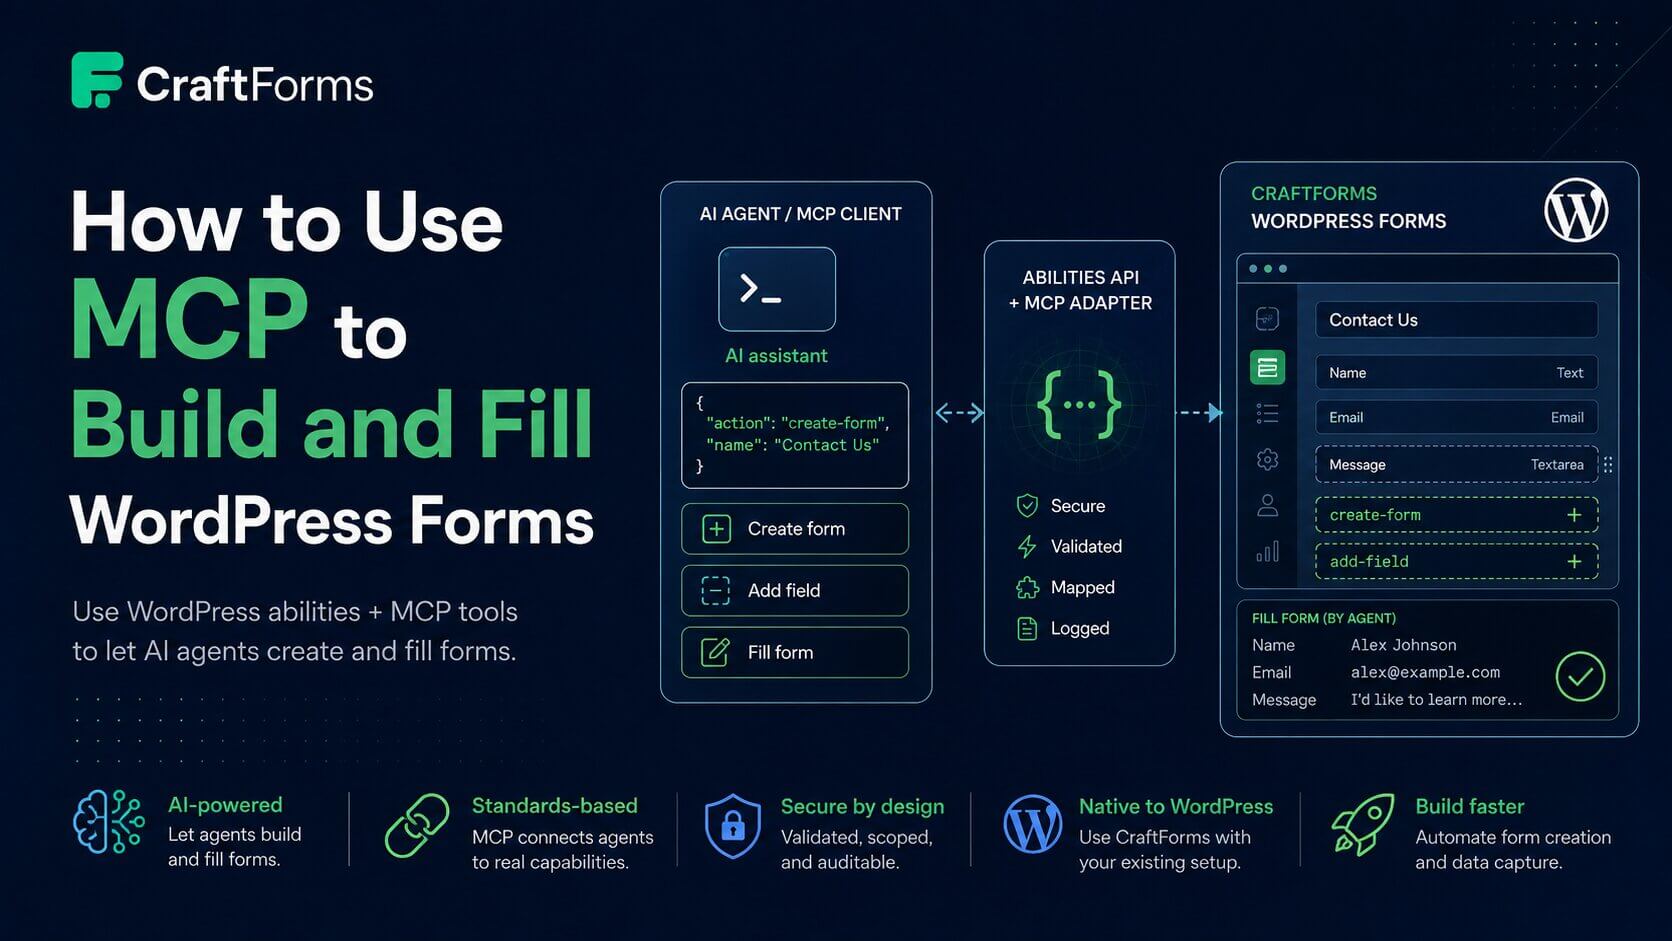
    Put those two together and the picture inverts. Instead of an AI feature living inside your form plugin, your form plugin publishes capabilities that any agent — Claude, Cursor, a CI script, your own code — can pick up and use. No vendor key. No textbox.

    This guide walks the whole thing end to end: install the adapter, register a server, connect a client, and have an agent build a working form. Then the other half nobody covers — having an agent fill one.

    What each piece actually is

    Three layers, and it’s worth being precise about which does what, because the names get used interchangeably and they shouldn’t be.

    The Abilities API is WordPress core (6.9+). A plugin calls wp_register_ability() with a name, a JSON Schema for its input and output, a permission callback, and an execute callback. That’s it. It’s a registry — it knows nothing about AI.

    The MCP Adapter is a separate plugin from the WordPress project. It reads the abilities registry and republishes abilities as MCP tools over a real MCP transport. It is the bridge, and it’s the piece people mean when they say “WordPress has MCP now.”

    Your form plugin registers the abilities. CraftForms registers two:

    AbilityWhat it does
    craftforms/create-formCreates a form post with optional price formula, transformations, and submit actions
    craftforms/add-fieldAppends a field to an existing form as correctly structured Gutenberg blocks

    Both ship in CraftForms free. There’s no AI tier and no key to buy — the abilities register on any install running WordPress 6.9 or later, and are simply absent on older versions (the registration hooks never fire).

    The distinction that matters: CraftForms doesn’t talk to a model. It declares what it can do, in a schema any model can read. Which model you point at it is entirely your business.

    Step 1 — Install the MCP Adapter

    The adapter isn’t on the plugin repository yet; it’s distributed from its GitHub releases.

    wp plugin install https://github.com/WordPress/mcp-adapter/releases/latest/download/mcp-adapter.zip --activate
    

    Requirements are WordPress 6.9+ and PHP 7.4+. Activating it gives you a default server and a WP-CLI command. Check what it found:

    wp mcp-adapter list
    
    ID                            Name                        Version  Tools  Resources  Prompts
    mcp-adapter-default-server    MCP Adapter Default Server  v1.0.0   3      0          0
    

    Three tools — those are core’s own abilities (site info, user info, environment info). CraftForms’ abilities are registered, but the default server doesn’t expose them. That’s deliberate: the adapter makes you opt in to what an agent can reach.

    Step 2 — Register a server that exposes the form abilities

    Drop this in an mu-plugin (wp-content/mu-plugins/craftforms-mcp-server.php):

    <?php
    /**
     * Plugin Name: CraftForms MCP Server
     * Description: Exposes the CraftForms abilities as MCP tools via the WordPress MCP Adapter.
     */
    
    add_action( 'mcp_adapter_init', function ( $adapter ) {
        $adapter->create_server(
            'craftforms',                       // server id
            'craftforms-mcp',                   // REST namespace
            'mcp',                              // REST route
            'CraftForms MCP Server',            // name
            'Build and configure CraftForms forms from an AI agent.',
            '1.0.0',
            [ \WP\MCP\Transport\HttpTransport::class ],
            \WP\MCP\Infrastructure\ErrorHandling\ErrorLogMcpErrorHandler::class,
            null,
            [
                'craftforms/create-form',
                'craftforms/add-field',
            ]
        );
    } );
    

    The last argument is the allowlist. Only abilities named there become tools on this server — everything else on the site stays invisible to it. If you want an agent that can create forms but never add fields, remove a line.

    The namespace and route arguments determine the endpoint: craftforms-mcp + mcp gives you https://yoursite.com/wp-json/craftforms-mcp/mcp.

    Confirm it registered:

    wp mcp-adapter list
    
    ID           Name                    Version  Tools  Resources  Prompts
    craftforms   CraftForms MCP Server   1.0.0    2      0          0
    

    Two tools. That’s the pair.

    Step 3 — Look at what the agent will see

    Before wiring up a client, it’s worth seeing the tool definitions the way a model receives them. The adapter includes a STDIO transport you can drive from the command line:

    echo '{"jsonrpc":"2.0","id":1,"method":"tools/list","params":{}}' \
      | wp mcp-adapter serve --user=admin --server=craftforms
    

    The response includes both tools with their full input schemas. Trimmed to the essentials:

    {
      "name": "craftforms-add-field",
      "title": "Add a Field to a Form",
      "description": "Appends a new input field block to an existing CraftForms form.",
      "inputSchema": {
        "type": "object",
        "properties": {
          "form_id":    { "type": "integer" },
          "field_type": { "type": "string",
                          "enum": ["text","email","number","textarea",
                                   "select","radio","checkboxes"] },
          "name":       { "type": "string" },
          "label":      { "type": "string" },
          "required":   { "type": "boolean" },
          "options":    { "type": "array" }
        },
        "required": ["form_id","field_type","name","label"]
      }
    }
    

    Two details worth catching here, because both will bite you otherwise:

    Tool names are slugified. The ability craftforms/create-form becomes the MCP tool craftforms-create-form. Slashes aren’t legal in MCP tool names, so the adapter converts them. When you call a tool, use the hyphenated form.

    The enum is the contract. field_type accepts exactly seven values. A model that hallucinates "date" gets a validation error back rather than a broken form — which is the entire point of schema-typed abilities over prompt-and-hope generation.

    Step 4 — Connect a client over HTTP

    STDIO is good for testing. For a real client you want the HTTP transport, which is the endpoint the server registration created.

    Authentication is standard WordPress — an application password is the practical choice. Create one under Users → Profile → Application Passwords, or:

    wp user application-password create admin mcp-client --porcelain
    

    MCP over HTTP is a session protocol, so the first call is a handshake:

    curl -i -X POST "https://yoursite.com/wp-json/craftforms-mcp/mcp" \
      -u "admin:xxxx xxxx xxxx xxxx xxxx xxxx" \
      -H "Content-Type: application/json" \
      -H "Accept: application/json, text/event-stream" \
      -d '{"jsonrpc":"2.0","id":1,"method":"initialize",
           "params":{"protocolVersion":"2025-06-18","capabilities":{},
                     "clientInfo":{"name":"curl","version":"1.0"}}}'
    

    The response headers carry the session:

    HTTP/2 200
    mcp-session-id: 3d75124b-3f55-49be-a28b-cadb7b0eb633
    
    {"jsonrpc":"2.0","id":1,"result":{
      "protocolVersion":"2025-06-18",
      "serverInfo":{"name":"CraftForms MCP Server","version":"1.0.0"},
      "instructions":"Build and configure CraftForms forms from an AI agent."}}
    

    Every subsequent request must carry Mcp-Session-Id. Miss it and you get -32600 Invalid Request: Missing Mcp-Session-Id header, which is the single most common first-run stumble.

    A real MCP client handles all of this for you. In Claude Code, for example, you’d add the server once and never think about sessions again:

    claude mcp add --transport http craftforms \
      https://yoursite.com/wp-json/craftforms-mcp/mcp \
      --header "Authorization: Basic $(printf 'admin:xxxx xxxx xxxx' | base64)"
    

    Step 5 — Let the agent build the form

    Now the payoff. With the server connected, you ask in plain language:

    “Build me a quote request form with the customer’s name, email, a service dropdown for Basic / Pro / Enterprise, and a project details box. Name and email required.”

    The agent calls craftforms-create-form first:

    {"jsonrpc":"2.0","id":1,"method":"tools/call","params":{
      "name":"craftforms-create-form",
      "arguments":{"title":"Quote Request","description":"Service quote request"}}}
    
    {"jsonrpc":"2.0","id":1,"result":{
      "structuredContent":{
        "form_id":932,
        "uuid":"form_6a953ab5dc2c6",
        "edit_url":"https://yoursite.com/wp-admin/post.php?post=932&action=edit"},
      "isError":false}}
    

    Then one craftforms-add-field call per field, threading form_id: 932 through each. Four calls later the form exists, is published, and opens in the block editor at that edit_url.

    Note the output schema is doing real work here. The agent gets back a structured form_id and edit_url, not prose it has to parse. That’s what lets it chain calls reliably instead of guessing.

    Why this beats “paste a prompt into a textbox”

    Here’s what the agent actually wrote into the post, for the email field:

    <!-- wp:craftforms/text-input-field {"name":"email","label":"Email Address","required":true,"type":"email"} -->
    <!-- wp:craftforms/label {"content":"Email Address"} /-->
    
    <!-- wp:craftforms/text-input {"name":"email","required":true,"type":"email","fontSize":"medium","style":{"spacing":{"padding":{"top":"var:preset|spacing|20","bottom":"var:preset|spacing|20","left":"var:preset|spacing|20","right":"var:preset|spacing|20"}}}} /-->
    
    <!-- wp:craftforms/form-error {"content":"{{error.email}}","style":{"typography":{"fontSize":"0.8em"}}} /-->
    <!-- /wp:craftforms/text-input-field -->
    

    That’s correct Gutenberg block markup, with matched attributes, the right nesting, a bound error block, and theme spacing presets. The model didn’t generate it — the ability did. The model supplied four values (name, label, required, field_type); PHP built the markup.

    This is the structural difference, and it’s the whole argument:

    • A prompt-to-HTML AI builder asks a language model to produce block markup. Sometimes it’s valid. Sometimes you get “This block contains unexpected or invalid content” in the editor, because a single mismatched attribute between the comment JSON and the saved HTML fails Gutenberg’s block validation.
    • An ability takes typed arguments and generates the markup deterministically, in code that was tested. The model can only get the intent wrong, never the syntax.

    The same holds for everything the ability handles on your behalf: required-field validation, aria-describedby wiring, role="group" on option sets, unique field names. You get accessibility and validation correct by default because a human wrote that part once, not because a model remembered to.

    And because permission callbacks are part of the ability definition, the agent inherits WordPress’s own access rules. craftforms/create-form checks the CraftForms access capability; craftforms/add-field checks edit_post against the specific form. An agent authenticated as a Subscriber can enumerate the tools and accomplish nothing with them.

    The other half: filling a form with an agent

    “Build a form” is where every competitor article stops. But the more interesting automation is the reverse — an agent that submits to your form. Order intake from an email parser, a nightly job that pushes leads from another system, an internal assistant that files a request on someone’s behalf.

    CraftForms exposes submission as a plain REST endpoint:

    POST /wp-json/craftforms/v1/submit/{form_uuid}
    

    The {form_uuid} is the value create-form handed back (form_6a953ab5dc2c6 above). Field values go at the top level of the JSON body — not nested under a data or formData key, which is the mistake everyone makes first:

    curl -X POST "https://yoursite.com/wp-json/craftforms/v1/submit/form_6a953ab5dc2c6" \
      -H "Content-Type: application/json" \
      -d '{
            "full_name": "Ada Lovelace",
            "email":     "[email protected]",
            "service":   "pro",
            "details":   "Need a quote for Q4"
          }'
    
    {"success":true,"data":{"successMsg":"We have received your message. Thank you!"}}
    

    A real submission: it runs server-side validation, recalculates any price formula rather than trusting the payload, saves the entry, and fires the form’s submit actions — emails, webhooks, PDF generation, whatever’s configured. It’s the same code path a browser submit takes.

    The security model you need to understand first

    That request only succeeded because the form was explicitly configured to allow it. The endpoint has a gate, and it’s worth walking through because it’s the difference between “agent-fillable” and “open spam relay.”

    CraftForms classifies every submission by Origin/Referer:

    Same-origin submissions (a browser on your own site) require a valid nonce. An agent driving a real browser gets this for free — the nonce is in the rendered page. An agent making a bare HTTP call from your own domain without one gets Invalid security token.

    Off-site submissions — which is what an agent, a script, or a static site is making — are rejected by default. To allow them you must:

    1. Be on CraftForms Pro. Without a licence: External submissions require a PRO licence.
    2. Enable external submissions on that specific form. It’s per-form, not global. Without it: External submissions are not enabled for this form.
    3. Optionally, add required header rules — key/value pairs the caller must send. This is a shared secret, so an agent can submit and a random script that discovered the UUID cannot.

    That third step is the one to actually use. A form UUID isn’t a secret — it’s in the page markup. If you’re going to let machines post to a form, put a header behind it:

    curl -X POST "https://yoursite.com/wp-json/craftforms/v1/submit/form_6a953ab5dc2c6" \
      -H "Content-Type: application/json" \
      -H "X-Agent-Token: your-shared-secret" \
      -d '{"full_name":"Ada Lovelace","email":"[email protected]","service":"pro"}'
    

    Be honest with yourself about what this is: shared-secret authentication plus origin checks. It’s appropriate for an agent you control calling a form you control. It is not a substitute for a captcha on a public contact form, and CraftForms doesn’t pretend otherwise.

    Where the ceiling is

    Two abilities is a deliberate starting point, not a finished surface. Worth knowing what falls outside it before you plan around it:

    • Seven field types. text, email, number, textarea, select, radio, checkboxes. The agent can’t add a date picker, file upload, payment block, or booking calendar. Those exist in CraftForms — you add them in the editor.
    • No editing or deleting. add-field appends. There’s no ability to reorder, modify, or remove a field. An agent can build up; it can’t refactor.
    • Pricing is create-time only. create-form accepts a formula and transformations, so an agent can scaffold a calculating form — but only in the initial call. There’s no ability to adjust pricing afterwards.
    • The adapter is young. MCP Adapter 0.6.1 at the time of writing, distributed from GitHub rather than the plugin repository. Treat it as a capable pre-1.0 tool, not a set-and-forget production dependency.

    The honest framing: this gets an agent from nothing to a real, valid, publishable form in a handful of tool calls. Then you open the editor and finish it. For scaffolding — a dozen similar intake forms, a client’s ten department contact forms — that’s a genuinely large chunk of the work gone. For a complex booking or product configurator, it’s the first five minutes.

    If you hit that ceiling, there’s a second path. CraftForms publishes its full authoring specification as the AI Form Builder Guide. Hand that to a coding agent with shell access to a local install and it can build anything the plugin does — date pickers, repeaters, conditional logic, WooCommerce — then export the result as a single file you import on production. Slower to set up, no ceiling, and the agent never touches your live site.

    Running WordPress older than 6.9?

    The abilities simply don’t register — the core hooks they attach to don’t exist, and CraftForms checks for wp_register_ability() before doing anything. No error, no MCP.

    The fallback is WP-CLI. Forms are a custom post type with block content and a meta array, so an agent with shell access can scaffold one with wp post create and wp post meta update. It’s a lot more finicky — you’re hand-writing the block markup the ability would have generated, and getting a block-comment attribute out of step with the saved HTML is exactly the validation failure the ability exists to prevent. Upgrade to 6.9+ if you can.

    Try it

    Everything above runs on a stock install:

    1. WordPress 6.9+ with CraftForms (free) — the abilities register themselves.
    2. wp plugin install https://github.com/WordPress/mcp-adapter/releases/latest/download/mcp-adapter.zip --activate
    3. Drop in the mu-plugin from Step 2.
    4. wp mcp-adapter list to confirm two tools.
    5. Point your client at https://yoursite.com/wp-json/craftforms-mcp/mcp with an application password.
    6. Ask for a form.

    The interesting part isn’t that an AI made a form. It’s that nothing in that chain is proprietary to CraftForms — core registry, core-project adapter, open protocol. Any plugin can register abilities. Any client can call them. That’s a considerably better bet than an API key field in a settings screen.


    Related: Answer-Engine Optimization for Form & Quote Pages · How to Use WordPress as a Form Backend for Static Sites and Web Apps · Use WordPress as a Locked-Down Form Backend